Train with a Group at PLAYTRI

It is simple, group workouts are fun and motivating. 

The goals in every PLAYTRI group workout are simple. 

As coaches, we strive to:

1- teach the athlete something new and implement the knowledge in each workout

2- push limits that are appropriately designed around their strengths and weaknesses

3- make new friends and have a great time!

But don't take our word for it, check out what some of the athletes are saying about PLAYTRI's Weekly Group Workouts:

"I look forward to meeting up with a group to train, it makes it much more enjoyable."- Tish R.

"Accountability, and there is always a friend there who is going to push you harder than trying to do the same run alone. Sweating together is always more fun than training by yourself.

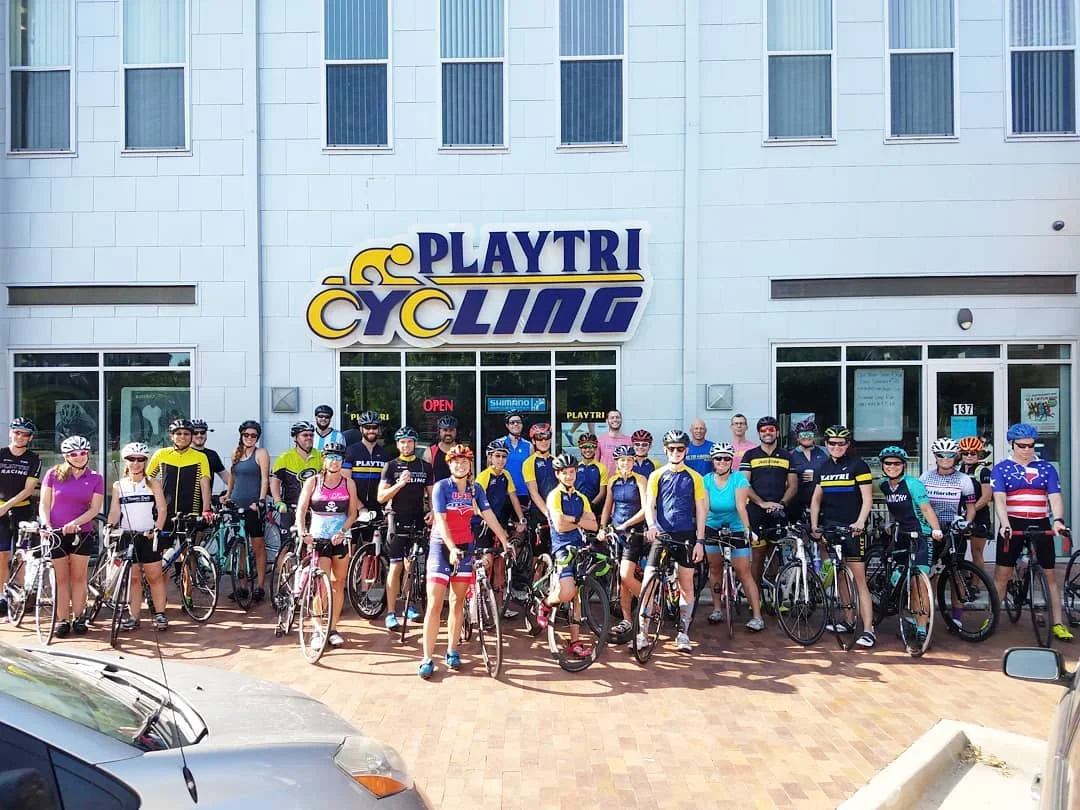
group ride ptcy.jpg

Or real reason- you will get texts from everyone asking where you were!" - Lauren S.

"Not all group workouts are created equally... yours are the best...I'm not really into group workouts - everybody doesn't have the same fitness level or speed...your workouts cater to all levels and speeds...I feel I can challenge myself by trying to keep up with speedier athletes, or I can stay in my own level and steadily improve...reading a W workout isn't the same as you explaining an interval with appropriate rest...you make them fun and appropriately stressful at the right moments." - Michael D.

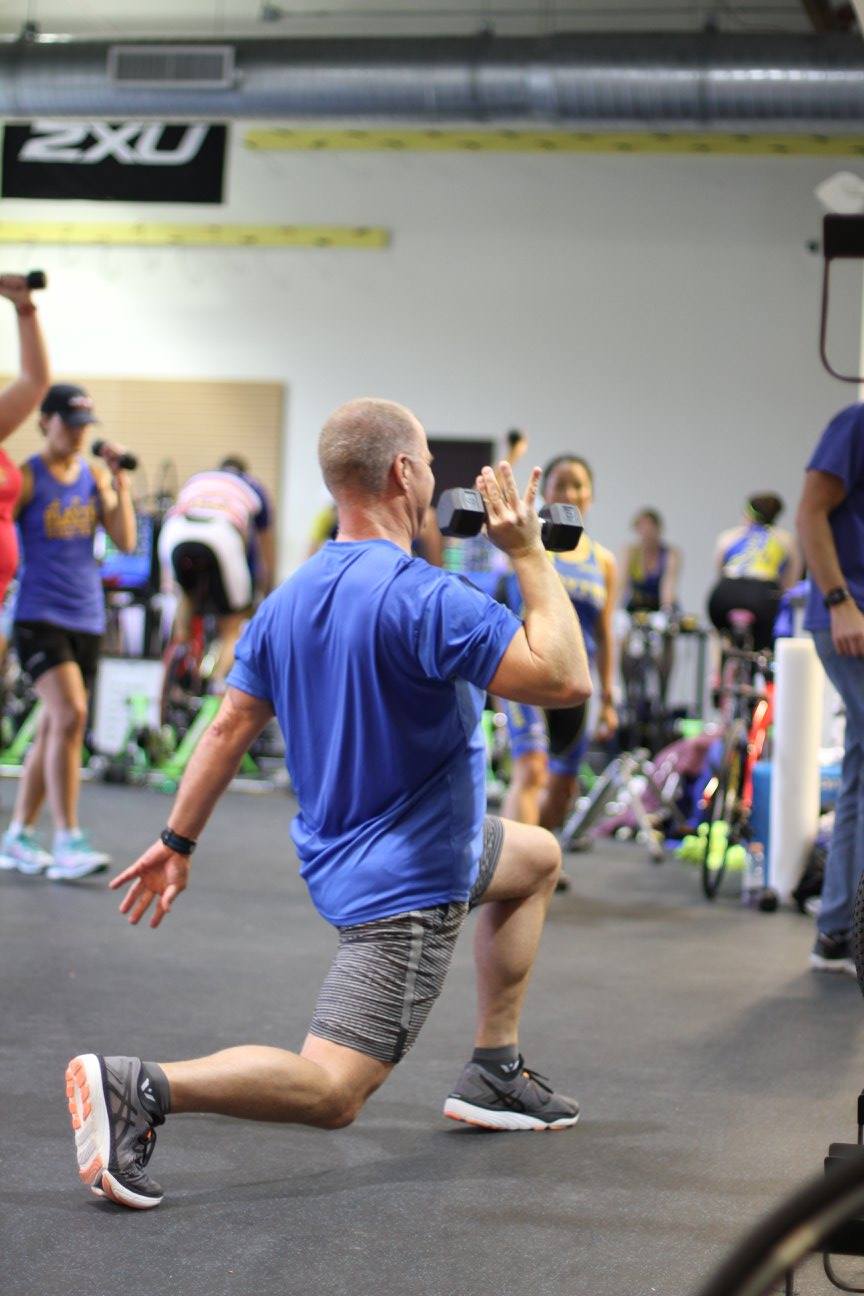
group workout.jpg

"It pushes me past my ability alone. It makes hard stuff fun."- Stephanie B.


"With almost all skill and experience levels represented at group workouts, it’s very easy to pair up with others around your ability. I find this group collaboration to be a key to dig deep and give the workout all you have. It brings home the social aspect of the sport. We are also coached on by the best and most experienced triathletes in the industry. I have finished each of my group workouts thinking - that was a great workout; I’m looking forward to the next one."- Paul S.

Come join one of the many Playtri Weekly Group Workouts... Don't miss the opportunities to learn, push limits, and have fun in the sun.

New training sessions starting soon at PLAYTRI store locations: https://www.playtri.com/group/

We look forward to seeing and working with you!

Off-Season Training Tips

BACK TO THE BASICS

What is the off-season? Many folks seem to think it is all about taking time completely off BUT THEN they come back Jan 1 all signed up for huge 2020 goals!

At this time of the year, I absolutely promote the idea that fitness should not strictly be Swim-Bike-Run.  There is tremendous opportunity right now to return back to the basics and dial in corrective workouts and technique.

Here are just a few (of the endless) drills and technical workouts that I strongly suggest for your ‘off-season’:

1.       SWIM

KICK SETS WITH THE SNORKEL- Focus on the continuous small kick, engaging in core/ glutes/ hamstrings to maintain proper body position on top of the water- most under rated drill out there!

SINGLE ARM DRILLS WITH THE SNORKEL- Whether working the front end of the stroke, crescent elbow, finish through the hip line, or ‘recovery’ phase, there are endless possibilities to dial in a more efficient stroke.

2.       BIKE

SINGLE LEG DRILLS- On the trainer/ outdoors, to smooth out that pedal stroke and reduce ‘dead spots that lead to loss of power and risk of injury’ work 5-10 x 30sec-1min/side single leg pedaling.

OVER- GEAR WORK- Not focused on target hr rate/power, again inside and/or outside, shift into a hard gear, holding anywhere between 45-65rpm.  Starting point ~30min: 4min at a time w/ 1 min recovery in between.

3.       RUN

SINGLE LEG DRILLS EMPHASIZING THE LIFT- We want to encourage the glute and hamstring muscles to wake up and ‘join the running party’ (triathletes tend to rely too heavily upon their quads) +isolate each side with various paces.

BRICK BIKE SESSIONS WITH QUICK BRICKS- Yes, this is a drill.  I have athletes simply do 1/2 mile out, 1/2 mile back- no pace goal, certain aspects we emphasize: run cadence, easy build, breathing only through the nose (again so many ways to tackle this drill)

4.       WEIGHTS

SINGLE LEG/ STABILIZATION EXERCISES- Simply put, ‘balance’ out the body (hence ALL the single sided work above).  Also add this element into your strength sessions.

ROTATIONAL/ LATERAL EXERCISES- Triathlon moves primarily in one direction.  Make sure to add exercises that involve directional changes, different pace challenges, rotational work… you get it, move different in the gym J

5.       RE-ESTABLISH YOUR RECOVERY FORMULA

Nope, you are not in tri race season. My guess you are getting your body back into routine.  Crazy, but this is when athletes are prone to injury = some humbling workouts remind us that we don’t have the fitness or feel we did a couple months ago + lack of technique focus = end in poor form and overuse as you compensate to try and ‘get back’.

That said, incorporate foam rolling, stretching, massage, physical therapy… all methods into your recovery formula NOW.

Maximize this ‘off-season’, details will ALWAYS matter when we are talking strong and efficient come race season.

If you have any questions or want to schedule your assessment and specific drills for your strengths, weaknesses, and goals?

Email me: Amari@playtri.com

Coach Recommended Tools for All Athletes

Tools for All Athletes

As I coach I spend a great deal of time interacting with athletes. This includes face to face coffee time, time on the track, and going for swims and rides together. Of course, there is always a TON of interaction online. Unfortunately, it is not practical for me to be at every session with every athlete. This means that much of my coach-athlete relationship is built over a training platform. I look at their workouts and always look at the comments written by athletes. I think that how an athlete feels is as important as the data they provide. That being said, I do need the data to pair with their thoughts. I have a few tools that I love athletes to have in order to help us gauge effort, stress, and workouts. 

Most working athletes do not consider the giant toll life stress plays on their workouts. Having athletes monitor their daily stress with a tool like the Vivosmart by Garmin is a massive value. The tracker lets us look at total stress from the day, sleep quality, and workout stress. We can use this to shape future workouts, plan around stressful days, and understand why workouts went a certain way.  Athletes can be good at putting their head down and doing work, disregarding sleep and stress. This is great, until it isn’t. This tool can help athletes understand just how stressed or tired they are. 

Getting the experts to check out my power meter!

Getting the experts to check out my power meter!

The power meter is another must-have. Whether it is Garmin, Powertap, stages, or Sram, a power meter is a great tool to put a number to cycling efforts. Cycling has an extremely high amount of variability. Terrain, weather, wind, road surface, hills, groups and traffic all affect speed, duration, and/or distance. Power offers an objective tool that shows just how hard an athlete was working. Once we have established zones this is a very effective tool for writing workouts, gauging race efforts, and measuring fitness gains. An all-around essential!

“Adult-onset swimming” sounds like an affliction, and that is on purpose! Adults learning to swim need to take a different approach than children. Most children learn to swim without any gadgets. That is great, and I admire the purists. Children learn with a coach on deck and are much better “sponges” than adults. Tools like the Aqua Sphere Focus swim snorkel and buoyancy tools can be helpful. They take away various parts of the stroke so that you can focus on other parts. The snorkel cuts out breathing so that you can focus on your stroke. The buoyancy tools help you float so you can work on other aspects of the stroke.

Always running with a watch!

Always running with a watch!

Last up is the running or triathlon watch. I can’t remember the last time I saw someone running without a watch. PlayTri has a wide variety of Garmin watches, but my go-to is the Forerunner. I find the heart rate from a strap to still be more accurate than wrist based heart rate, and I like having heart rate for running, even if only to use after the fact. The Forerunner can also be used for swimming and riding which is a huge bonus. For running, having a watch for pace, duration and to keep track of intervals is crucial. Being able to look at all the data afterward can really help give you a complete picture. It can be hard to tell if you are running on a false flat up or down, so having that data after can really help you compare pace to effort to heart rate and look at elevation gain or loss. 

The last tool is different in that it does not provide me feedback or more information. It does help the athlete stay healthy, which is one of my main goals. The trigger point foam roller is the recovery tool that has stood the test of time. Every athlete should have a foam roller and know how to use it. Foam rolling can help you figure out how your body is really feeling. You can often find sore places you didn't know existed. I have found this to be the best all-around recovery tool for athletes to use 4-5 times a week. 

Find these tools at Playtri.com/onlinestore

JESSE VONDRACEK

Learn more about Jesse at Playtri.com/partner-coaches


Cold Weather Racing

cold weather.png

Fall is a fun time to race. The cooler temperatures, the changing colors, but the change in temperature requires a change in your racing strategy. If you are doing a cold-weather triathlon this fall, here are my quick tips:

  1. If it’s an open water swim, acclimate to the cold water. Cold water on your face can trigger you to gasp for air. Get your face in the cold water before the race, and practice turning your head to breathe as you would during the race.

  2. If it’s an open water swim, along with your wetsuit wear earplugs and wear two swim caps. Both will help your core temp stay up.

  3. Wear a two-piece tri suit. Do the swim without the top on. Water is an excellent conductor of heat, so a dry tri top to put on in T1 will be helpful.

  4. OR Skip the Tri Top and go for a heavier weight and/or wind-resistant long sleeve bike jersey/jacket.

  5. Keep your hands and feet warm while you bike and run. Wear gloves on your hands. Cold hands don’t function as well. Have a pair of rolled down gloves ready to put on in T1. And cold feet aren’t fun for running on, so keep them warm on the bike. Wear socks (wool stays warm even when wet) or toe covers or tape over the vents in your bike shoes or a combination of these. But make sure to roll your socks and gloves so they are easier to put on in T1.

  6. Keep your head warm. Wear a beanie underneath your helmet.

  7. Have warm, dry clothes ready at the finish. As soon as you can, get out of your wet, sweaty gear, towel off, and get into warm, dry clothes. Hypothermia can happen even after the race is over.

  8. Revise your expectations. Cold weather racing is hard on everyone unless you are a polar bear. Make the decision before the race starts whether you are going to race it full gas and take risks or do the race for the enjoyment of the sport and cover up.

Coach Jim Rowe

Playtri Level 2 Coach

UESCA Certified Triathlon Coach

Coach Amari's summer approach to Acclimating and Training

summertemps.png

Our research shows that it takes roughly 10-14days to acclimate to the blazing heat and humidity this time of year. Instead of simply throwing your body through the ringer, read up on Coach Amari's easy strategy to safely and effectively adjust as well as continue to nail those new limits, regardless of the temps!  

SHORT ON TIME: GO AHEAD AND JUMP DOWN TO THE ACCLIMATING STRATEGIES FOR THE NITTY-GRITTY IF YOU WISH.

The goal: slowly introduce your body to the added stress and fatigue of the increased temperatures and humidity. An outside factor to consider, how much recovery does your schedule allow?  Meaning if your lifestyle only allows a 5min cool down after each workout, you might consider the more conservative adaption route than the athlete who can include a solid 15-20min foam rolling/ stretching routine or compression boots/ massage throughout each week.  Again, the recovery tools simply help flush that excessive fatigue both mentally and physically- if we are not recovered between sessions, we risk injury due to the a. a rapid breakdown that the heat causes b.reduced mental and physical focus c. poor response, form, and mechanics.

So, let's get down to the meat of how to acclimate over the course of 4-6weeks.

1. Notice at most, we will only build to roughly 80% of your training time to be spent outside. Why? Have you ever heard the 'golden rule' of it is better to be 20% under-trained rather than 2% over-trained??? Let's keep this same philosophy with the environmental demands. (example: if you have 10hr of bike and running for the week, consider at most, at complete acclimation, doing ~8hr outside & 2hr inside).

2. In the beginning of this transition to outdoor training, keep the of your majority intensity sessions (Race Pace efforts or Harder/ Zone 4+) inside.

Rather, focus on your easier aerobic sessions (<Training Pace-Training Pace/ Zone 1-3) to build your 'base' during heat acclimation. 

3. You will also notice, you will never fully be completing your week's total training time (neither aerobically or anaerobically) outside. 

4Ideally you would have at least 24hrs between each outdoor workout.  NOTE- I said 'ideally'- this is not always doable,  but it is preferred.

5. Bonus ways to acclimate: do outdoor chores in the afternoon/evening, walk the dog... casually tackling life outside under low-moderate stress helps the body to quickly adapt to the conditions.


STRATEGY ONE

***FOR THE ATHLETE WHO: recovers rapidly b/w sessions, has good consistent sleep quality, focuses on available modes of recovery, regularly maintains a nutrient-dense diet and optimal hydration levels...

WEEK ONE

OUTSIDE- up to 30% total time- this includes both TP/zone 2-3 & RP/ zone 4+

INSIDE- remaining 70%

WEEK TWO

OUTSIDE- up to 50% total time- this includes both TP/zone 2-3 & RP/ zone 4+

INSIDE- remaining 50%

WEEK THREE

OUTSIDE- up to 65% total time- this includes both TP/zone 2-3 & RP/ zone 4+

INSIDE- remaining 35%

WEEK FOUR

OUTSIDE- up to 80% total time- this includes both TP/zone 2-3 & RP/ zone 4+

INSIDE- remaining 20%


STRATEGY TWO

***FOR THE ATHLETE WHO: less time to recover b/w sessions, low sleep quality, cannot or will not get: massage/rolling/stretching, maintains less than optimal daily nutrition/hydration, also consider age here- I like athletes above the age of 50 to more conservative in this build up...

Also there is reduced total time outdoor to encourage less breakdown and increased recovery...

WEEK ONE

OUTSIDE- up to 20% total time,- this includes both TP/zone 2-3 & RP/ zone 4+

INSIDE- remaining 80%

WEEK TWO

OUTSIDE- up to 30%- this includes both TP/zone 2-3 & RP/ zone 4+

INSIDE- remaining 70%

WEEK THREE

OUTSIDE- up to 40%- this includes both TP/zone 2-3 & RP/ zone 4+

INSIDE- remaining 60%

WEEK FOUR

OUTSIDE- up to 50%- this includes both TP/zone 2-3 & RP/ zone 4+

INSIDE- remaining 50%

WEEK FIVE

OUTSIDE- up to 60%- this includes both TP/zone 2-3 & RP/ zone 4+

INSIDE- remaining 40%

WEEK SIX

OUTSIDE- up to 70%- this includes both TP/zone 2-3 & RP/ zone 4+

INSIDE- remaining 30%


Happy Training!

~Coach Amari

See Coach Amari's profile

Tune Up Guide with SHIMANO

Chain Wear

 Your drivetrain is made up of your crankset, chainrings, derailleurs, pulley, wheels, cassette and a chain. All of these parts wear out as you ride, degrading the quality of your shifting.

A WORN-OUT CHAIN WILL BEGIN TO DETERIORATE ANY COMPONENT IT TOUCHES, LIKE THE CASSETTE COGS, DERAILLEUR PULLEY WHEELS, AND CHAINRINGS.

chain.jpg

The chain is the first component in the drivetrain to wear out. A chain will typically last around 1,000 miles of riding but the wear interval can change drastically based on many different factors like riding style, riding conditions, and even how the chain is lubricated. As you ride, metal from the chain's roller bushings wears away, creating a poor fit on any component with teeth on it.


You can check the condition of your chain with a special chain-checker tool or when taking your bike in for service at Playtri.

Worn Pulley Wheels

Your pulley wheels will wear as you ride, degrading the quality of your shifting.

Rear derailleur pulley wheels are usually made of a hardened plastic to keep your drivetrain feeling smooth and quiet under shifting. 

pullys.jpg
chainwear.jpg


Since plastic is softer than metal, pulley wheels will conform to a wearing chain. The wearing chain will grind material from the square edges of the pulley wheel teeth, turning them to sharp points.

Unworn rear derailleur pulley wheel.

Edges of the pulley wheel teeth have square edges, indicating good condition.

Worn rear derailleur pulley wheel.

Edges of the pulley wheel teeth turned to sharp points from chain wear. 

Worn Cassette & Chainrings

THE CHAIN WILL WEAR DEEPER GROOVES INTO THE COGS OF YOUR CASSETTE THROUGH PROLONGED USE, JUST AS IT DOES ON THE PULLEY WHEELS.

RoadDrivetrain02.jpg

While this is harder to spot visually, a telltale sign of a worn out cassette is poor shifting or skipping when you shift to or from the gears you use most often. Much like the cassette cogs, the chainrings wear at different rates depending on which ones you use most often. Much like the cassette cogs, the chainrings wear at different rates depending on which ones you use the most. Unlike the cassette, however, you can replace chainrings one at a time. A worn chainring may have very sharp teeth. Shifting to and from a worn chainring will not only be difficult, but may even result in a dropped chain.  


Show your bike some love. Have the bike techs at Playtri check your drivetrain for wear to make sure you are getting the most out of your ride!

Blog post curtesy of SHIMANO

RUNNING SHOES: HOW, WHAT, & WHEN ~ Guest Blog by Dr. Kimberly Davis

DR. KIMBERLY DAVIS from RUNLAB™ give us some insight into Running Shoes: How, What & When

HOW OFTEN DO I NEED NEW SHOES?

Probably more often than you think. We recently had a great guy come into the clinic with a hole in his shoe so big that his pinky toe was sticking out because…wait for it…the school pig had chewed on it a few weeks back. Yes, a few WEEKS back. Another lovely woman came in last week wearing Newtons with so little heel left on them that it was causing her to lean backward when she ran (in case the irony of this is lost on you, Newton’s big claim to fame is that they "teach" you to run on your mid/forefoot..a topic for another day). Even if you have managed to achieve sound biomechanics (rare), are extremely light weight (also rare), and a low mileage runner without a pet pig, it is still important to remember that your shoes have a shelf life. Those sweet (rad?) neon and splatterpaint Nike knock-offs you bought for 39.99 from TinyHandsTinyPrices.com may look really cool, but they probably aren’t doing you any favors from an injury prevention standpoint. Most people wait until they start to notice nagging pains before they think to replace their shoes, instead of doing it before the issues pop up. EVA foam hardens after 1-1.5 years, meaning that when you buy older model shoes on clearance or online it is possible for them to be “worn out” before you ever run in them. Most runners should replace their shoes every 300-500 miles depending on the weight of the runner and the efficiency of their mechanics. This means every 5-6 months for the average recreational or very lightweight runner, and every 2-3 for the higher mileage or heavier runner, and this assumes you ONLY RUN in your running shoes, not wear them to work or to the gym.

WHAT ABOUT ROTATING THROUGH SHOES?

I am a huge fan of this concept. Not only does it allow your shoes time between runs for the foam to “bounce back”, but different types of shoes give you different feedback from the ground, and in my opinion, this is always a good thing from a neuromuscular standpoint. Your body adapts very quickly to a learned stimulus. By giving it different signals you are forcing it to constantly respond to outside stimuli instead of just “going through the motions” with learned patterns. I personally rotate through several shoes depending on the type of run and how fatigued my body is, and I find it works very well for keeping my body engaged with what is going on between my foot and the ground. If you would like some guidance on this please feel free to call us or stop by and chat. Everyone that works at RunLab is a dedicated runner and we love talking shop!

HOW DO I CHOOSE THE RIGHT SHOE(S)?

If you answered: "Well obviously, I choose the shoes that will match my tutu for the Goofy Challenge", then you my friend could probably get a job in any number of running retail stores...but I digress. Choosing the right shoe is much more complicated than most people think IF you have suboptimal structure, range-of-motion, and/or biomechanics, which most non-elite runners (and even many elite runners) are challenged with. "How do I choose the right shoe" is the eternal question that every runner (and shoe company, and retail employee) wishes had an easy answer, but at the end of the day...it doesn't. At RunLab, we feel very strongly that it isn't so much about the shoe as it is about the foot that inhabits the shoe (and the knee and the hip and the body that live above the foot and for some reason get left out of most types of "gait analysis" done in shoe stores). Most elite runners with sound biomechanics can run in almost anything they want to run in within a certain range, typically avoiding extreme stability in most cases. They aren't great runners BECAUSE of the shoe, They are great runners because of the work they have put in on the strength side, and often because of the genetic gift they have been given on the structural side. Back to the question. First and foremost, if a shoe doesn't feel good in the store, it won't feel any better when you run. Second (maybe even first) stop choosing shoes based on color! Base your choice on what works with you structure, goals, foot shape, etc. If you fall outside the "norm" structurally, meaning you have bunions, very high or very flat arches, knock knees, are bowlegged, have retroverted or anteverted hips, super tight hamstrings or calves, etc, or if you have a history of injuries or trouble finding shoes that work for you, get a gait analysis. And I don't mean the kind where somebody watches you run for 10 seconds down the street, looks at your foot/ankle, and then starts talking about how much or little you pronate or supinate. That isn't a gait evaluation folks! A good gait evaluation should look at your entire body from multiple angles, ideally, both in shoes and barefoot, and should factor in what is happening with your unique structure, range-of-motion, goals, strengths, and limiters. This is not something most people have expertise in doing well. Think of it in bike-fit terms, you can get your saddle height adjusted, OR you can go through a lengthy process that looks at all the necessary angles and takes your individual needs, foot position, femur length, tibia length, reach, etc into account. Both of these things might be referred to as a "bike-fit" but one of them clearly takes your unique structural and functional makeup into account and requires expertise in biomechanics to really fit you properly. Gait evaluation is the same way. Remember: understanding what could go wrong down the road through thoroughly understanding your mechanics is a heck of a lot cheaper than the rehab to fix the issue when you break. Just sayin.... :)

in summary.png
dr davis.png

DR KIMBERLY DAVIS IS THE FOUNDER AND CEO OF RUNLAB™, A GAIT EVALUATION AND MOVEMENT ANALYSIS COMPANY HEADQUARTERED IN AUSTIN TEXAS THAT PROVIDES RUNNERS ANYWHERE IN THE COUNTRY ACCESS TO COMPREHENSIVE GAIT EVALUATION SERVICES THROUGH WWW.RUNLAB.US.

AN IRONMAN TRIATHLETE AND ULTRA-DISTANCE ADVENTURE RACER HERSELF FOR OVER 20 YEARS, DR DAVIS HAS DEDICATED HER CAREER TO THE STUDY OF CLINICAL BIOMECHANICS AND HELPING RUNNERS GET BACK ON THE TRAILS, IMPROVE THEIR PERFORMANCE AND ENJOY RUNNING AGAIN. WORKING AS PART OF SPORTS MEDICINE TEAMS FOR OVER A DECADE, SHE GREW TIRED OF HEARING HER PATIENTS SAY THEY HAD BEEN TOLD NOT TO RUN OR THAT “RUNNING IS BAD FOR YOUR KNEES” BY THEIR DOCTORS WITHOUT ANY DISCUSSION ABOUT BIOMECHANICS, SHE LAUNCHED RUNLAB AUSTIN IN 2014 AS A RUNNING-CENTRIC HEALTHCARE FACILITY BUILT ENTIRELY BY, AND FOR, RUNNERS. IT HAS SINCE GROWN TO BECOME ONE OF THE NATION'S PREEMINENT GAIT-EVALUATION AND TRAINING FACILITIES IN THE U.S., WORKING WITH EVERY AGE AND EXPERIENCE LEVEL RUNNER, FROM OLYMPIC GOLD MEDALISTS AND WORLD CHAMPIONS TO BRAND NEW RUNNERS, KIDS, AND RUNNERS WITH SPECIAL NEEDS SUCH AS DOWN SYNDROME CEREBRAL PALSY, AND A WIDE VARIETY OF MOVEMENT DISORDERS. RECOGNIZING A LACK OF CONSISTENCY AND QUALITY IN GAIT ANALYSIS ACROSS THE COUNTRY, DR DAVIS LAUNCHED RUNLAB.US IN 2018 AS A MEANS FOR RUNNERS TO ACCESS HER INDUSTRY-LEADING GAIT TEAM FROM ANYWHERE IN THE UNITED STATES.

Book an evaluation in the Dallas area at Playtri https://www.playtri.com/testing

For more information about the RunLab team, please visit WWW.RUNLABAUSTIN.COM For gait evaluation services outside the Austin area, please visit WWW.RUNLAB.US

When is the Right Time to Upgrade?!

Erin Storie

Loving my TRI BIKE. Right time to UPGRADE!

I’ve been a professional triathlete for 7 years. My dad got me my first ‘competition’ bike when I was 18 years old. It was an aluminum frame Trek 1000 with rat trap pedals and I grinded on that bike. She was heavy, and she was my first bike love. After that bike, USA Triathlon gave me my first carbon fiber LITESPEED. I was so grateful for the upgrade. It was such a difference. It was lighter, faster, shifted better and could carve around corners like butter.

After that bike, in 2016 I got a new QUINTANA ROO, Red White and Blue bike. Training for the Olympics, I loved this bike. I was part of Team USA and I loved representing our nation.

After two years of riding hard and traveling around the world with her to over 20 countries, it was time for an UPGRADE!

Why now?
Sport is constantly changing. Technology is upgrading, products are becoming faster and more efficient. In a sport like triathlon, it is important to have the best gear to compete with the best women. Cycling is different than swimming or running where your products are limited. The bike can make all the difference. Not just physically, but mentally. I felt like after two years on this bike, I have really worn her out. There is new technology on bikes, better shifting, better brakes, better power that I need in order to compete at the top.

What do I look for in an upgrade?

 1) A brand that I want to represent.

o   I wouldn’t want to ride a brand that has negative energy. Argon18 is loyal to their customers.

2) A bike that fits my frame size.

o   I’m small, I need a small bike.

3) A bike with new technology.

o   Better shifting. Better brakes. Better power.

4) Components

o   The frame is one part of the bike, but the components make it work. You have to have the best component to make her run smooth. I use Shimano Ultegra, because they are dependable. I ride Garmin pedals and power because it gives me the most accurate data anywhere in the world.

*      BONUS

A good set of race wheels. You want to look like you are flying out there. ZIPP have been my favorite since the first time I rode them.

Make friends with your local bike shop or an online store you trust. I get everything from PlayTri because I know I can count on them for the best quality products and the most welcoming support when I need it.

Happy training & racing!

Hoka One One Shoe Review

Travis Vance

I’ve tried a fair amount of running shoes in my day including Nike, Asics, Newton, and Hoka One One among others.  Since the day I put on my first pair of Hoka One One’s over four years ago I knew that I had found my go-to shoe for years to come.  Hoka offers a diverse range of shoes so no matter what your intended use is, whether its road running, trial running, or triathlon you are likely to find a pair that suits your needs.

Over the last four years I’ve tried out several models including multiple generations of the Clayton, Clifton, and Cavu.  The one consistency between them all is what Hoka One One is known for – a cushioned foam mid-sole that is up to the task of absorbing the day in and day out training that you put them through.  While there is a small adjustment period for some that have never worn a shoe like this, I found that within one run I had adjusted to the different feel of running in their shoes. 

The Clifton was the first pair that I had ran in.  For me, this is great all-around shoe but I typically find myself using it during my long run because I find it absorbs the pounding of the pavement slightly better than others due in part to its slightly thicker mid-sole.  So, after a long run your legs don’t exactly feel like they ran as far as they did, which is great not only for longevity but also recovery.  At the same time the Clifton is versatile enough to take to the track if you wanted to, but if you’re going to go that route there are other models I would recommend first.  

I tried out the Clayton after running on the Clifton’s for about a year.  I wanted to find something that was a little more suited towards speed work and didn’t weigh quite what the Clifton did.  I found exactly that in the Clayton.  Another great all-around shoe and one that I’ve used on long runs as well as track runs, this model takes the benefits you get with the Clifton’s but offers slightly more versatility.

My current race day choice is the Cavu due it’s lightweight and responsive feel.  This shoe is built to meet your needs whether you’re going out for a quick jog, hitting the track, or running a marathon.  The material is also one of my favorite things about the shoe, specifically it’s “breathability” which I find useful as a triathlete, especially on hot days when you are sweating a lot or on race days when you are pouring water on yourself throughout the run.  The last thing you want is for your shoes to become weighed down from getting soaked with sweat and water, and these do a good job of drying out so that you are left running with shoes that feel like cement blocks. 

Playtri carries a wide selection of Hoka One One shoes and can help you find the pair that is right for you.  Stop by your local store to try out a pair and then get out there and start running!

Shop HOKA ONE ONE at any of our Playtri store locations https://www.playtri.com/locations or online at https://www.playtri.com/onlinestore

Swim Drills You Should Start Doing Now

Swim drills! Who needs them? Have you ever finished a swim and thought, “How am I going to complete two more legs of this race? I’m exhausted!” Or perhaps you have said, “How did that person beat me out of the water? I am in WAY better shape than they are!” If this sounds familiar, I encourage you to consider adding swim drills to your swim routines as a way to conserve energy expenditure while increasing your speed.

Let’s address three common myths encountered during the triathlete training process.

Myth #1: “I don’t do drills because I want to go fast, and drills just slow me down.”

Okay, Speed Racer! I respect your goal of wanting to lower your swim time. However, I challenge you to answer a question. Do you want to feel fast or do you want to be fast? There is a huge difference between these two things. Unfortunately, moving your arms and legs faster doesn’t always equal faster swim times. More times than not, it just means trading a lot of energy for nothing of value.

Myth #2: “I don’t kick because I need my legs for the bike and run. Why would I practice swim drills involving so much kicking?”

This philosophy leads to what I fondly refer to as the sinking leg syndrome. Just as the name suggests, this is when you drag your legs through the water to conserve energy. If you’re thinking that those epic triathlete leg muscles will effortlessly glide behind as you avoid all physical exertion from the waist down, I’m sorry to say that your race plan may be a bit flawed. Here’s the fun fact! Muscle naturally sinks in the water and fat floats. What’s the bottom line? An efficient triathlon stroke requires the elimination of drag. If your legs are dragging through the water, the overall energy you’re expending is greater than if you learned how to counterbalance your body while adding a small, steady kick to keep your body on top of the water. You may be asking, “How do I learn to do that?” So glad you asked. My answer, “Drills, drills and more wonderful drills!” 😊

Myth #3: “I have to move my arms and legs fast to keep my body on top of the water.”

Many swimmers avoid drills like the plague because they currently have to move their arms and legs super fast just to stay on top of the water. The beautiful thing about intentionally slowing down your stroke is that this process reveals stroke weaknesses that need to be corrected. Just like babies must crawl before they walk, swimmers must lay a foundation for their stroke by going slowly before they can go fast. If the underlying issues with your stroke are not corrected, you will always exert more energy than needed and your speed will ultimately plateau.

Take time to review and implement the fundamental drills associated with this article. If you’re a DIY (Do It Yourself) triathlete, practice the drills to improve your stroke technique. However, if you want help diagnosing stroke challenges or would like to accelerate your progress, contact your local Playtri to schedule a session with a swim specialist. We are here to help you achieve your epic goals!

Watch Coach Beth’s Recommended Swim Drills here: Playtri TV

🏊🏻‍♀️🏊🏼‍♂️ Just Keep Swimming! 🏊🏻‍♀️🏊🏼‍♂️

~ Coach Beth Jones

Biking 101

Coach Beth

Biking 101

Are you new to cycling or seriously thinking about caving to the positive peer pressure of those crazy road warriors? If so, I encourage you to read the answers to the following commonly asked questions:

Question: I want to get in to biking but don’t want to spend a fortune. What gear is necessary for me to get started without breaking the bank?

Answer: Let’s be honest, there isn’t a shortage of bike gear on the market. Many of these products are wonderful but not exactly necessary for a beginner. If you don’t want to spend a ton of money but still want to be prepared, here are the necessities you’ll want to have before hitting the road:

1.)   Helmet – safety first

* This is the piece of equipment you don’t want to cheat on and hope that it never gets put to the test!

2.)   A bike that has been tuned up by a bike mechanic (it’s a good idea to get a tune up before the beginning of every season)

* Safety on the bike entails more than just looking both ways before crossing the road. Having a bike that has been properly tuned up is extremely important. Many people ask me if a tune up is necessary if their bike has been “resting” in the garage for a while. Think of what happens to us humans when we are sedentary for long periods of time. The same break down happens to bikes!

3.)   Water bottle and cage (or hydration system)

* The importance of proper hydration cannot be overstated. Please do yourself a favor and take water and electrolytes with you on the bike.

4.)   Headlight and tail light (just in case you ever get caught on the road at dusk or in the dark)

* I didn’t realize the importance of this until I got caught in the dark after a long ride took me longer than anticipated…not a safe situation!

5.) Bike tire flat kit

* Even if you don’t know how to change a tire, having the equipment on your bike will allow others pull over and help you. Attending a tire changing clinic in your area or watching a few YouTube videos will equip you to undertake this epic activity!

Question: When is it time for me to get pedals that allow me to clip in and out?

Answer: Clipping in and out is a huge area of concern for new cyclists. If you’re new to cycling, I recommend you start by riding on standard flat pedals. However, once you’re ready to increase your power, speed and overall awesomeness…it’s time for the wonderful world of clipless pedals! The easiest way to learn the appropriate technique for clipping in and out is by utilizing a stationary bike trainer. Being able to practice the motions without the demands of the outdoors will help create the muscle memory to make this a natural part of your cycling experience!

Playtri can help with any and most bike equipment. Find a store or shop online at Playtri.com/onlinestore !


TOP TEN NUTRITION TIPS

TOP TEN NUTRITION TIPS by Angela Naeth  

When it comes to the best nutrition advice, there’s a ton of info out there — some that contradict each other. It can be hard to decipher what is actually good advice and what’s something to read and put aside. From fad diets to the new trend, misinformation can be found everywhere.

I always tell my athletes to be wary of “secrets to success” and new products being developed that guarantee to work better than their counterparts.

The key to all of the nonsense? Realize there is no magic potion or one set of rules that is one-size-fits-all.  Here’s a summary of the best advice I’ve been given over the years as a professional triathlete for training/racing and overall day-to-day nutrition.  These haven’t changed no matter what new hot product is on the market or what fad diet is trending.

  1. Keep it Simple. In all areas, keep what you eat as simple as possible. Stick to the same products for training as you would racing, snack on easy items like a healthy bar, apple with almonds. There’s no need to reinvent the wheel every time you eat. Make a list of good snacks, meals to eat, and items for training and racing that you can use daily.  For meals, rotate them weekly, get a variety of in by augmenting with different lean meats and vegetables.  

  2. Keep a food log – occasionally.  Keeping track of your food intake (what you eat, how much and when) can help you see your food habits (good and bad). By looking back on these days you can see what needs to change to help you fuel and recover better. There’s no need to do this everyday – once every month or two is good plan. 

  3. Enjoy what you eat!  Yes, food is fuel but that doesn’t mean it has to be bland, be disgusting and/or boring. There are plenty of healthy snacks/bars out there for on-the-go snacks/meals that are not only highly nutritious but delicious. Don’t be afraid to add spices/herbs to your meals and opt for foods you like. If those foods are unhealthy, find alternatives that do the trick. For example. I love mac and cheese. Instead of this, I make a tasty fried cauliflower rice with a small amount of goat cheese, fresh herbs and spice. 

  4. Have a replenish meal every week.  This is where you can enjoy the sought-after meals you find alternatives for all week. Sushi is my top pick. We don’t concern ourselves with amount and just enjoy the meal and time together. It helps us focus on the week and also enjoy a good meal together. 

  5. Eat carbs.  There are many fad diets and advice recommending no carbohydrates for training. The body requires them and using your race nutrition during training is key to a successful race day outcome. Using carbohydrates during the right meal windows (before and after training; pre-day large meal for a race) will help you not only feel better, but race with the energy required to perform at your best.   

  6. Keep it real.  A good rule of thumb is four fruits and four veggies a day. This is easily incorporated into a daily diet. Make meals with a  good size of vegetables and snacks to a piece of fruit with nuts or a healthy snack bar made of similar ingredients. 

  7. Plan Ahead. How hard is it to pack an apple and a bag of almonds? It’s not. When you’re on-the-go, have back-to-back workouts, a heavy work schedule, pack a lunch and snacks the night before — this should be as much of a priority as your workout itself. Bring training nutrition, recovery fuel and everything you think you’d need in a day and then some. It’s easy to have extra nutritious items stored in your gym bag and/or car. 

  8. Eggs. One of the most versatile foods out there. You can eat them by themselves, with vegetables, bake with them, and mix them with just about anything. They are highly nutritious and a great source of protein and fat. 

  9. Train like you race. Use race nutrition while training. Don’t wait until race day! Be consistent and practice this to ensure your gut can absorb what’s required. Stick to the same fuels. Liquid fuels work the best for most people. 

  10. Eat enough Even when trying to lose weight, many individuals skip out on caloric intake when it’s needed the most (during training and recovery). Tracking calories can be helpful for learning what you eat for a few days. Seeing and talking with a sports dietician is also helpful for those trying to maximize their fitness and learn how much they should be eating for their weight loss goals and racing.

TRANSITION TIPS

TRANSITION TIPS!


"You need to 'WIN' the transitions this weekend!"

True story, pushing the 'free speed' in transitions can be the difference in landing your next PR or podium finish!

Why are transitions considered 'free speed'- maybe the correct term would be finding 'easier speed' than what is required in the swim, bike, or run legs of triathlon.

BUT GUESS WHAT- there are techniques that can improve your transition times. Here my top 3 ways to increase finding your next gear out of T1 and T2:

1- Keep your space TIDY!

You are not moving into nor taking a nap in transition (better yet, you shouldn't be if you are planning on nailing some new goals).

So, minimize the junk. You should have a small hand towel- at the front of the mat: bike shoes (if not starting with them on your bike), helmet on top of the shoes with sunglasses and gloves (if you are wearing them inside the upside down helmet. Right behind the bike gear, place your running shoes, rolled socks to the toe inside the shoes (if wearing them, all you have to do is put your toe in and roll those guys up quickly), then race belt and sunglasses on top of all that.  Notice everything is uniform and easy to grab and go- if you need to put nutrition in there- place them INSIDE the shoes so you do not forget to take with you.

2- Learn to start and/or get off with your toes on bike.

This is a trick- YOU MUST PRACTICE AND NOT SIMPLY 'YOUTUBE' THE HOW-TO ON THIS ONE!

1st master getting OFF your bike (headed into T2) with their shoes attached. 

This may look easy, but your legs are going to feel like Jell-O. You have to focus on controlling the bike and navigating the dismount line and other athletes.

Even slipping the shoes off before the dismount line and simply stepping off the bike in order to not wobble to your bike rack (due to the bike shoes being uneven and even slick)- you will automatically increase your speed. 

The 2nd aspect of this shoes on the bike concept that I emphasize is starting with your shoes on the bike, possibly using a rubber band to keep the shoes in place, and then stepping onto the shoes at the mount line  (step NOT jump yet) in order to work the feet in ONLY AFTER you have gotten up to speed and have the momentum to carry you through as you work the feet in.

The 3rd step I take with athletes is to practice incorporating the 'flying squirrel mount'/ flying mount and smooth, speedy, gliding dismounts.

Lastly, I worry about the speed in which the athlete runs with the bike.  This is last on my priority list because it won't matter how fast you run or come in off the bike- if you can't control the technique it is likely you will actually end up slowing yourself down, getting in the way of another athlete, or falling at the line. Speed will come- see #3 below, work the technique first of each detail.


3- PRACTICE sprinting / fast running a.) with your bike in and out of 'transitions' b.) as if you are leaving T2.

You should be moving fast- your heart rate is most likely going to feel like it is going to pump out of your chest. GOOD! You are doing it right.  But you need to get used to that feeling + you need to be able to focus and work transitions effectively.  You don't want your speed to get in the way of executing the details. Upon leaving T2, I  ask clients to push through to the line and then worry about settling into pace.  Why, otherwise I have some that get a little 'lazy' + this allows the athlete to get their run legs under them with the increased cadence and effort= then we worry about falling into the race strategy / pace of the run.


So here's to finding some 'easier speed' faster transition times = getting you to the finish line, PR, and podium FASTER!

See you at the races and Happy Training.

Absolute Best Swim Products

Hello Fellow Fish!


Triathlon is definitely a sport that doesn’t have a shortage of gear to choose from. However, it’s very easy to become overwhelmed by the options. Whether you’re a gear junky or a budget conscious triathlete, there are a few items you must have in your swim bag:


1.) Focus Swim Snorkel (just a heads up…you may need to pair this with a nose plug)

Working on swimming technique can often feel like you’re simultaneously patting your head and rubbing your belly. Using the snorkel allows you to eliminate one of the trickiest parts of the stroke which is breathing. You then have the ability to focus on correcting other areas of your stroke. The Michael Phelps Focus Swim Snorkel is my personal favorite because it securely stays in place and the wider mouthpiece allows your mouth to comfortably relax while maintaining a secure seal to the water.


Pros:

snorkel.jpg

·       Beginners: enables you to master correct body positioning, kicking and arm strokes before adding the breathing

·       Advanced: builds your lung capacity and allows you to isolate components of your stroke without sacrificing form


Cons: Be prepared for the following to potentially occur…

·       Weird looks (don’t worry…they’re just jealous of how epic you look!)

·       You will sound like Darth Vader when you breathe (this may be exciting for some of you!)


2.) Finis Pulling Ankle Band

Most triathletes work against themselves by either not kicking or by using a kick that’s too big. Here’s the problem…a lack of kicking results in the sinking leg syndrome and a big kick creates drag making you less energy efficient. The goal is to have a compact kick that helps you maintain a level body position while contributing to your forward momentum.


Pros:

Screen Shot 2019-02-27 at 12.25.27 PM.png

·       Creates a compact kick that improves power and efficiency

·       Strengthens kicking muscles


Cons:

·       Can cause legs muscles to be sore if you aren’t used to kicking properly

·       Can sometimes cause you to kick with legs that are super straight and stiff (you want to maintain a relaxed leg and soft knee when kicking)


3.) Stroke Maker Hand Paddles

Efficiency and power are the name of the game in swimming. Many swimmers exert effort that does not translate to speed. Having an inefficient underwater pull is a large contributing factor to this loss of speed and energy. Paddles are a great way to improve power and efficiency in the water. However, it is very important for you to have proper stroke technique before adding paddles to your workouts. Adding paddles to improper form can lead to injury. The Stroke Maker Hand Paddles come in various sizes so you can select the best fit. They are also designed with several holes throughout the paddle to allow for an appropriate amount of resistance.


Pros:

·       Increases the power of your underwater pull

Screen Shot 2019-02-27 at 12.25.41 PM.png

·       Helps you feel when you’re “slipping” water which improves efficiency


Cons:

·       Can lead to injury if any of the following happen:

o   Your stroke technique is not correct

o   You’re swimming with paddles that are too large for your hands (make sure the paddles are not much bigger than your hand)

o   You’re swimming with paddles that do not have enough holes to reduce the water resistance


Just Keep Swimming! 😊

Find these recommended products in store or online at Playtri.com!

Coach Beth

Why Teams Matter

Thinking of entering your first triathlon or joining a team? Here are some thoughts to consider. 

Triathlon may not be a true 'team sport', but it is a community sport. We might be out racing individual, but the struggle and fight we all experience throughout the race, and oftentimes in training, is shared. If you've participated in or even viewed any race, it's easy to see the camaraderie among the competitors and spectators alike. The energy is addicting! 

When you combine all of that with the power of a team, that energy becomes electric. The camaraderie helps get to to the workout and often gives a newbie the confidence that they can and should keep proceeding to that finish line. There is nothing like recognizing your teammates in the wee hours setting up in transition or out on the course giving or receiving a cheer “Go Team” when you (or others) need it most. And of course, having teammates at the finish line is an extraordinary experience. It’s great to celebrate or commiserate the trials of your triathlon journey with someone that experienced the course firsthand.

So find a team!

There are many teams to join. Here are two great options that I personally work with:

iraceteam.jpg

iracelikeagirl  

  •   All women welcome

  •     All teams welcome (already part of team, we welcome and support everyone - no requirements/conflicts) 

  •     No qualifying times to join and no mandatory anything! Just a positive attitude and willingness to empower other women. 

  •     Opportunity for race homestays. Group that allows geographically dispersed women to meet and bond about their passion.

  •     Forum to discuss or ask questions about anything related to endurance sports

  •     Member organized training and social meet-ups

  •     Monthly challenges and tons of product/giveaways - $35K in gear! 

  •     Learn more:  www.iracelikeagirl.com 


Playtri Teams

12814740_489890204529280_2949751214838572336_n.jpg
  •     There is a team for any and every athlete from Youth to New-to-Sport to Expert

  •     Weekly coached workouts at your Playtri Store location (all programs include weekly coached Bike, Run and Strength Training workouts, and triathlon-specific programs will include a coached Swim workout as well)

  •     At-home training schedule to supplement your coached workouts

  •     Access to all Club workouts, including open water swims

  •     Playtri Swag including tech shirt, bike jersey or tri top depending on program

  •     Savings off all full-price retail in Playtri Stores during your program or membership term

  •     Learn more at: Playtri.com/group and Playtri.com/teamapp

 Whether you choose to join a team or go it alone, we’ll see you out there! You got this!!

Happy Training,

Angela


🚲Things to Consider When Shopping for a New Bike 🚲

 When looking for a good triathlon bike, make sure to consider the following:

  • Comfort

  • Brand and budget

  • Components

  • Support from the shop

COMFORT

Comfort trumps.  You’ll want to be sure you’re getting a bike you feel comfortable riding in both a technical standpoint, and riding.  Comfort comes from a good bike fit and size of bike, and a good shop will recommend bikes suited to your frame and interests. Consulting with knowledgeable, trusted bike fitters helps to ensure best results with bike fit.  A discussion of the style of riding and where the rider wants to improve– whether speed, handling, turning, etc. – is key. Being able to communicate with the bike fitter in person or virtually allows for the best outcome to learn about the rider and what they are trying to achieve. And always test-ride before you buy!


BRAND AND BUDGET

There are many brands to consider for a triathlon bike and a big part of this decision is budget, so take a look at starting price points for bikes is a good way to determine what to expect you’re your budget. Aluminum bike frames are less expensive than carbon frames, which is a major consideration for pricing. You can expect to spend $1500+ on a triathlon bike, or $500+ on an aluminum road bike. Different brands will provide a different fit and feel, so make sure you give yourself plenty of options when looking for that perfect bike! When I looked at bikes, I made sure to consult with my trusted fitter to ensure the Quintana Roo PRSix would fit me and help me achieve my goals. Playtri recommends testing several brands based on the fit assessment if shopping in store, or narrowing down choices with a bike specialist if shopping remotely. Larger shops and brands should provide a satisfaction guarantee program allowing exchanges if the athlete is not completely satisfied.


COMPONENTS 

Personally, I have been a Shimano athlete for a decade, so Shimano is #1 in book for cycling components – I particularly like that they have electronic components at fair prices that make my bike ride smooth and fast! However, there are plenty of high quality bike components and brands to choose from. If you don’t know the difference in components, your local shop can help you understand differences in pricing and performance.  I always recommend athletes start by looking at a brand’s “middle-of-the-road” component set. I myself use Di2 Ultegra electronic shifting, which has helped me become a stronger and more efficient cyclist. Electronic shifting has become more affordable, and is very versatile. You will want to look at your gearing as well.  For most riders, I recommend an 11-28 rear cassette and 53/39 for the front cassette, which usually allows enough variety in gearing for almost any type of riding.  However, a good bike fitter and shop will make sure you figure out the right components and gearing for your skill set and cycling goals.


SUPPORT FROM THE SHOP

When you walk into the bike shop, you want to feel comfortable right away. If you don’t, you have gone to the wrong shop!   You should be able to get measured, talk to them about the type of riding you plan to do, and get answers to your questions.  A good shop will recommend bikes suited to your frame and interests, and give you the opportunity to test-ride those bikes (highly recommended). You should be able to reach out to them, and get answers back within 24 hours whether you call, email or message the store. And, most importantly, you should feel like they want to help you find the right bike for you.


At Playtri, they will work with all athletes to achieve each athlete’s goals.

Need help or have inquiries about how you can be more comfortable or ride faster?

Playtri has been outfitting triathletes and specifically women in triathlon for over 18 years with exceptional service, expansive selection and critical knowledge enable athletes from all backgrounds to invest in their health and well-being.

Start here by finding a Playtri store near you: Playtri.com/locations or emailing info@playtri.com so their bike specialists can work on finding the perfect bike for you and your goals!

Happy Training!

Angela


How to Get Faster on the Swim

I love it when I hear triathletes say: “I don’t want to work on technique, I want to work on speed”. Here’s the issue…if you focus on speed without establishing proper technique, you will inevitably plateau or worse, get injured. There are a lot of things you could focus on to improve your swim. The internet is filled with tips and tricks. However, most triathletes have two questions

            1.) How do I get faster?

            2.) What’s the fastest way to get there?

This article will focus on one of the most common issues preventing triathletes from reaching their potential in the swim.

The goal of the swim portion of a triathlon is to be as efficient as possible to conserve energy for the Bike and Run without sacrificing speed. After years of coaching swimmers, I’ve identified a common issue I refer to as the “Sinking Leg Syndrome”. This happens when a swimmer is dragging their legs through the water instead of balancing on top. This is a big problem with triathletes due to the epic leg muscles that are developed through bike and run training. Here are the cold hard facts…fat floats and muscle sinks. This means that learning to effectively counterbalance your body in the water is essential to having an energy efficient, fast swim.

When learning to counterbalance your body, I encourage you to think back to your playground days and focus on the mechanics of how the see saw worked. If one side was up, the other side was down. It’s a very similar concept in the water. If your legs are sinking, you have to counter that by keeping your eyes looking down, head in a neutral position and upper body pressing slightly forward. The best way to practice proper body position is by using a snorkel. In my opinion, the Michael Phelps Focus Swim Snorkel is the most comfortable and effective snorkel on the market. Some of you may be thinking, “I’ll just dig out my old scuba snorkel”. As someone who really wants you to have a positive experience training with a snorkel, I strongly encourage you to invest in a swim snorkel that is specifically designed to stay in place during your swim training. The only other thing you may need is a nose plug. Some swimmers are able to use a snorkel without experiencing a wonderful sinus cleanse (aka-snorting water up your nose) but most newbies to the snorkel world will need to start with a nose plug until they’re comfortable.

Once you have all your gear, head to the pool! Here’s my favorite drill for correcting the “Sinking Leg Syndrome”:

Superman Kick on Belly with Snorkel

The purpose of this drill is to teach you how to counterbalance your body so you can create a small, splashy kick. The splash created by your kick is a great way to determine whether your body position is accurate. You should be able to create a splash with just a tiny kick. Here are some things to focus on when practicing the drill:

* Kick on your belly with arms extended and shoulder width apart (arms should be relaxed)

* Look at the bottom of the pool (keep the back of your neck relaxed)

* Kick with straight legs but maintain a soft knee so you don’t have any unnecessary tension in your legs

 * Keep your kicks small and make sure you can feel a splash

** Please Note: If you feel your legs sinking and are unable to create a splash, press your chest slightly forward toward the other end of the pool (you’re applying pressure with your chest to elevate your legs…you’re officially a human see saw!)


Stay tuned for more recommendations for becoming a faster, more efficient swimmer. And remember…Just Keep Swimming! 😊

Coach Beth

Get Faster This Spring!

Get Fast Check List:

  1. Find someone to help you. Get a coach, join a triathlon group, find a training buddy. 

  2. Focus on the fundamentals.  

    1. 3 swims, 3 bikes, 3 runs a week - one being a brick.

  3. Strength train: not just in the gym but in the three disciples.  Use tools like an elastic tubing on your ankles while you swim with paddles, low gear work on the bike and running uphill.  

  4. STOP fearing your finish time. 

  5. Treadmill running - to build a faster cadence. 

  6. Run on tired legs - the brick. 3 times runs a day instead of a long run…

  7. Get a good bike fit - Optimizing your bike fit not only improves your performance, but also increases comfort while decreasing your odds of injury.

  8. Find a good wetsuit - try a few one, 

  9. The right run shoes - shoes, as soon as you put them on should be comfortable.  You shouldn’t have to break in a shoe.  Nor should you feel anything that causes you even the slightest discomfort.  

  10. Experiment with your rhythm and cadence - in all disciplines.

  11. Find your mantra

  12. Track your performance. 

  13. Jump in a local 5K or swim/bike time trial

The Beauty of Being an Age Grouper

In triathlon, we have the opportunity to race along with the best in the world. There is no other sport out there that gives the ‘average Joe’ a chance to push limits and sweat along the side of the Elite. Many age groupers mentally/ physical mimic a pro’s approach to the swim, bike, run... recording/splashing social media by sharing their training, nutrition, recovery tips, etc.

That said, without sacrificing our type A personality that many times accompanies personal ambitious standards, goals, and commitment, I want to remind you of the simplicity and privilege it is in being an age grouper.

1- No Expiration Date

Technically, you are not limited by the number of years that you can race in this sport. The oldest Ironman World Championship athlete has been well into their 80’s. Age group athletes don’t have to face the idea of ‘retirement’ and public announcement of leaving the sport. We have the chance of competing and staying relevant within our respected age groups/amateur rankings for really as long as we wish.

2- Life Long Heath & Mental Well-being

This sport is no joke. Whether you are racing within yourself or striving for that podium, the sport “will beat you down”. Forget the physical strain but consider the emotional truth in that statement. Many pro athletes have come forward with an honest reality of loneliness and having a true struggle with self-worth, outside the sport. You have the chance, as an age grouper, to stay committed to a bigger picture and more fulfilling lifestyle outside the sport. Not to mention, you have the opportunity to ‘listen’ to your bodies signals. You do not have to ignore the significance of a bigger picture both mentally and physically.

3- Affords Balance

Your choice, “approach your training as a part-time pro (1K-2K hrs/year): while juggling a full-time job & part time friend/ family member OR spread out that 1K-2K hours over the course of 2-3 years while building and maintaining excellence in your professional and personal life)... your choice!

Again, without dismissing our allegiance to our performance aspirations, we have the opportunity to better balance our lifestyle. Age groupers do not have to isolate their lives into the sport while ignoring personally, relational, profession, etc goals. It has been said over and over, “A HAPPY athlete, will be a FAST athlete”.

One of the happiest, smartest, and most talented athletes explained how he organized a 3yr cycle of training & racing. His order of importance-

1st yr: family, professional, training/racing primarily locally

2nd yr: professional, family, training/racing primarily locally with 1-2 high profile races (goal to qualify for Boston or IM Worlds)

3rd yr: family, racing at the highest level for an age grouper, professional

Mind you, he owns his business, has a family of 3, and has maintained this rotation since the early ’90s!

Aside from feeding the age groupers ego, you do not face the need for instantaneous success. So maintaining a balanced approach will more likely give you a happy, healthy, fulfilling, and steady growth in many aspects of your life.

My hope is that you may find your formula.

Have faith, your day in/day out focus and consistency will lead to new limits.

Happy training!

Product Review: Garmin Forerunner 935 Multisport Watch

Product: Garmin Forerunner 935 Multisport Watch

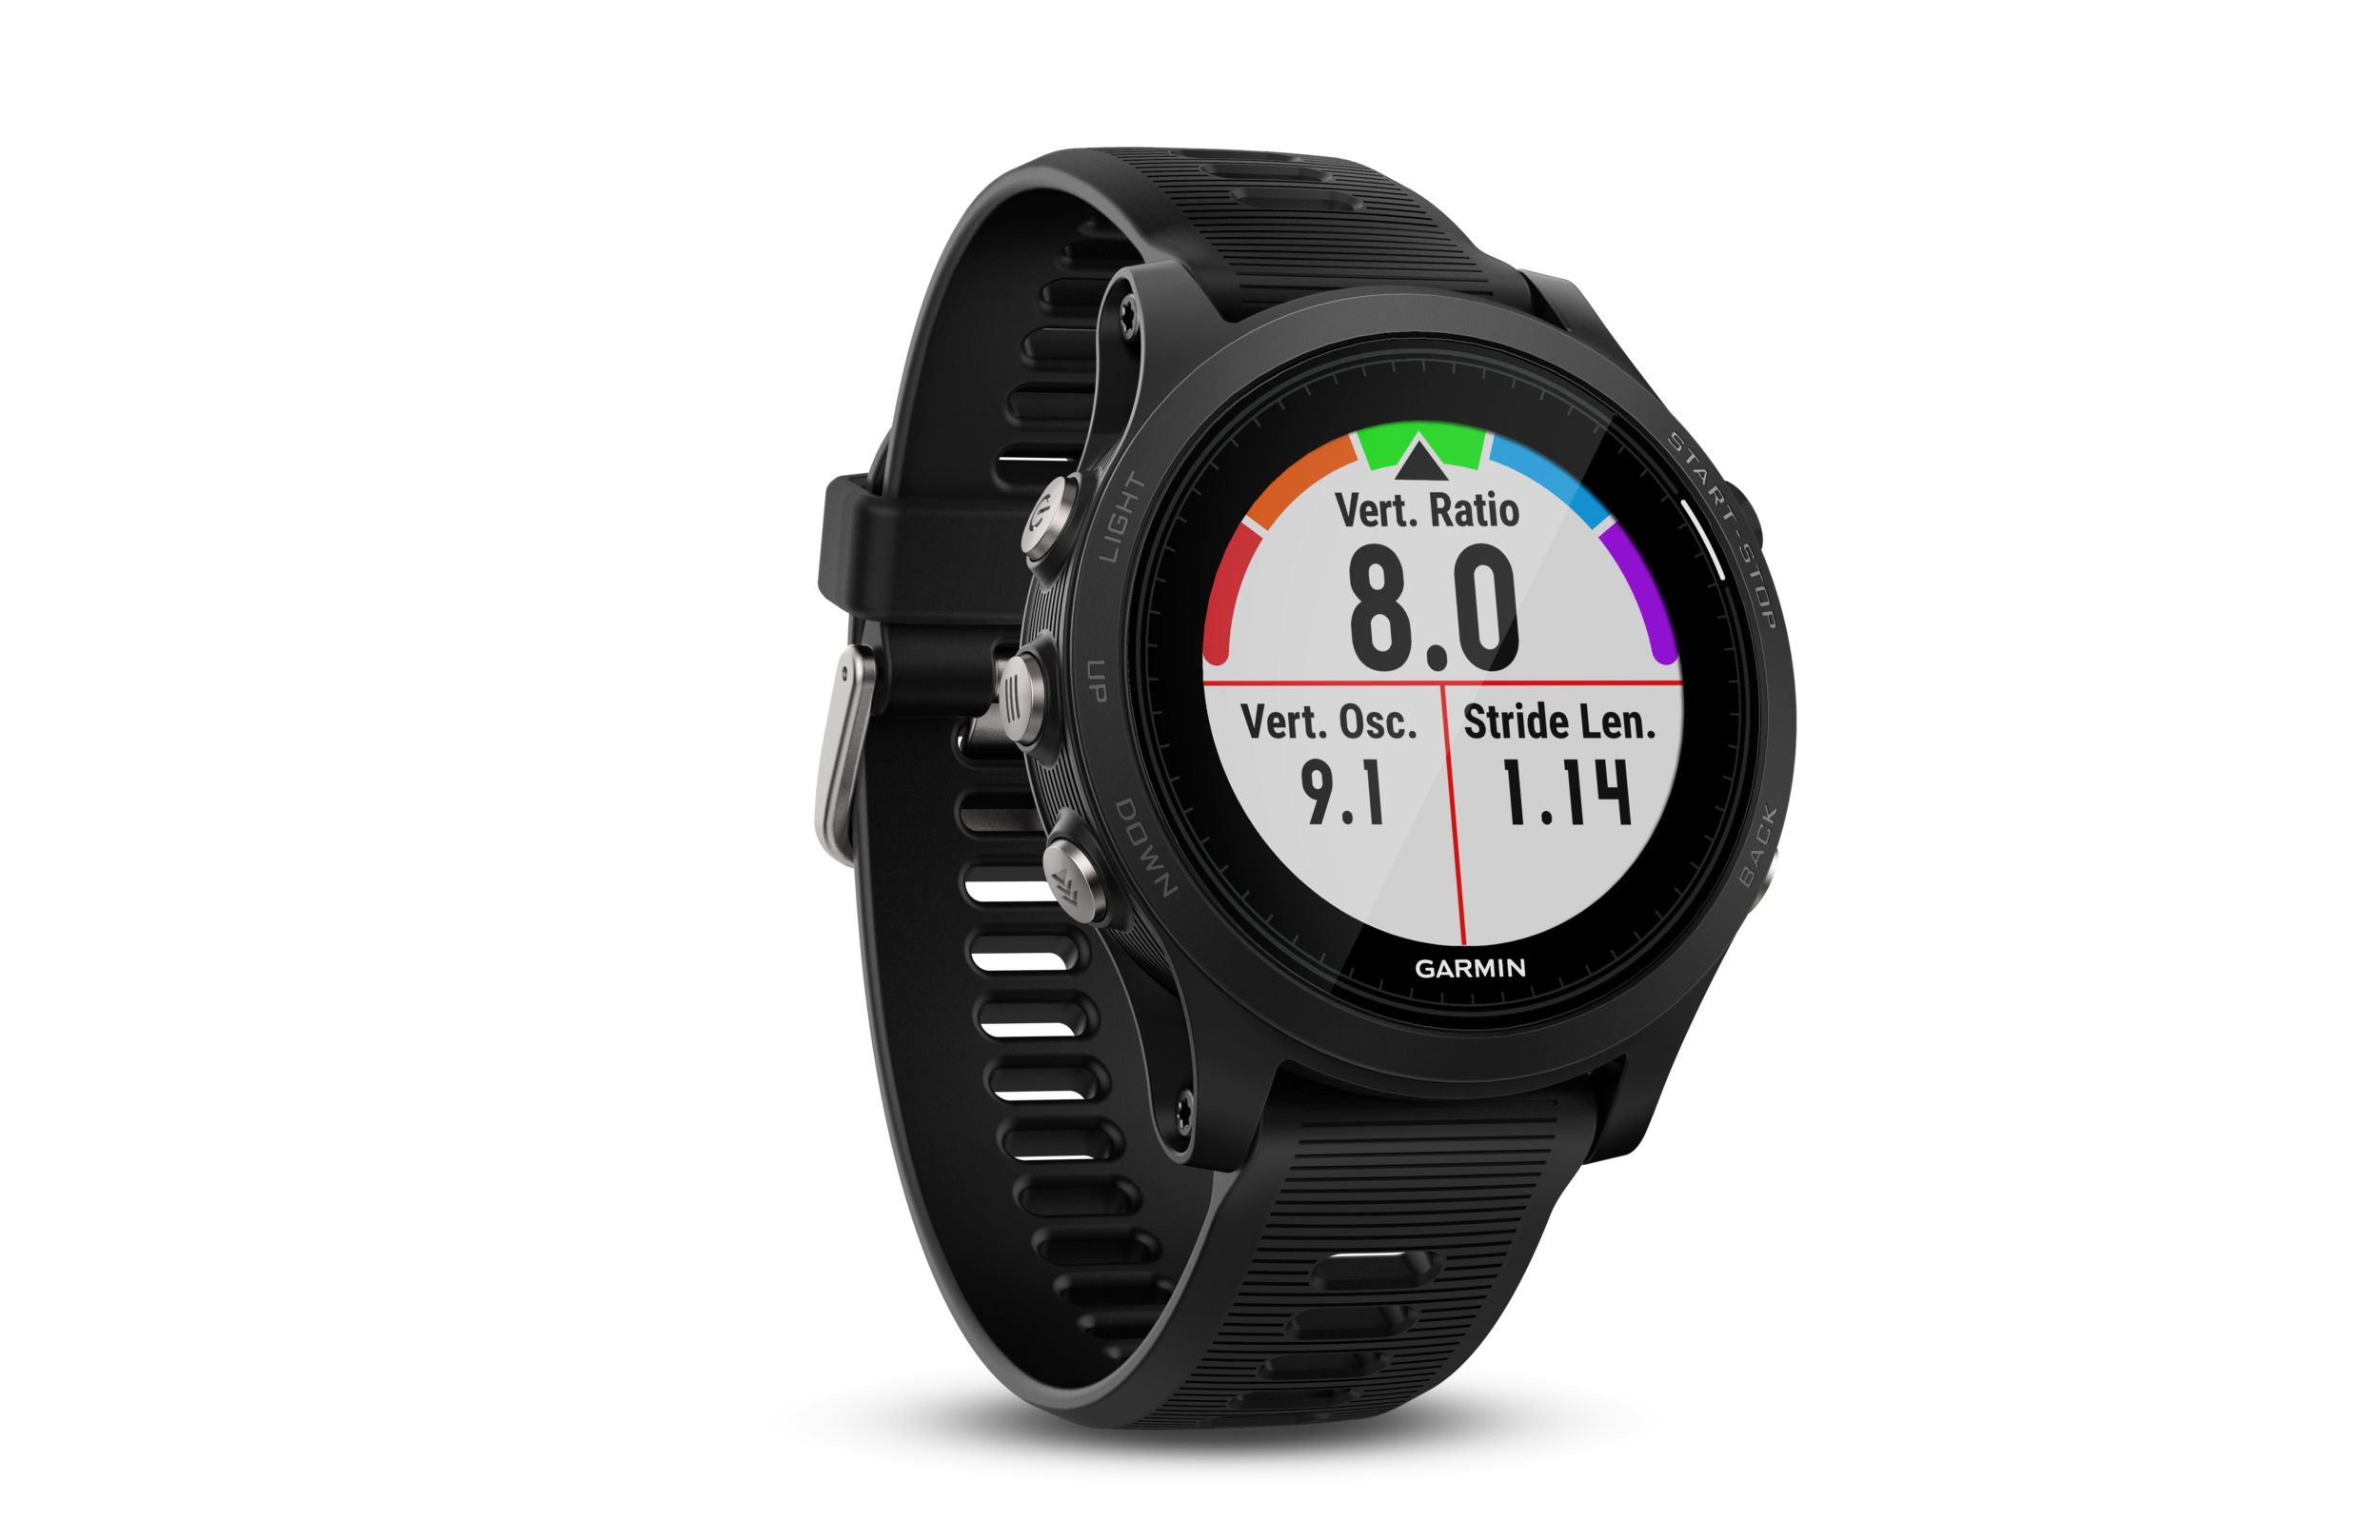
R_Forerunner935_HR_2002.60.png

Basic specs:

· Watch-style multisport computer

· Weight: 49 grams

· GPS: Yes

· Connectivity: Bluetooth & Ant+ enabled

· Display size: 1.2" circumference

· Water rating: 5 ATM (waterproof)

· Batter life: 24 hours in GPS mode (2 weeks in watch mode)

· Stock color: Black

The Garmin Forerunner 935 has been my go-to, all-in-one device for my triathletes since mid-2017 when it was initially released. Having tested other brands (and other Garmin models), while many perform similar tasks, they don't seem to do it with the all-encompassing, intuitive ease of the 935.

What I love about the 935

· Lightweight - I'm not a big athlete, so bulkier devices are also a bit of a distraction for me. The 935 is so light I forget I'm wearing it sometimes, and I'll often wear it as a regular watch outside of training.

· Subtle design - again, I like to wear this watch outside of training (especially if I'm keeping an eye on HR throughout the day), so I appreciate the all black, watch-like design as it can be worn with most casual or even business casual outfits.

· User-friendly set up and functions - I love useful data, but technology has never been my strongest point, so user-friendly software is always a huge selling point for me. If you've used Garmins before, it will take you less than 5 minutes to figure this one out. If not, give yourself 15-20 minutes with your 935 and smart phone (you will need to download the free Garmin Connect app) prior to the first workout to set up.

· Data screen set up - One thing Garmin has always done well is provide athletes with simple solutions for seeing the data they want to see when they want to see it, and the 935 is no exception. You can easily update available data screens for individual workout types to show the metrics you need to see in workout (the device will record all relevant metrics for a given workout type regardless of whether or not they are represented on your screen during the workout) - My go-to combo on the bike is a four screen setup showing heart rate, workout time, cadence and 3 second power.

· Auto-sync with Garmin Connect (and therefore TrainingPeaks) - Myself and my athletes track all of our training and files in TrainingPeaks, and one of the key selling points for me with any Garmin is the ability to save my workout and forget about it, knowing it will load to TrainingPeaks without any additional work on my part.

· Variety of functions - I coach triathletes at all levels, distances and formats, so if I can get all the metrics I need to coach from this device, you too should be covered! Heart rate, cadence, speed, power, foot turnover, stroke count and much, much more are all available in this tiny powerhouse.

· Navigation - I love the nav feature so much it gets its own mention separate from the other functions. I'll sometimes lead rides with Playtri, so having back up nav is essential if we're on a new course or need to make a detour. It's also invaluable for trail running, and gravel riding if you don't already have a good bike computer. The nav works concurrently with the workout function, and is surprisingly easy to follow despite being somewhat simplistic visually (the primary difference between the nav on the 935 and the Fenix 5). The only catch with nav is that you have to load the desired route on your laptop or home computer via Garmin Connect and load it to the device prior to using it the first time.

· Open water GPS - I love knowing how far my athletes (or I) ACTUALLY swam during our open water sessions and race legs! This gives me more accurate swim pace, and helps me know how much work the athlete actually did during an OWS.

· Battery life - I can't explain how wonderful it is not to have to charge my training device after every workout. We've come a long way in the last 10 years!

Features I'm not as wild about (and how I got around them)

Hey - nobody's perfect! I love the 935, but there are a few things about it straight out of the box that I had to find fixes for before I was 100% satisfied with my training and racing experience.

· Training status/performance updates - every so often a screen will pop up in workout telling you how the 935 thinks you're doing in relation to the baseline it has calculated for you. I don't know about you, but on a mentally tough day, I definitely don't need my watch telling me my performance is at -2 of baseline, while at the same time hiding the data screens I actually want to see. It's an easy fix, though - just go to the Settings page, then select Physiological Metrics > Performance Notifications and turn that one OFF. (Or leave it on if having your watch criticize you sounds motivating).

· Text/call notifications - another feature that primarily irritated me because it would hide my selected data screens during workouts. This one is also easy to turn off via the Settings menu.

· "Move" feature - this is a feature that functions outside of workout mode, and is designed with individuals more focused on general fitness in mind. Essentially, if the watch feels you haven't had enough activity that day, it will give you a little buzz and a reminder to "Move!" - however, I've had it give me this reminder 20 minutes after a 90 minute run, so you can probably guess that this was another feature I ended up turning off.

Other than the above - there is very little I don't love about the 935. It's got triathletes of all levels covered, and it's the first thing I recommend to my new athletes.

Morgan Johnson Hoffman