Coach Jim's Tri Tips: Improving Your Short Course Racing

It seems inevitable that when you tell someone you are doing a triathlon they ask about Kona. “Oh, are you doing the one in Hawaii?” It’s the race that put triathlon on the map for most people. However, don’t let their misunderstandings about the sport get you down. Short course racing is not just a steppingstone to the “real thing.” Short course racing is fast, intense, and hard - something we frequently encourage for our Playtri athletes to improve skill and execution. Here are four tips to help you improve your short course racing this season.

Practice your transitions.

Short course racing is fast from the get go. If you put all your training focus into swim, bike, and run and don’t practice your transitions then you are losing out on free speed. Depending on the size and strength of the age group, a slow transition can mean the difference between a podium spot or middle of the pack. Develop a routine for transitions and then practice practice practice until you can transition from swim to bike and bike to run smoothly, efficiently, and as fast as you are able. The goal for age group athletes in T1 is less than 10 seconds at the rack. 15 seconds at rack is a good goal for T2.

At Playtri we even offer private lessons for transition skill development.


Your easy days should be really easy.

Even though short course racing is fast, it is important to remember that short course triathlon is still an endurance sport. Newer triathletes (and even veterans trying to get faster) often neglect this aspect of training. Easy days are opportunities to work on form, cadence, developing fat efficiency, and active recovery while building a strong aerobic foundation. Here are some of my favorite easy day workouts to use with my Playtri athletes:

Swim: 15 minutes warm up. 15 minutes as 25 drill / 25 swim with 15 seconds rest. 15 minutes pull with snorkel, buoy, and paddles. 15 minutes easy swim with snorkel. Focusing on good form the whole time.

Bike: 2 hours at Below Training Pace or lower half of Training Pace heart rate. Keep cadence at 80-95 rpm. Practice getting in and out of your shoes while they are still clipped in if you need to improve that transition skill.

Run: 1 hour run with walk breaks. Warm up for 5-10 minutes gradually moving from a walk to a run. Run 4 minutes keeping HR in lower half of Training Pace and cadence above 170-175 steps per minute, walk 1 minute. Repeat 9 times. Walk 5 minutes for cool down.


And your hard days should be really hard.

The flip side to your easy days is including really hard intervals in your training with really easy recovery between the intervals. Far too often endurance athletes end up in the in-between space where easy is too hard and hard is too easy because we haven’t recovered fully from the last interval. Here are some of my favorite intervals for short course racing.

Swim: 200 repeats at race pace with 20 seconds rest. AND 50s (Odds 25 really fast / 25 really easy and Evens 25 really easy / 25 really fast) with 15-20 seconds rest

Bike: After a thorough 15 minute warm up, do 1.5 minutes Below Training Pace heart rate, then 30 seconds at 100-150 watts above your Vo2 power. Repeat for a total of 30 minutes. End with 15 minutes of spinning the legs at 90-100 rpms with your heart rate Below Training Pace.

Run: Warm up for 10-15 minutes. Then do repeats of 3 minutes really easy jog (or walk) followed by 2 minutes at 1 mile pace. Repeat for a total of 40-45 minutes. Walk for 5-10 minutes to cool down.


Work on the mental game.

Since short course racing takes less time, it is easy to think that the mental aspect of racing is not as important. However, with the intensity and speed so high the mental aspect is even more important. During your easy training sessions and in the weeks leading up to your race, spend 5-10 minutes each day visualizing what a good race day will look like for you. Visualize how a good day will unfold from the moment you get up until you cross the finish line. Then visualize how you will calmly and quickly handle any race day mishaps: a flat tire, leaky goggles, dropped nutrition.

Again, don’t let anyone (including yourself) dismiss short course racing as something lesser than long course racing. Short course racing is hard, intense, and fast. Check out upcoming races with Playtri, and talk to your coach about working some fun, fast local races into your training schedule!


Jim Rowe is a Playtri Level 4 Coach, a USAT LI Certified Coach, and NASM Certified Personal Trainer who works with adult athletes of all abilities from beginners to IRONMAN World Championship qualifiers. Learn more about Jim at www.playtri.com/jim-rowe.

Making Cycling Safer

It’s warming up and everyone is happy to be out and about. So an increased number of drivers and cyclists are getting out on the road.

While there are health and environmental benefits to cycling, the road can be a very dangerous place when it’s not shared responsibly. According to The U.S. Department of Transportation, there’s been a steady increase in bicyclist fatalities since 1991, with 2016 reported bicycle deaths (840 fatalities) increased by 1.3 percent.

It’s critical that both cyclists and drivers take necessary actions in order to keep themselves and each other safe. Cyclists need to defend themselves with preventative measures and strategic ways of riding. Drivers, on the other hand, need to be extra vigilant and respectful of the additional cyclists that are inhabiting the lanes. Here are some tips to keep in mind when sharing the road.

CYCLISTS

Protect Yourself Before You Ride

  • First and foremost, always wear a helmet. While wearing a helmet is not a cure-all, it’s one of the easiest ways to prevent major injuries. But it’s equally important that you ensure a proper fit and wear a helmet properly so your helmet can best protect you. Any of our Playtri staff can help access and advise on bike helmet fit.

  • Make sure to keep your bicycle in riding condition with correct air pressure and working gears to avoid equipment failures as much as possible. 

  • Tuck and tie your shoelaces and pant legs so they don’t get caught in your bike chain.

  • Plan your route—if driving as a vehicle on the road, choose routes with less traffic and slower speeds. Your safest route may be away from traffic altogether, in a bike lane or on a bike path.

  • Don’t go onto the roads if you don’t feel confident with your riding abilities. We suggest joining a group ride to get started or to take classes to learn about new advances in cycling safety.

Make Yourself Visible

While it might seem obvious, it’s critical to remember that you’re more in danger as a cyclist on the road because drivers may not see you.

Best tips:

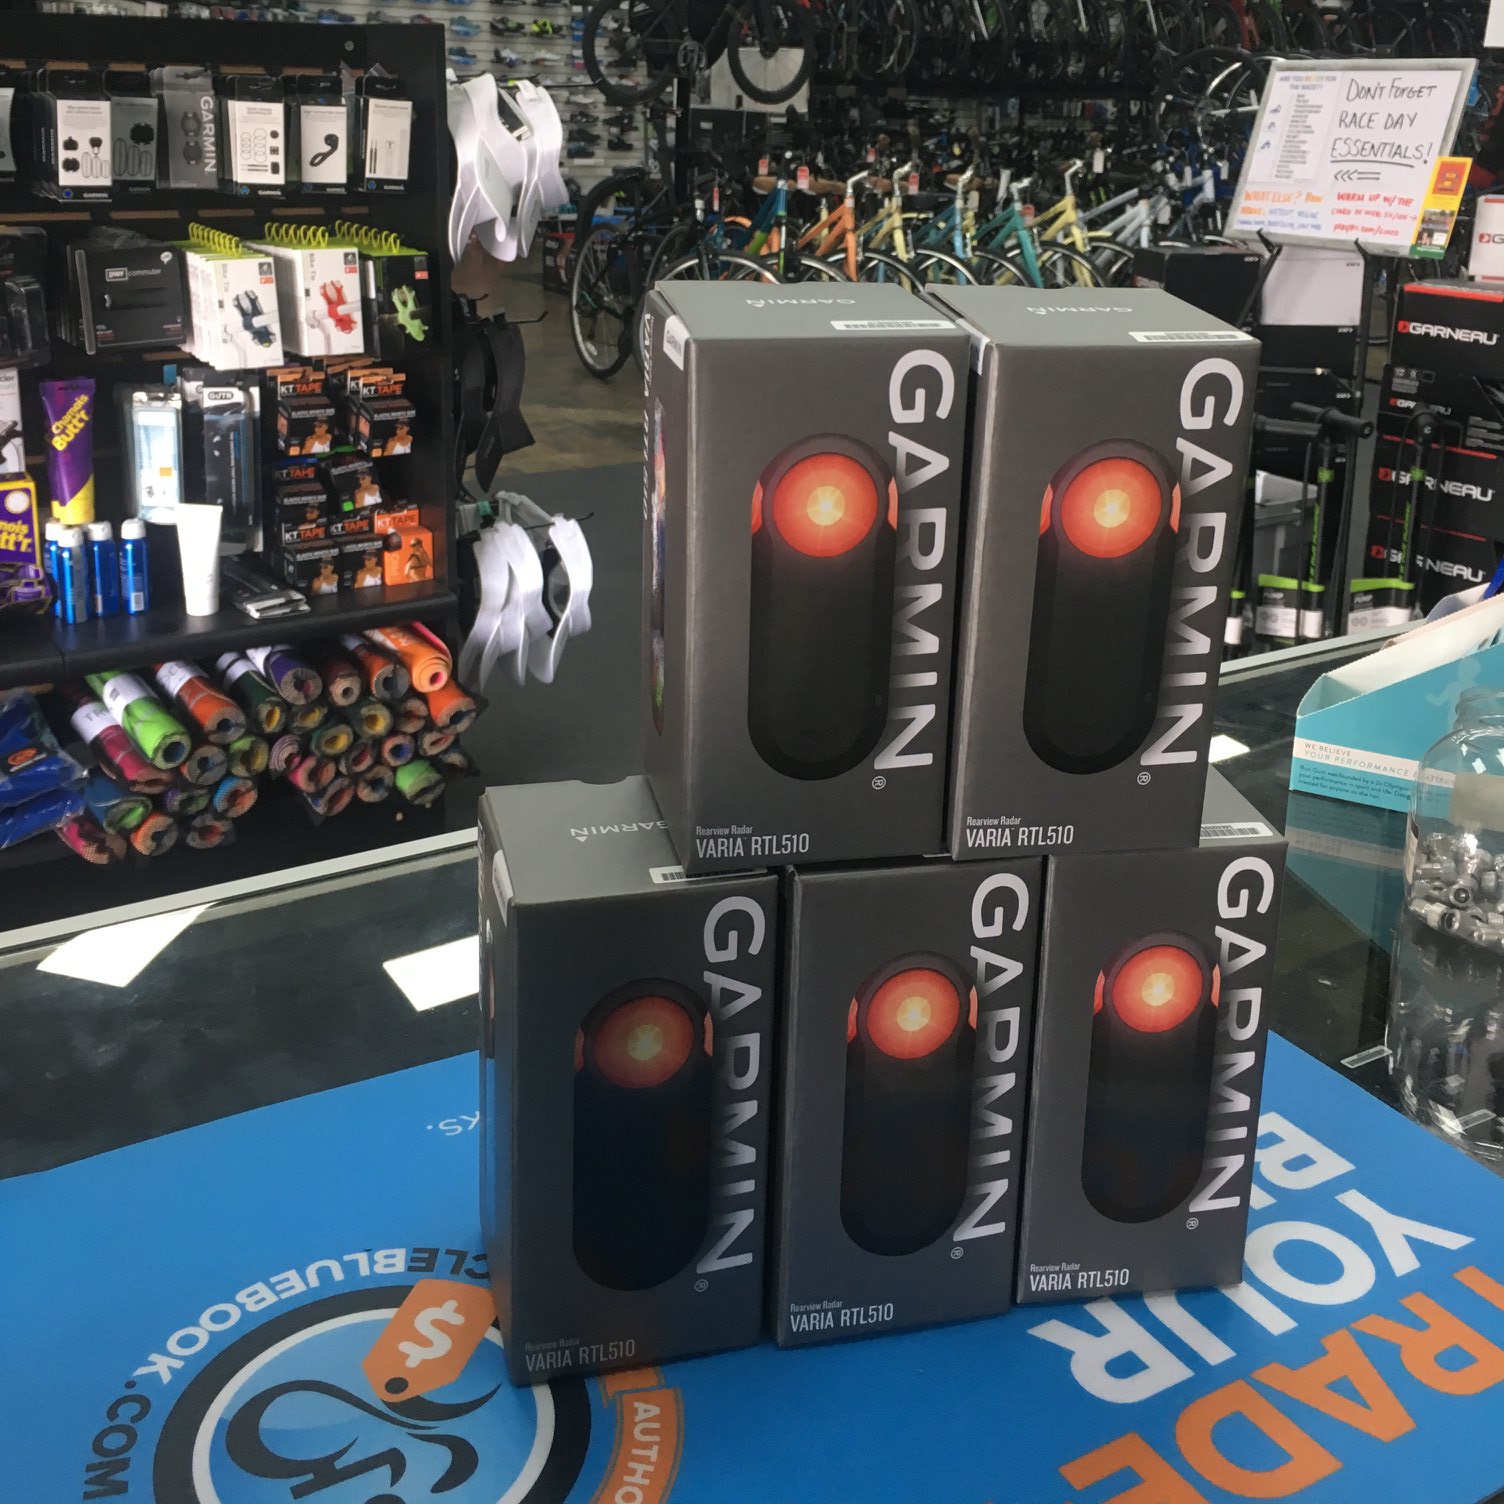
  • Be extremely visible by using bright flashing lights along with reflective tape anytime but especially important for dawn and dusk riding. Consider newer technology to alert cyclists when a vehicle approaches from behind:

rearview radar.jpg

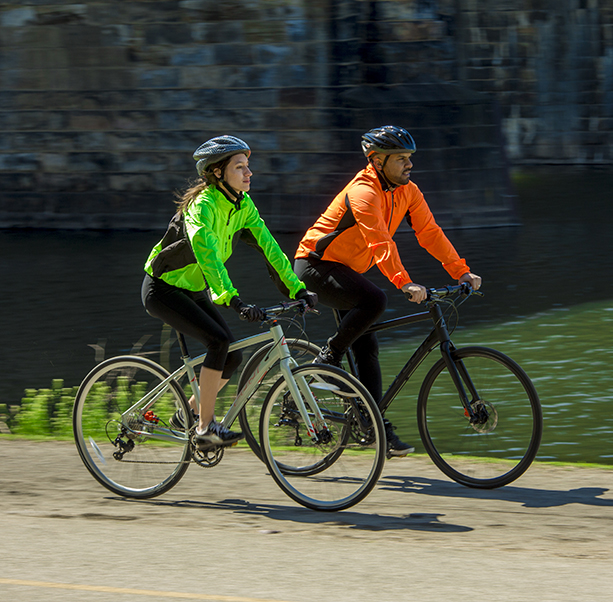
  • Wear bright colors and reflective gear:

fuji absolute.jpg
  • Ride with others in a group when possible: 

groupride.jpg
  • “I didn’t see the cyclist” is, unfortunately, a common statement in cases involving motorists and cyclists.  That’s never an excuse, but it’s imperative that you, the cyclist, make yourself as noticeable as possible.

Ride Predictably and Responsibly

Many communities post signs that cyclists have the right to share the road. Often, the safest thing to do on a road that is below 35 miles per hour is to take a whole lane. Because the side of the road can get pretty dirty, you’re better off riding predictably in a straight line in the middle of a lane than making sudden movements to get around puddles or debris on the shoulder.

It is recommended that cyclists avoid riding on the sidewalk so that pedestrians are also safe.

Cyclists follow the rules of the road at all times. While it’s tempting to ride through a stop sign, it is imperative to your safety that cyclists come to a full stop.

Use bike signals with your arms for turns and stops or simply point to where you are turning ~ it's okay to over-communicate your intentions to other cyclists and drivers on the road.

DRIVERS

Be Mindful of Intersections

Intersections are one of the most dangerous places for a cyclist.

One of the most common situations that lead to cyclist injuries on the road is when a cyclist is going straight and gets hit by a car making a right turn by crossing over the cyclist’s path of travel.

Drivers need to signal early and cyclists who are traveling straight through an intersection need to be sure to not pass cars on the right if the cars have their right-turn signal on or appear to be veering right to make a turn. Bikes should pass on the left in these instances.

Pass With Care

Cyclists should always try to ride as predictably as possible. There are circumstances that force a sudden movement by a cyclist. It’s important for drivers to keep this in mind while passing bicycles on the road. The law in most states dictates that a driver must give a cyclist three feet space while passing.

It’s a good idea to be extra cautious when passing a cyclist — by driving slowly and giving sufficient distance — you never know when a cyclist might need to veer unexpectedly.

Be Patient

Getting stuck behind a cyclist may slow a driver down a few minutes, but the reality is that cyclists have virtually the same rights as motorists in nearly every state and need to be treated that way. Getting road rage behind a cyclist is a recipe for disaster for all involved.

The safe course of action for both cyclists and drivers is to be patient and respectful of each other’s existance and right to the road.

Ride happy and stay safe.

get out and ride 3.jpg

Find cycle gear and accessories at any of our Playtri locations.

Find a group ride within your community. Playtri offers weekly rides at most locations.


Coach Jim's Tri Tips: Positive Self-Talk

Race season is upon us and with its arrival self-effacing talk shows up for many athletes. I often hear rookies and veteran endurance athletes alike say things such as, “I hope I survive the swim,” or “I don’t think I’m going to do very well on race day,” or “I made a lot of mistakes during training so I don’t know how this race will go.” These are prime examples of negative self-talk and when this happens it present an opportunity for endurance athletes to drastically improve their training and racing by improving their mental strength.


Mental strength is the ability to produce consistently at a high level of performance despite challenges, setbacks, and adversity. And mental training is often a part of endurance sports that is neglected. There are multiple facets to mental strength, one of which is positive self-talk.


When you are faced with a challenging workout or race day conditions are less than ideal, what do you say to yourself about yourself? Do the challenges overwhelm you or do you focus on what you can control? When we are placed under pressure in training and racing, we are more susceptible to negative self-talk telling us that we aren’t very good or won’t finish or shouldn’t have started in the first place. These words, although not usually spoken out loud, can bounce around in our heads and impact our performance in training and racing. And if you don’t practice positive self-talk in training, then you are more likely to experience negative self-talk when things get tough.


Tough workouts provide excellent opportunities to improve your headspace before race day - develop short phrases related to each sport or discipline, then repeat these to yourself when you are struggling. For the swim, you can say something like “Stay Smooth” or “Long and Strong.” For the bike, you can say something along the lines of “Pedal circles.” For the run, perhaps you say, “Run strong” or “Stay tall” or “Lift your knees.” And, of course, “You’ve got this!” is a fail-safe phrase at any moment when you feel particularly challenged. Short, second-person phrases like these can provide cues to get you back on track or lift your spirits when the negative self-talk shows up.


Positive self-talk is an important aspect of preparing yourself to race well and actually racing well, no matter the distance. More often than not you will likely be saying these things silently to yourself, but don’t be surprised if you find yourself speaking these affirmations out loud. Who knows? Maybe your verbal self-talk will lift the spirits of another athlete who needs to hear the same thing.


Because mental strength plays such an important role in training and racing, this is a regular topic of conversation at our camps and during the regular communication between athlete and coach. Our goal as Playtri coaches is to help you achieve your goals in a way that is as healthy and well-prepared as possible. We don’t just coach the workouts - we coach the athlete!


Jim Rowe is a Playtri Level 4 Coach, a USAT LI Certified Coach, and NASM Certified Personal Trainer who works with adult athletes of all abilities from beginners to IRONMAN World Championship qualifiers. Learn more about Jim at www.playtri.com/jim-rowe.
Orange Mud Product Review

Orange Mud Product Reviews

It’s inevitable that any runner trying to build mileage and run longer eventually faces the dilemma: how in the world do I stay hydrated during these sessions? Whether it’s getting hotter, water fountains have been turned off for the winter, or there’s simply not any source where you’re training, not having access to proper hydration methods is a classic mistake many athletes make. Thankfully, Orange Mud has come out with some great products for tackling longer miles and sessions, and not just for running. Whether you’re riding your bicycle, hiking, taking out your stand-up-paddleboard, or just out for a random adventure, the hydration packs and flasks from Orange Mud are a great addition to any active person. Their products are incredibly effective and comfortable at maintaining a way to stay hydrated for training sessions and racing.

After years of running with a handheld bottle (specifically the Orange Mud handheld), a couple of years ago I made the switch to running with hydration vests after I started long distance running. Without the ability to get aid and support during sessions and races, I turned to Orange Mud’s “Gear Vest 1L Bladder” pack. By putting all of my hydration squarely on my back, my nutrition readily accessible via the velcro pockets on the shoulders, and front pockets large enough for my phone, extra flasks, and “leftovers”, this vest quickly became my best friend out on the road and trails. I couldn’t believe how comfortable the pack was, and was incredibly surprised that my fear of chaffing as the bladder jostled during runs never occurred. The freedom of having full range of motion in my arms, the added weight comfortably behind me, and the ability to sustain myself without needing pitstops has become crucial.

Shorter runs, however, really don’t need 33oz of fluid and space. So recently, I tested Orange Mud’s “PFV 2.0 Hydration Vest” for my runs that still required being able to hold my nutrition and accessories. Equipped with a 17oz soft flask, the Phone.Flask.Vest 2.0 is a comfortable way to carry some fluid on your person, your phone and keys in the back zipper pouch, and even nutrition comfortably via the shoulder pockets while also allowing handsfree activity. Designed for activity less than 2 hours, the pack is a great way to carry your essentials on quick workouts. Though incredibly comfortable like other Orange Mud vests I’ve tried, for me this vest would be best for activities that don’t require a lot of vertical movement. Where this pack will continue to be a go-to for hiking and low-key adventures, it wasn’t as comfortable as I’d hoped for run training. The flask jostled around a little too much, and became quite distracting. Interestingly though, even though the flask moved, the vest itself stayed perfectly still, again avoiding any chafe. For shorter runs, I think that Orange Mud’s “HydraQuiver Single Barrel” is still the better choice for less fluid carried (with the bonus of using a regular water bottle instead of bladder or flask).

All in all, Orange Mud has really put out some solid products these past few years, and each new version just boasts incredibly thought-out changes that help with one main goal: worry about running, not the accessories on you. Orange Mud has made it incredibly easy to stay hydrated and carry all of your nutrition without taking away from the task at hand: running.


Saucony Kinvara and Altra Torin Review - Heel to Toe Drop VS. Zero Drop

Saucony Kinvara and Altra Torin Review - Heel to Toe Drop VS. Zero Drop


Trying to find the ideal running shoe these days can feel like looking for a needle in a haystack. Words like light, stiffer, flexible, neutral, stability, pronation, rocker, and heel drop stats are just a few examples of words peppering packaging boxes and product reviews. With all the choices out there, it’s easy (and common) for many athlete’s to just end up picking something that “feels comfortable” and/or “looks cool”. And a few miles later, we start to suffer the consequences of those choices.

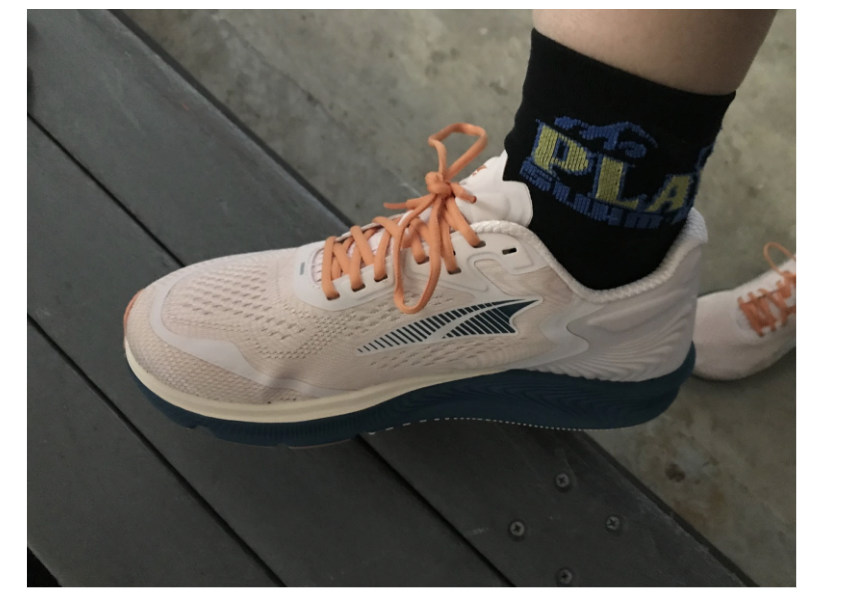
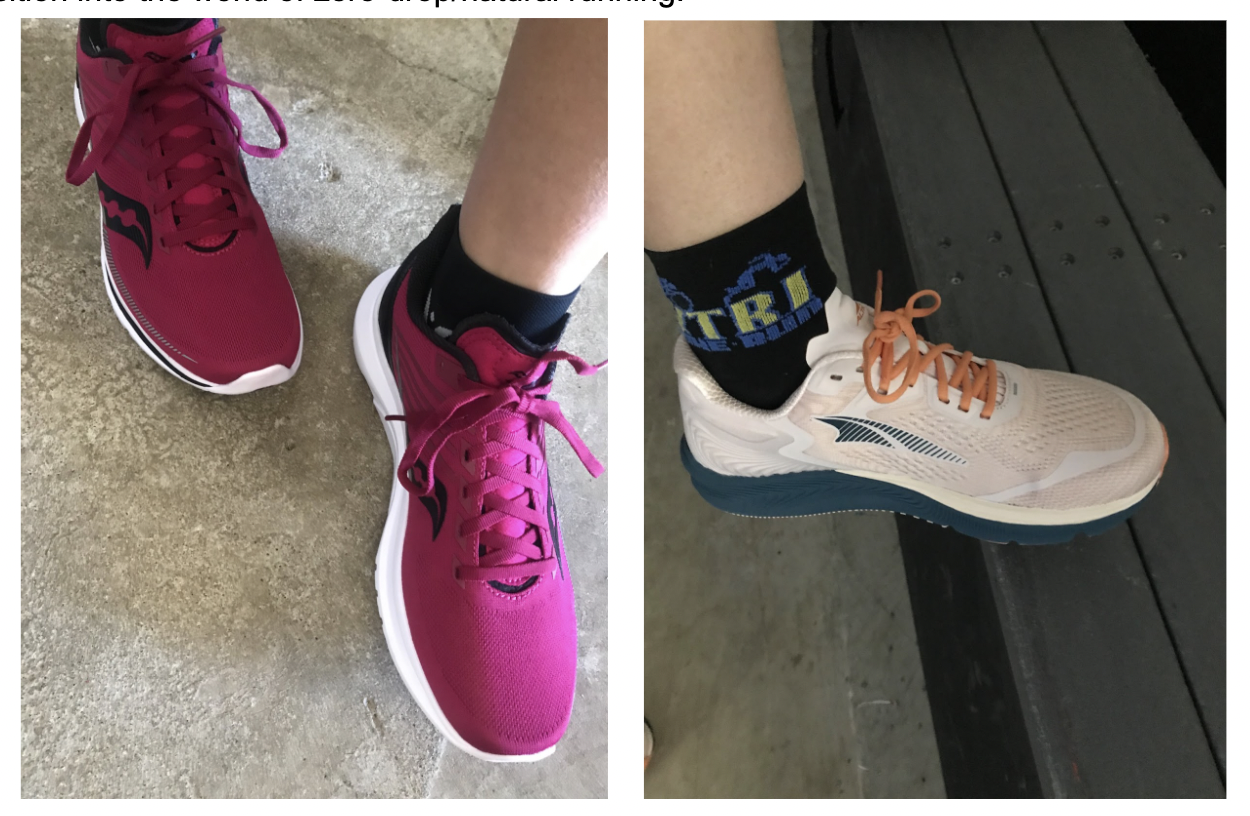
As a runner that tends to fall in line with the majority of people, I run in neutral shoes for road running. This means that the shoe itself doesn’t have any structural changes that promote compensation in the sole of the shoe pitch to the inside or outside of the foot. And recently, I spent some time testing out and comparing the difference between two popular neutral shoes - the Saucony Kinvara 12 and the Altra Torin 5.

This 12th generation of the Kinvara has brought some great looks while shedding some weight in the simple upper, and kept the “fast, flexible feel” that long-time fans have loved. With a heel offset of 4mm, it is one of the more “natural” feeling shoes while still great ground feedback. I really love how natural the shoe feels while not compromising my calves and ankles on longer runs. Though traditionally made for shorter, faster runs, this shoe was a fantastic partner in a 50k run, and the subsequent training to it. Whether a quick jog on the treadmill, or long road miles, this shoe held up beautifully. And at only $110 MSRP, it’s one of the lowest priced, high performance shoes on the market.
Positives: The flat laces cinch tight, and it truly felt like nothing on my feet.

Negatives: The slimmer toe-box required me to move up a half-size for longer running. 


Altra’s flagship neutral road shoe, the Torin, has had many changes since it’s first introduction. The Torin 5 is the latest in the progression of a company always working to bring the most comfortable and supportive feel to the world of zero-drop shoes, while maintaining their Signature Footshape, a wide toe-box allowing for a more natural spay of the foot as it hits the ground. Compared to the more narrow toe-box of the Saucony, I loved the wider design in Altra, as it allows runners to wear their “true size”. With an increase to the heel collar padding, I really could feel comfortably “locked-in” to the shoe, and quickly fell in love with this “natural” shoe. Just remember, if you’re not used to wearing a zero-drop shoe, I’d recommend cycling it into your run routine with shoes that you’re body is used to as your calves adjust. Hesitations: Though the shoe had a flexible, thin tongue, it seems higher than normal, and I was hesitant I wouldn’t have issues. Much to my surprise, the tongue was not an issue tested up to 10k (though extremely long runs might prove otherwise). Heftier price at $150MSRP.

Positives: Immediate comfort that feels supportive but light. True to size.

Negatives: Slightly heavier than the Saucony Kinvara, tongue a little invasive.


All in all, if you’re a neutral run-shoe athlete, these two are great choices for your everyday road running. The Kinvara would be a great speed companion, while the Torin would be a great transition into the world of zero-drop/natural running.


Heat Acclimation & Heat Training

By Playtri Coach Chad Carpenter

As we exercise, our bodies produce heat. This is why some of us are completely comfortable running in shorts and t-shirt when it’s 50°F or lower outside. However, when the weather starts to heat up, our ability to shed heat diminishes. During Ironman Coeur d’Alene in 2021, temperatures reach 101°F. Most athletes, including pros, struggled to perform in that kind of heat.

Fortunately, the human body is an adaptation machine. we have a few tricks up our sleeves that assist in acclimating our bodies to heat. In fact, some studies suggest that heat acclimatation can lead to the same physiological benefits as altitude training[1]. Without getting too heavy into the science, I want to provide a few key benefits of heat acclimation along with some suggestions of how to incorporate heat acclimation into your race build (I still include a few references for my fellow nerds).

WHY WE WANT HEAT TRAINING

  • Your sweat threshold lowers, or in simpler terms, you start to sweat earlier and at a lower core body temperature[2].

  • On top of that extra cooling you get by sweating earlier, you will also have an increased sweat rate[3], further increasing your body’s cooling ability.

  • Heat acclimatation also increases our blood plasma volume[4] which provides better heat transfer and oxygen delivery.

  • Mental preparation for managing heat and understanding the perceived effort in heat.

HOW TO DO HEAT TRAINING

Incorporating heat acclimation into your training is primarily about spending time at an elevated core body temperature and stressing our body’s ability to cool itself. Below are some ways to incorporate heat training into each sport of triathlon.

Swim: Many pool facilities have sauna and hot tub access. Throughout your swim workout, keep sipping on your hydration in between sets. At the end of your swim session, immediately get into the sauna or hot tub. Start the heat sessions for small durations, 5 – 10 minutes, then gradually increase the duration to 30 minutes in the hot tub or 45 minutes in the sauna (saunas tend to run hotter but the water submersion of hot tubs is more stressful on our bodies ability to cool). Avoid any active hydration during these sessions. Since you were hydrating throughout the swim workout, you should not be at risk to over dehydration during the heat session. If needed, take only small sips of your hydration, and it should not be chilled.

Bike: Anyone that has trained on an indoor trainer knows that our “pain cave” room can get warm quick. We usually keep things cool by running a fan (or several) faced directly on us. For heat training, turn those fans off. By simply removing the forced convection of fans and relying on natural convection, your body heats up quickly. I have measured core temperature over 101°F while training in a fanless garage  that had an ambient temperature of 50°F. You will get sweaty, very sweaty. Have a towel ready to keep too much sweat from sitting on your bike. Also, be mindful of the pool of sweat that will start accumulating under you. Go ahead and have a towel laying there or at least a hardy exercise mat to keep the sweat off any floors your care about.

Run: Some of us love running in cooler temperatures, and sometimes, we do so in bare minimum clothing. It’s hard for us not to love that extra cooling boost that cold temperatures provide. Well, you are going to throw that out the door for heat acclimation. Instead, Add an extra layer or two to your running attire. Remember the goal is to stress your cooling ability. If you would have normally worn some thin shorts and tank top for your run, now throw on some thermal leggings and long sleeves. Just have the washing machine ready, because those clothes are going to stink.

For both the bike and run suggestion above, keep hydrating throughout the training session with the proper electrolyte solution. Remember, athletes can have vastly different needs in electrolyte solutions, from as little as 200 mg of sodium per liter to over 2000 mg of sodium per liter. If you are unsure of what your individual electrolytes needs are, I highly recommend getting a sweat concentration test at Playtri (https://www.playtri.com/testing/#sweat). During the sauna or hot tub sessions, avoid drinking. You should go into those already well hydrated. Hydrating during the sauna or hot tub can work against our core body temperature rise that we are wanting out of it as well as other physiological benefits. You can immediately start hydrating afterwards BUT do it slowly and gradually throughout the day (i.e. no chugging).

WHEN WE DO HEAT TRAINING

The tricky and most important part about heat training is when to do. How often do you it? How many times a week? During which sessions? , how often, and for how many weeks? There are a lot of different ways to incorporate heat training. We have to keep in mind that the inclusion of heat training is extra stress on the body and that has to be properly accounted for. Failure to do so can leave an athlete showing up to race day still fatigued – not a great starting point for that ‘a’ race you wanted to crush.

For anyone wanting to incorporate heat acclimation into their training plan, I highly encourage you to work with a coach that understands it and can help you apply it correctly and safely. Chronic heat stress can rock your body and have some serious detrimental effects. There are many anecdotes of athletes, including professionals, pushing themselves in hot conditions for too long and too often which only resulted in their body having long term struggles when returning to heat[5].

SUMMARY

Heat training and acclimation can be a great addition to your race build that you can give you a slight edge over you competition. When done properly, you can exhibit the same benefits that come with altitude training as well as improved body cooling. However, we must be mindful of the particular stress that heat induces. Think of heat training as that little bit of seasoning you sprinkle onto an entrée – a little goes a long way but too much can absolutely ruin it. If you have never experienced heat training, consult or hire a coach - you can get started with Playtri Coaching at https://www.playtri.com/individual.

Personally, I will be using heat acclimation as a part of my training plan for  Ironman World Championship in St. George, and I can’t wait to see what the pay off will be.

Chad Carpenter is a Playtri Level II Coach and IRONMAN World Championship Qualifier. Learn more about Chad at www.playtri.com/chad-carpenter.


[1] Lee, B. J., Miller, A., James, R. S., & Thake, C. D. (2016). Cross acclimation between heat and hypoxia: heat acclimation improves cellular tolerance and exercise performance in acute normobaric hypoxia. Frontiers in physiology, 78.

[2] Roberts MF, Wenger CB, Stolwijk JA, Nadel ER. Skin blood flow and sweating changes following exercise training and heat acclimation. J Appl Physiol Respir Environ Exerc Physiol. 1977 Jul;43(1):133-7. doi: 10.1152/jappl.1977.43.1.133. PMID: 893254.

[3] Armstrong, L.E., Maresh, C.M. The Induction and Decay of Heat Acclimatisation in Trained Athletes. Sports Medicine 12, 302–312 (1991). https://doi.org/10.2165/00007256-199112050-00003

[4] Senay, L. C., & Kok, R. (1977). Effects of training and heat acclimatization on blood plasma contents of exercising men. Journal of applied physiology, 43(4), 591-599.

[5] While leading the race with only 1 kilometer to go, Sara True collapsed during Ironman Frankfurt due to heat exhaustion. She continued to have extreme reactions to heat in the following years of her career.

Playtri's Five Pillars of Open Water Swimming

Open water swimming season is here, which means now is a good time to get back in the water and gain more confidence for those upcoming races. At Playtri, we teach Five Pillars of Open Water Swimming based on decades of experience and research that we have learned apply to all triathletes. Whether you are a beginner or already competing at a high level, here are the Five Pillars on which to build a strong open water swim.


1.      Visualization: For some, Open Water Swimming is an anxiety producing experience. Because of this, we teach our athletes to utilize visualization during their training so that when race day comes you can swim confidently with minimal thought or decision making. Visualization helps eliminate surprises and spur of the moment decisions during the race. Set aside 5-10 minutes every other day during your build and taper phases, and on race day prior to start, to visualize how your swim is going to go. To make sure that visualization has a positive affect on your race, keep these three things in mind.

a.      Know your course and potential conditions. What direction are you swimming in? Where’s the sun likely to be? What are possible water conditions (waves, swells, etc.) you might face?

b.      Know what you want to do and envision yourself doing it. Envision your start position, your strong stroke, your confidence, how you will respond calmly if your goggles are knocked off, and how you will exit the water with a smile on your face because you’re going to nail this swim!

c.      DON’T visualize (or vocalize) the things you DON’T want to do! Negative self talk and imagery is not helpful in achieving your goals, so don’t do it. Be realistic and stay positive!

2.      Warm up: The swim warm up is THE most important warm up on race day since you hit the water first. Your swim warm up should be the last portion of your warm routine and should finish about 15 minutes before the race start. Depending on the event, you will end up either an in-water or dryland warm up. For an in-water warm up, begin with easy swimming and drills that help you focus on good form. Then sprinkle in a few brief pickups and end with a minute or two at race effort. For a dryland warm up, bring along some resistance tubing. Start with shoulder rotations, arm circles, and upper body twists, then use your resistance tubing to do single- and dual-arm pull drills finishing with 30-60 seconds of single-arm pull drills at race cadence.

3.      Starting position: For mass starts, never line up in the middle, unless you really want to experience what clothing feels like in a washing machine. Instead, line up at the front of the group on either side so that you have clean water to swim in at the start. Also, remember to line up on the side opposite of your preferred breathing side, so that you can see the other swimmers when you take a breath.

4.      Drafting & sighting off other athletes: Utilize the other athletes to improve your swim. Ideally, you spend the whole swim drafting of an athlete who is slightly faster than you with your head within 1-2 feet of the other athlete’s hip, never having to forward sight, using them for sighting, and enjoy swimming in their wake. Practice getting comfortable swimming this way, by regularly working out with other athletes and practicing this skill. You can practice this skill in the pool or open water.

5.      Continuous swimming: Barring personal danger, keep on moving forward at all times. It may be difficult in a large pack or going around buoy turns, but getting started from a full stop is hard. If you need a break, then utilize a different stroke like breaststroke, backstroke, or even doggie paddle. But keep swimming!


Building on these Five Pillars can set you up for a great swim. Start practicing these today – join us at a Playtri Open Water Swim if you have one available locally. Good luck this year and I look forward to seeing you at the races!


Coach Jim Rowe is a Playtri Level 3 Coach, and also holds a USA Triathlon Level I Coaching Certification, a UESCA Triathlon Coaching Certification, and a TRX Coaching Certification. He can be reached at jim.rowe@playtri.com.


Learn more about our Aquatics programming at www.playtri.com/aquatics.

Getting the Biggest Bang for your Tri Budget

Getting the Biggest Bang for your Tri Budget

Triathlon has always been a sport that has been an early adopter when it comes to innovative new ideas and gear. Some of the best innovations in cycling and endurance sports have come through the envelope pushing attitude of triathletes. Because we have an early adoption attitude, triathlon can be an expensive sport. However, not all improvements in this sport require money. If you are looking to make some big gains this season, here are some of the most economical upgrades you can make on the bike to improve, assuming that you already have or will be purchasing a tri bike soon.

Improve your flexibility.

Regular stretching and myofascial release, especially in your hips and lower back, is critical to improving your on-bike position. Whether you are riding a road bike or tri bike, you cannot hold a good aerodynamic position if you aren’t flexible enough. Regular yoga, Pilates, or your own homemade stretching routine will do. Stretches such as Happy Baby pose, Pigeon pose, Downward Dog, and Cow-Face pose will loosen tight hips and lower back.

Shave your legs.

Shaving your legs allows you to get your wetsuit off easier, reduce drag in the water, improve cleaning and healing after a crash, and adhere to cycling tradition. In addition, you can save watts on the bike, some studies show that smooth legs will give you a whopping 15 watt savings!

Update your tri kit

Select the snuggest fitting, sleeved, one-piece tri suit that you can fit into. Anything that flaps in the wind will increase your drag. I’m a big fan of this kit made specifically for Playtri.

Proper bike fit

You can have the most aerodynamic bike money can buy, but if you aren’t able to hold an aerodynamic position because the bike doesn’t fit you then you are wasting energy and money. A good bike fit will optimize your position, making you more aerodynamic, more comfortable, and make the best of the bike you currently have or are buying. When you get your fit, talk with the fitter, a coach, or a sales associate about the best ways to store nutrition & hydration on your bike.

Work with a coach

It is hard to be objective as a self-coached amateur athlete. It is so easy to fall into a routine that does not help us improve as athletes, but comfortably fits into our life commitments. Coaches who write a plan that meets your life commitments, fits into your schedule, challenges you to get better, and helps you to learn the in’s and out’s of triathlon faster are worth every penny. You can find out about working with a Playtri here.

Power meter

Outside of a heart rate monitor, this is the best tool for measuring your performance on the bike. Heart rate monitors help us know the physiological cost of exercise (how hard it is on the body), while power meters help us know the exact energy we put into the bike. Using both a heart rate monitor and power meter will allow you to really dial in strategies for bike pacing and with testing (a Blood Lactate/Power Zone test and a Vo2 calorie expenditure test), you can determine the correct nutrition strategy for training and racing at different intensities.

Aero helmet

Aero helmets are the next upgrade if you are looking to make performance gains with your money. Your head provides a big wind catch and using an aero helmet can minimize some of that drag and increase your overall speed. Short, blunt aero helmets or aero road helmets work well for amateur athletes who can’t hold their aerodynamic position for an entire race.

Race tires & Aero Wheels

Both race tires and aero wheels will give you an advantage on race day. Race tires will help you cut down on rolling resistance and increase overall speed and should be something you use on race day no matter what type of wheel you are using. Save the bomb-proof tires for training. Aero wheels, although they will cost more, offer a significant advantage in comfort and aerodynamics. When you purchase aero wheels be prepared to have an honest talk about your bike handling skills and the type of race courses you will be racing, since those impact how deep your aero wheels can be.

Jim Rowe is a Playtri Level 4 Coach and a USAT LI Certified Coach who works with adult athletes of all abilities from beginners to IRONMAN World Championship qualifiers. Learn more about Jim at www.playtri.com/jim-rowe.
Coach Jim's Tri Tips: How to Run Better Off the Bike

It’s a fairly common issue for triathletes to struggle on the run at the end of a race, no matter the distance. Fatigue sets in, cadence slows down, and your pace starts to decrease. If this is a normal occurrence for you, then it is worth trying out these training and racing tips.


Commit to post workout and race nutrition & hydration — Immediately after every workout and race, take time to get post-exercise nutrition & hydration in. Shoot for a 4:1 ratio of carbs to protein in the 300-500 calorie range. Some ideas are: 1 medium sweet potato with 2 tablespoons of almond butter; 1/2 cup (dry) oatmeal with 2 tablespoons dried tart cherries; 2 oz (dry) whole wheat pasta with 1/4 cup tomato sauce, 1 cup broccoli, and 2/3 cup green beans


Commit to post workout and race dynamic stretching and myofascial release — Immediately after every workout and race, commit to stretching and rolling (or massage gun or compression boots). Overly tight muscles or fascia can lead to a snowball rolling down a hill effect if you don’t address it right away. If you can’t do this right after your workout, then make sure to get it in at the end of the day.


Strengthen your core and stabilizing muscles — Strength training is often the first thing to be dropped by athletes if their schedule is tight. Our focus for strength training isn’t to bulk up, but to improve strength endurance, stability, and sport-specific strength. Sport-specific strength looks like pull sets in the pool, hill repeats or big gear, low cadence work on the bike, and hill repeats on the run. To improve your strength endurance and stability include twice weekly core work such as: prone, frontal, and supine planks; banded straight leg lifts, banded clamshells, banded lateral walks, banded squat walks; and hamstring focused work like single leg Romanian deadlifts, single leg glute bridges, stability ball (or elevated) hamstring curls.


Include brick runs in your training on a weekly basis — Depending on what your focus is for the week, include a weekly brick run off at least one brick run per week. Some examples: 30 -60 minute bike before a long run; 30-60 minute run after a long bike; 15 minute run after hill repeats or speed work on the bike.


Improve your swim form — Triathlon is about managing your energy throughout the race so that you can finish strong at the end of the race. Improving your body position in the water means less wasted energy. Working with a swim coach who is familiar with open water swimming will help you on race day.


Nail your bike nutrition & hydration — The term “ride for show, run for dough” applies here, especially for long course racing. How you fuel your bike has a direct impact on your ability to run strong. At Playtri we work with our athletes to build a nutrition & hydration plan that is science-based and tailored to the intensity of their race.


Work on your run form and cadence — Regularly working on running tall, with relaxed arms, and a high cadence (above 170 steps per minute) will help on race day. To improve your run cadence try this 30 minute workout:

  • Warm up for 5 minutes, gradually moving from a walk to a run.

  • Walk 1 minute, Run 4 minutes with a cadence that is 2-5 steps per minute faster than your current preferred cadence. Use a metronome or music to guide your feet and visualize your new run cadence during the walk breaks. Repeat 1 minute walk, 4 minutes run four times. (If your cadence drops below your goal cadence, take a short walk break and then start up again.)

  • Cool down with 5 minutes of walking.


Adopt a run/walk strategy for training and racing — Accept that walking during the run portion of a triathlon is not a sign of weakness, but an opportunity to strategically bring your heart rate down, visualize good run form and cadence, and get nutrition & hydration in at aid stations. The vast majority of Playtri athletes use a run/walk strategy for their races whether it is walking the aid stations or walking one minute for every 4, 9, 14, or 19 minutes.


Jim Rowe is a Playtri Level 4 Coach and a USAT LI Certified Coach who works with adult athletes of all abilities from beginners to IRONMAN World Championship qualifiers. Learn more about Jim at www.playtri.com/jim-rowe

Five (Not So Obvious) Reasons to Hire a Coach

By Coach Chad Carpenter

For many there is a mental reflex whenever the topic of getting a coach comes up. often, people may think, “I’m not trying to be a pro, so I don’t need a coach” or “I will get a coach when I am fast or competitive enough”. Maybe you think that you just don’t have enough time before your race, and you might as well stick to what you are doing. Getting faster or being competitive is such a small slice of what a coach can truly bring to your life, and we can still provide immense help even in the days leading up to a race. Below are five not-so obvious reasons why you should be getting a coach now.

1. SOMEBODY DOES THE BORING, TIME CONSUMING WORK FOR YOU

Building a real training plan that maximizes an athlete’s growth takes time and continuous iteration. Sure, plenty of free training plans are available when you search online, but none of those were written to fit your lifestyle, work demands, family time, and current fitness level. Planning your own workouts takes a lot of time to do correctly, and it comes with the risk of composing a poor plan due to lack of experience. Add the hours of planning to the hours of actual training, and you will end up with zero free time (and possibly a very upset spouse or partner that you do not spend enough time with). When you hire a coach, you are getting a ‘training assistant’ that composes the workouts for you, plans out the entire season, and makes the necessary changes to it when life comes up. You save countless hours of effort by not worrying about the planning which gives you more time and energy in executing your personal training plan as well as enjoying your life outside of sport.

2. PROVIDE STRUCTURE TO YOUR LIFE

For most of us, the only real structure we have from day to day is when we go to work and when we don’t. I like to sort-of joke that my days are basically structured by finding ways to distract myself in between meals. Outside of those time constraints, we generally make it up as we go. Some of us are good at that, and some of us are generally bad at it. What you thought was going to be a productive weekend when you eventually  got around to working out, turned into not making up your mind on doing a long bike ride or trail run. Instead, you looked for an inspirational movie that led to a 6-hour Netflix binge and no workout. With a coach, your entire workouts are already planned and structured into your life so that you do not have to figure it out as you go. Adding the structure of daily workouts will not only make you more organized but also more consistent in your training. We often bring the better parts of ourselves to the structure in our life. While your job may get a lot of the better parts of you, you deserve bringing it to yourself and your training.

3. IMMERSE YOURSELF WITHIN A COMMUNITY

When you hire a coach, you are getting more than a single individual’s attention and effort. Your coach will likely work with a team of coaches as well as work with other athletes. This instantly gives you a network of people to work with, learn from, and have fun with. The coach can provide group workout sessions to enable the social nature of us all as well as athlete happy hours that help us meeting new people and make new friends. Additionally, with the network of the coach, you are almost guaranteed to get the assistance you need for your own training needs. For example, I have an athlete that enjoys using TRX as part of his training regime, but I have zero experience using a TRX system. With only one quick email to another Playtri coaching, and we have supplied the athlete with some great TRX workouts that have been geared towards triathletes. You don’t just get a single coach, you gain a network.

4. ACCELERATE YOUR EDUCATION

You can read journal articles, books, and online magazines all day about the best ‘this or that’ for triathlon training. The resources area quite endless, and as with most subjects, you need to be able to filter out the useful information with the bad, misleading information. With a coach, you get a veteran who has been there, done that, and got the t-shirt (too many race t-shirts, actually).  Not only do we provide a training plan, but we provide a dedicated and reliable source of information. We can provide suggestions on what the best gear is and why,  how to set yourself up for success in getting improved sleep, and even give you easy to follow rules of thumb for pre/post workout nutrition and race day strategies.  I originally got my first coach because I wanted to learn, but I got so tired of filtering through all the overwhelming data and strategies, nor did I have the time for it. Now, I personally enjoy forwarding on quick reads, articles, and good books to my athletes who I know love reading about it but are too time crunched to find what they need.

5. ACCOUNTABILITY AND FEEDBACK

For many of us, it is clear on who are the ‘first marshmallow’ kids, and who are the ‘second marshmallow’ kids[1]. Some of us want or need accountability to be consistent. This does not have to be any dictator-level overwatching, big-brother accountability, but just a casual check-in about how a workout went or maybe what the plans are for the next training session. A coach can provide these short, frequent communication channels that enables a sense of accountability. We also provide feedback to your efforts and progress. For newbies and veterans alike, determining what is hard and what is easy is not always straightforward. Sometimes, we lose good form or pick up bad habits. Coaches not only provide a framework for structure and difficulty but can give insights to how well you executed and how we can correct our form. Overtime, you begin to calibrate your own personal perceived effort and form based on the frequent feedback.

When it comes down to it, coaches provide so much more than a training plan for the fast and competitive. We are here to make the life of any athlete more efficient and productive. With us, you gain a network of coaches and group knowledge that will progress you towards your goals. Through feedback and accountability, you remain consistent throughout your training, and consistency is a key element in having both a successful and enjoyable triathlon career.

Coach Chad is a Playtri Level 2 Coach and an IRONMAN World Championship qualifier. Learn more about Coach Chad at www.playtri.com/chad-carpenter.

[1] If you are unfamiliar with the term, I highly suggest doing a quick search about the multiple variations of psychologist Walter Mischel’s famous experiment that correlated achievement in adult life with a child’s ability to delay satisfaction for a greater return: eat one marshmallow now or wait an extended period for two marshmallows.

Training Metrics: When to Use Them... and When Not to

By Coach Chad Carpenter

There is a time and place for everything, and this concept certainly applies to training metrics. With all the wearables, online platforms, and data analysis methods built around endurance training, feeling “paralysis by analysis” is quite common. A few years ago, heart rate monitors were only used by the curious elite, but now, it seems like every person not only has a monitor on their wrist, they also wear monitor another across their chest. Our phones receive a notification every morning that inform us of the quality of our sleep and remind us throughout the day to get you 10,000 steps, regardless if you already had a bike, swim, or strength workout. Some platforms even have the audacity to tell us we should rest for 40+ hours after a workout even though we have not even gotten to the hard workouts later in the week. Do we have to listen to all of this? Short answer: no, but you should listen to some.  Let’s first talk about some post-event metrics (e.g. sleep or average pace) and then we will talk about in-situ metrics (e.g. heart rate or power).

FOCUS ON TRENDS AND CORRELATIONS, NOT SINGLE DATA POINTS

Picture this. You get your new fitness tracker, be it a Garmin, Fitbit, or whatever you fancy, and after the first night wearing it, the tracker gives you an indication of low sleep quality. Does this make you a poor sleeper? Probably not. It is easy to land into the pitfall of feeling like an underachiever when receiving a single data point that ‘indicated’ less than optimal results. You would be surprised how that single data point can completely affect our day and decisions from the unintended bias that notification enabled. You may have not felt tired throughout the day, but now that you checked your sleep score after lunch, you suddenly feel tired and bogged down. We can be primed into feeling this way by a metric that is subject to error and only a small piece of the entire picture.

There is more to this story. Let’s say that with the same tracker, you usually average about 7.5 hours of sleep a night. However, for a stretch of 3 nights, it determined you only achieved around 6 hours of sleep each night. A change in the data trend is worth exploring and reflecting on. Additionally, if you can also see that your resting heart rate also increased throughout that same 3-day span, it might be time to reduce the stress in your day as you could be over trained, over stressed, or simply coming down sick. Trends and correlated metrics are difficult to argue with and should be considered into how you adapt your lifestyle.

This concept of interpreting trends instead of single data points applies to performance output metrics as well such as bike power or running pace. If you go to a single, track session, but your lap splits are not as fast as they were last week, do not freak out. Fluctuations in performance can and will exist workout to workout. I would be very suspicious if they did not. However, if you are showing consistently slower splits over a few weeks, then it is time to reflect and seek feedback. Have you also noticed an imbalance in your strides such as more ground-contact-time on your left side than your right side? Has your load in your bike or strength workout also increased? You could have picked up a bad habit in your run form or maybe you are chronically fatigued or on the brink of a real injury. At the end of the day, you should not worry until you see a steady trend. If you do, then take action.

KNOW THE INTENTION OF THE WORKOUT

We not only analyze and assess metrics after our workouts, but often we can let the metrics drive how we train. When using or not using metrics during your workout, you should know the intention and focus of the workout. Are you aiming to get some hill work and build up strength endurance? Are those 100m laps for time at race pace or just an easy recovery swim? If you are feeling leg fatigue, should you still push to race power?

When building your own workouts, you should be deciding what the intention of a workout well before execution, and then build the workout plan or structure around that intention. For those who are part of a group program or have a personal coach, make sure you understand the intention of the workout before deciding if or how to use the live metrics to get the most out of your workout. For example, for the ‘long endurance’ runs, I often recommend athletes to not look at their pace. Instead, I would suggest that they give me the best running form at a pace that keeps them near a particular range of heart rate. If their heart rate goes above the prescribed range, then they get a walk break. The intention of the workout is to accumulate time in a smooth, good form and aerobic condition. This pace is a secondary outcome, not a primary input. This approach not only empowers the athlete to adjust their perceived effort based on the terrain (flat, hilly, trail) and weather (hot, cold, humid, dry) but also frees them from worrying about pace and performance. After a while, I find the athletes start to calibrate their ‘inner animal’. They know exactly the perceived effort needed to hit the target metrics, and they do so without looking down at their watch or bike computer all the time.

On the flip side, an athlete may have a workout that asks them to hit intervals of threshold power on the bike. If the athlete is consistently getting up to the prescribed power but still feels fresh as if they can go a little deeper, should they continue to stay at the initial target power? More often than not, I am going to tell them to lay down the watts and show me how much further they can go. As long as pushing a little harder does not interfere with their training or recovery in the coming days, this can be a great opportunity for the athlete to reach a new plateau or learn how their body responds to a little extra effort. It takes a smart athlete, and a smart coach, to know when to stick to their target metrics, when to push harder, and when to back off.

BRINGING IT ALL TOGETHER

When it comes down to it, metrics are just information and not hard lines to train or live by. As with any information, it is up to us to decide to use the information or ignore it and move on with our day. Be skeptical of single data points but highly reflective when you see trends and correlations form, both good trends and bad trends. Know the intention of your workouts and which metrics are important for those workouts. At Playtri, we often keep our workout structure simple with heart rate zones based on your blood lactate threshold which has proven to be effective over and over again. By keeping it simple, we keep it not only easy to follow, but repeatable for athletes to achieve success. If you wish to find out more, make sure to contact Playtri about our blood lactate testing or talk to one of our coaches about one-on-one coaching.

Coach Chad is a Playtri Level 2 Coach and IRONMAN World Championship Qualifier. Learn more about Coach Chad at www.playtri.com/chad-carpenter.

USA Cycling and Junior Gearing

With road racing season "kicking into gear" (I hope everyone appreciated that) I've had lots of parents asking me about junior rollouts and junior gearing. First, these two phrases are directly related. Second, you need to know that they only apply to USA Cycling events, not USA Triathlon, which means if your young athlete only plans to race triathlons this season, you do not need to worry about this.

Here's a short and sweet video about junior gearing and rollouts

Note: At most Texas races, they will actually perform rollout before the race begins. The distance for rollout at junior races here in Texas is 26' or 7.93 meters.

Also here to explain Junior Gearing is USA Cycling and friends:

Junior Gears

USA Cycling's explanation for Junior Gearing: "The main purpose of junior gear restrictions is to help the young rider develop a good pedal cadence and to avoid injury. Junior gear restrictions also level the playing field for developing juniors who may be at a disadvantage against rivals who possess physical advantages such as height and power."

Why don't we require junior gearing in Playtri, or triathlon in general? This is a source of some debate. I have two primary reasons why I don't feel junior gearing is necessary for my athletes specifically:

1. I strongly believe that proper coaching on cadence and utilizing a cadence computer (why I am such a stickler about this for our Gold 2 and up teams, for those who didn't know) are the best way to teach cadence and proper use of gearing. I don't feel that equipment is a solution for lack of good coaching, and a newer athlete could still be "mashing" (pushing too hard at a low cadence) even on junior gears.

2. Disadvantages due to growth? Gearing does not fix this. Also, this is life. Physical development and sport development are both processes, and sometimes you're going to be on the "winning" side, and sometimes not. However, if you're teaching younger athletes that it isn't all about the podium, then I feel like this is a moot point. It's hard to accept, but I think ultimately it pushes athletes to value process over podiums, and that's a win in my book.

So, we "block out" or "lockout" gears (adjust set limit screws on the rear derailleur to prevent access to the smallest/hardest gears) when we go to USA Cycling events so that we can comply with the rollouts there.

This is a handy chart that tells you how many gears to block on a young athlete's bike based on their gear ration (please note, really a 50T front ring will probably need the 14T rear cog blocked as well, even though it doesn't appear that way in the following chart):

Junior Gear Ratio Chart

Just a reminder - once you've locked out your gears, you need to remember to unlock them, too! I suggest parents and athletes learn to do this simple procedure themselves to avoid the hassle of relying on a mechanic for such a quick fix.

Have questions? Please feel free to email me at morgan@playtri.com.

Have a great Thursday!

The 99% and Aspirational Training

The idea of the 99% is not new or unique. What is the 99%? It is the day-in, day-out discipline, intention and hard work that, outside of knowledge and equipment, brings athletes 99% of their success in their sport. High level coaches will consistently reinforce to their athletes that there is no magic formula for success – there is the 99%, and once you have that, then there is the 1%, or marginal gains as we often refer to it.

I recently spoke on this topic with a group of athletes at our Pre-Season Camp, and felt it warranted a write up as we begin the new year and consequently see a spurt of what I often to refer to as “aspirational training.”

What is aspirational training? Aspirational training is when an athlete sees another athlete whose level they aspire to be at, and think “if I can do the same workout as him or her, then I will be on the path to that same level of success/fitness/etc.” Essentially, they have decided to focus on the importance of this single session or type of session, to the detriment of the 99%. This is when we see athletes who have previously being doing 30 minute swims or short rides attempting to do 30 x 100 free in the pool, or a 3 hour ride out on the bike. The worst is the hard run sets, where athletes may go from doing brief, relaxed efforts to attempting to complete intense track sessions with minimal recovery.

Aspirational training, while emotionally appealing in its possibilities to boost confidence and reassure ourselves that we are on the path to success, is a common cause of injury and training plateaus/declines for amateur athletes. By attempting to complete sessions that their bodies do not have a skill or fitness foundation for, athletes dig a hole that they cannot recover from (or gain any benefit from) without significant time off, meaning that the athlete is actually LESS fit at the end of the process than before they did the aspirational workout. Sometimes it may take a few of these sessions to well and truly dig the hole of under-recovery, but eventually training based on that of another, fitter athlete will inevitably lead to the same conclusion.

I suggest, instead, the following:

  1. Examine your goals for the season. Where do you need to be, and in what amount of time, to achieve those goals?

  2. Examine where you are today. How close are you to where you need to be for your goals? Do you see a clear pathway to that level of skill and fitness? What weaknesses will hold you back and how can you address them?

  3. If the pathway is clear, do the 99%! Begin building from where YOUR body is, and focus on daily progress. Ignore what others are doing until you are close to their level, then examine their choices and determine if they make sense for your goals, strengths and weaknesses.

  4. Set realistic process goals surrounding the 99% including nutrition, hydration and sleep to support your training. For example, “I’m going to sleep 7 hours a night at least 6 nights out of the week,” or “I’m going to eat at least two different vegetables at dinner every day.”

  5. Enjoy training sessions for what they are – an opportunity to move and strengthen your body, and to reach your potential.

In short – be honest and measured with your self-assessment and training.

It isn’t an exciting approach – except in its ability to keep you healthy and produce results. If this resonates with you and you aren’t sure where to start, consider hiring an experienced coach who can walk you through the steps.

Coach Morgan Hoffman is the Head Coach of Playtri and a USAT Level II Coach and Coach Educator. She runs the Team Playtri Elite High Performance Team, and coaches junior and adult athletes of all levels.

Learn more about individual coaching at www.playtri.com/individual.

Tri Tips from Coach Jim: Essential Pre-Season Bike Drills

The preseason (or prep period if you use Joe Friel’s terminology) is the time of year where we are more intentional about preparing our bodies to be able to handle the increased training and racing that will happen in the upcoming season. Thus, it is an excellent time of the year to deliberately shift our focus from getting in the big miles and intensity and work on things like: improving body composition, core strength, swim form, bike skills, and run form. Here are my favorite preseason bike drills to improve your pedaling stroke and bike handling skills.

High Speed Spinning — While riding on a trainer or a flat section of road at the end of your warm-up, increase your cadence by 10-15 rpms, and hold that cadence for 1 minute, recover at normal cadence for 1 minute and repeat 5 times. The goal of this drill to improve your pedaling efficiency. If you start bouncing in your seat, then slow your cadence a bit until you are no longer bouncing.

Single Leg Drill — While riding on a trainer or a flat section of road at the end of your warm-up, unclip one foot and use the other leg to turn the cranks. Pay attention to lightly dragging your foot across the bottom (like scraping mud off the bottom of your shoe), lifting your knee upward, then gently kicking over the top. Pedal with one leg for a minute at a time, paying attention to where dead spots show up in your pedal stroke, then switch to your other leg. Repeat 5 times on each leg. The goal of this drill is to develop your ability to apply power efficiently throughout the entire pedal stroke.

Riding Slowly — In an empty parking lot, quiet road, or empty bike path, slow your roll until you are riding at 2-3 miles per hour, while maintaining a smooth pedal stroke and riding in a straight line. Riding slowly forces you to improve your overall balance and gives you confidence when you find yourself riding in traffic.

Slow Slalom & Parking Space Figure 8 — Like riding slowly, this drill improves your balance and also your handling skills. In an empty parking lot, use cones or small items like water bottles or spare inner tubes to create a short course for yourself. A slalom style course is particularly helpful. Another good course is riding in a figure 8 within the area of a parking space. Both of these courses require you to ride slowly, learn the handling qualities of your bike, and how you can use your body weight to steer your bike.

Single Hand Riding — Single hand riding is an important skill to develop for triathletes for signaling turns, grabbing water bottles & nutrition, and improving your handling and balance. In an empty parking lot, while riding at least 12-15 mph place your hands on the bar top, sit square on the saddle, and practice lifting on hand at a time. As you get more comfortable riding with one hand, move your free hand to different parts of your bike and body to practice grabbing a bottle from your down tube or grabbing nutrition from a jersey pocket. Once you are comfortable riding single handed from the bar top, practice single handed riding from the aero position.

Bike Mounts — Flying mounts certainly are not a requirement for age group triathletes, however there’s a lot of free speed if you can mount your bike without coming to a complete stop. If you are new to moving bike mounts, here are the steps to master a scooting bike mount. 1) In an empty parking lot, wear running shoes and practice running while holding your saddle with your right hand. Practice this until you are comfortable steering your bike while running. 2) Grab the handlebar with both hands and place your left foot on the left pedal and practice scooting your bike forward by pushing off the ground with your right foot. Continue this until you are comfortable and balanced. 3) Once you are comfortable scooting on your bike, then practice swinging your right leg back and forth over your saddle while scooting. After you have mastered these steps then you can practice these steps with your shoes clipped to your pedals.


Jim Rowe is a Playtri Level 4 Coach and a USAT LI Certified Coach who works with adult athletes of all abilities from beginners to IRONMAN World Championship qualifiers. Learn more about Jim at www.playtri.com/jim-rowe.
Race Season Gear Check

Race Season Gear Check

The beginning of the new year is a perfect time to not only start training for the upcoming triathlon season, but also the perfect time to check the condition of your gear, schedule any needed maintenance, and plan to purchase new gear. Here is an essential triathlon gear list and what to look for when it comes to maintaining your gear.

Wetsuit: Check your wetsuit for any tears or punctures. Also try your wetsuit on to make sure it still fits.

Swim caps: A well-fitting swim cap provides warmth, comfort, and drag reduction. Make sure your swim caps are in good condition.

Goggles: The type of goggle you use depends on the weather conditions during training & racing. Make sure you have 3 pair of goggles; clear, tinted, and mirrored/polarized.

Swim suit: Swim suit fabric breaks down from repeated exposure to chlorine. Check to make sure your swim suit is not revealing too much. Replace as needed.

Bike maintenance: If it has been awhile since you have had maintenance done on your bike, then it is time for a check up. Schedule a time for the mechanics to look it over.

Helmet: Check your helmet for any cracks, dents, and fraying straps. Helmets should be replaced every three years or immediately after any crash.

Bike Shoes: Plan on replacing your bike cleats every year or at least every 5,000 miles. Your bike shoes can be replaced every few years.

Flat kit: Inspect your spare tubes for cuts. Make sure you have full Co2 cartridges. You should have a flat kit on each of your bikes that consists of at least: 1-2 spare tubes, 2 Co2 cartridges, two tire levers, and a small multi-tool.

Sunglasses: Sunglasses are like sunscreen for your eyes. If you use them everyday they should be replaced every 1-2 years.

Socks, run clothes, and cycling kit: It’s good to have enough clothing to rotate your usage. A general rule of thumb is to have enough athletic socks for each day of the week, run clothes and cycling kit for 3 workouts per week. It’s nice to have one new pair of bike shorts per year since these wear out faster than bike jerseys or run clothing.

Water bottles: Plastic water bottles start to break down after continued use and need to be replaced about once a year. However, you can extend the life of your bottles if you have enough to rotate their usage and if you clean them after every use.

Running Shoes: Run shoes (except for racing flats or super shoes) last approximately 300-500 miles. If you aren’t tracking the miles on your shoes, regularly inspect the soles of your shoes for wear and tear.

Tri kit: Tri kit loses elasticity from exposure to sweat and bacteria can eat at your kit if you don’t care for it. Plan on replacing your racing kit every 1-2 years.

Bike fit: If it has been a hot minute since you last had a bike fit, then schedule one now. Comfort on the bike leads to better bike splits and faster run times.


Coach Jim Rowe is a Playtri Level 3 and USAT Level 1 Coach. He coaches age group athletes of all ability levels from first time finishers to IRONMAN World Championship qualifiers. Learn more about Jim at www.playtri.com/jim-rowe.

Meet the Coach: Ryan Siebert

Playtri Level II Coach Ryan Siebert began coaching with us back in April, and has quickly grown into his role as an individual coach on our team, as well as one of our junior elite coaches! Read on to get to know him better.

How did you get into triathlon?

I did my first triathlon at 10 years old. The Holtzville pool sprint triathlon on Long Island, NY. My mother was my influence as she was a highly competitive triathlete herself in the 80’s. She had some great results and competed in the Ironman World Championships in Kona in 1985. In high school, I began cycling and walked onto the swim team after giving up my NHL ambitions. So my junior year, I started racing triathlons more frequently and had quick age group success and wanted to turn that into overall success. I was fortunate to be introduced to a coach that has had a major contribution to my life as a whole but guided me to the top of the local podiums and beyond. I love the challenge of the process to the race and the variation from the three sports.

How long have you been racing and what are some aspects of your triathlon career that you are especially proud of?

I have been racing for 13 years. Even though I took some time off seriously competing while in the Air Force, I still found myself in the odd race here and there every year. Some victories stand out among others, but my favorite has to be when I won the RJA Memorial Mighty Montauk on its 30th anniversary and joined my mom on the list of winners.

What do you do when you aren't doing triathlon?

I still enjoy some hobbies from my old job: skydiving, scuba diving, rock climbing. But recently I’ve been spending time learning how to code. I enjoy the problem solving and don’t think the need for that skill is going anywhere any time soon.

What made you want to be a coach?

Triathlon has taught me many lessons that apply to all aspects of my life. Nothing comes free in the sport. You have to work hard and consistently to have success. And it never gets easier, you only go faster. These principles can bring you success in anything you apply it to and that’s the big picture I want to show athletes. In the short term, it’s very rewarding when athletes have success in workouts or races and accomplish something they never thought was possible.

In your opinion, what are the top three components necessary for athletes to be successful in triathlon?

Consistency, patience, discipline

How do you tailor your coaching to help age group athletes with limited time achieve their goals?

Starting off with an honest conversation about tailoring their goals to their availability (ie a particular goal may have to wait 9 months to be accomplished instead of 6). Then making the most of the time they do have. When high volume is important I need to write a plan that capitalizes on the time they have open without sacrificing the other aspects of their life such as family time and work.

You've got a strong cycling background - what are some of your favorite bike handling drills for triathletes?

The parking space figure-8 is a valuable drill with low requirements. Completing figure-8’s while staying inside the lines of a standard parking space force you to manage your body weight distribution and balancing pedal pressure and brake application.

A drill I have been doing with my juniors is having them stack cones as they ride by. This forces even more weight distribution management and brake application because you have to lean over to one side as you ride by as slow as possible to place a cone on the ground over another.

Contact partner drills is another valuable drill that can help every cyclist but especially those interesting in competing in draft-legal triathlon or standard cycling races like the criterium that are popular here in flatland-Texas. Riding side by side another cyclist bumping

elbows and leaning into each other to fight for a line will help you stay up when this happens unexpectedly in a race. This is best done on a grass field and with people you won’t hold a grudge over if they knock you over.

What is your favorite aspect of coaching with Playtri?

The community. Everyone that trains with Playtri has their own individual goals and unique athletic and life backgrounds that they bring to the table and everyone benefits from that melting pot.

Anything else you think we should know about you?

I served 6 years in the Air Force Special Operations community as a Pararescueman. We performed search and rescue both stateside and in combat. We deployed unilaterally as well as individually with other Special Operations teams, acting as point of injury medics and technical rescue specialists.

Check out Ryan’s coaching page at www.playtri.com/ryan-siebert, or contact him directly at ryan.siebert@playtri.com.

Meet the Athlete: Cody Tingle

Cody is a Playtri coached athlete who recently finished his first IRONMAN in Cozumel (with a fantastic 1st IM time of 10:33:15) - read on to learn more about his experience!

How did you get started in triathlon, and how long have you been racing?

I got started doing triathlons in 2012. I was an athlete in college and played baseball, once I stopped playing baseball I got very out of shape and gained quite a bit of weight. I was in my 4th year of med school in 2011 and decided to make the decision to start running again and losing all that extra weight to get healthy again. My mother had been doing triathlons for years prior to this so I had been around triathlons watching her, when I moved for residency in 2012 I decided to start doing triathlons with her so I bought a cheap road bike and started cycling for the first time. I did my first triathlon and finished with a terrible time, but I finished it which was a big accomplishment. My swim was a 2:00/m pace, bike was a 19.5mph and run was a 9:30 pace. I told myself at that point that I can do this and I’m a better athlete than most of these guys out here. That next year I trained a lot more on my bike and got faster. Within a couple years I was averaging 23.5mph on bike and running 7:45 pace on run at same event. It felt amazing to see those numbers getting faster as I put more effort into my training and being able to move up the rankings, I’ve been hooked ever since. Now I’m going for podium finishes in local races and being top 10% in the bigger national races.

What do you do when you're not doing triathlon?

So this year I didn’t do much when not training as I trained for my first IRONMAN and it took the vast majority of my free time - but I’m a physician so I’m pretty busy the majority of the day. When I do have free time outside of training, I like to play golf in warm months and deer/duck hunt in winter months. I have 2 kids so I also try to be involved in their activities and doing nighttime routine with them. I also enjoy going out on the weekends having drinks and dancing with my wife (Morgan probably doesn’t approve of this, though, so Morgan forget I said that).

Note: Coach Morgan says an occasional drink and dancing is 100% allowed, as long as you pull any dance moves that put you out of commission the next day!

How long have you been training with Playtri? What's your favorite part of being a Playtri athlete?

I started training with Playtri in April 2021. I decided that I wanted to do an Ironman 70.3 and dedicate training this year to doing one. With that I wanted a bike that was actually set up for me and not something that I bought and tried to fit me after. So went to Playtri and Coach Morgan fitted me on half a dozen different bikes and found a perfect fit. While we were there we spoke about my training and if I had a coach to help focus my training. I had already thought about getting a coach but just hadn’t pulled the trigger on one, I knew of a few from different triathletes. Did some research on Playtri Coaching and decided they had the same goals that I had and specific training for me. Not just some training plan someone has made and just follow it. Anyways, none of the coaches were available to pick me up so Morgan dropped the hammer and was like I’ll train you, let’s go!!! I love how my training plan this year has been specific to me and my abilities and progression. She plans it based on when I’m most available to do certain sessions and gives me flexibility to move them around if I need to. I’m out of town but I did like going to some of the open water swimming sessions on the weekends when I could. Having coaches there and getting some advice and coaching was very helpful. Having my coach nearby to me was important as well as if I needed to come by for something I could. One very important part of being coached by PlayTri is the ability to do research on my running and cycling like lactate testing caloric testing. Also sweat testing was important during those hot months to keep from cramping. I also got very detailed race plans for each race in my nutrition and hydration plans along with setting certain pacing with each section so I didn’t burn out too quickly. All of my training leading up to each event and hopefully peaking at just the right time.

Any big accomplishments this season you can share with us?

YES!!! I had more accomplishments this year than every other year combined and I owe it all to morgan and her dedication to my training.

1. I wanted to PR my local triathlon race, RCT, as this was a benchmark for me to see how I compared to my best year previously. I PR’d it by 5 mins. Went from a 1:30 to a 1:25.

2. On that race I got 2nd place in my age group, my previous best place finish was 10th there.

3. My first event this year was Playtri’s Olympic distance triathlon in May, I got a 3rd place podium finish there. That was the first time I had ever got a podium spot.

4. At the Playtri triathlon, I qualified for USAT Nationals Olympic distance. First time I had ever qualified for any national event.

5. At my local event (River Cities Triathlon), I qualified for USAT Nationals Sprint distance.

6. I completed my very first Ironman 70.3 in Lubbock in June. That was an accomplishment in itself but I also qualified for the IRONMAN 70.3 World Championships!! That was not expected by me or Morgan.

7. Competed at IRONMAN 70.3 World Championship in St George, that was the hardest race I’ve ever done, and I finished in the top 1/3 of my age group (which I was very happy with considering it was invitational only and I very well expected to be at the back of the pack compared to all the other athletes).

8. This is definitely my biggest accomplishment, competing and finishing my very first full IRONMAN!!!! This was at IRONMAN Cozumel in Nov 2021. Had an amazing race, peaked at the absolute best time, felt strong throughout. I had some personal goals of completing swim in under 1:10, did it in 55 minutes. Cycling at 23mph, had a 24.1mph pace till my flat at mile 77. Ended up with a 23.2mph pace still. Finishing in under 11 hrs and while it was still daylight out, finished in 10:33 and it was still daylight as I crossed the finish line. That was such a thrill and a release of emotions that’s hard to describe.

What is your favorite race?

My favorite race this year had to be my full Ironman because it was such a huge accomplishment for me and I just killed it from my perspective and goals. Also being in Cozumel for the race was a cool place to do it at. Swimming in the crystal clear ocean water would get distracting at times watching fish or looking at the coral. Biking along the coast and watching the waves crash on the beach shore. Running down Main Street and having the crowds out there just screaming and cheering you on the entire race was amazing. Crossing the finish line and hearing, “from Shreveport, Louisiana… Cody Tingle, you are an IRONMAN!!!” I’d been waiting to hear that for 9 months so how could it not be my favorite!

What is your favorite piece of equipment you're currently using?

Not even close, my Argon 18 Tri+ Bike. It fits me so well. It’s fast. I love cycling the most out of all 3 anyways and this bike has just pushed me further forward. At Ironman 70.3 Lubbock I average over 24mph. On my local time trials I killed my previous best times. My best was a 25.76mph average.

Most important lesson you've learned from doing triathlon?

Doing proper training, hydration and nutrition. I’ve done races but never really trained specifically for a certain race. I also never even thought about how much to drink, taking electrolytes and using carb fuel during the race. These were all new to me and no doubt made a significant difference in my training and racing. Lesson being that there is so much to learn from knowledgeable people that have been there and done that. Having a coach teach me these things and being open to be coachable is the most important lesson. You have to trust the guidance and coaching being given to you and know it’s only for your benefit.

If you could give new triathletes one piece of advice, what would it be?

To start slow, don’t go try to do an Ironman 70.3 as your first event. Start at some local sprint races and get a feel for it. Having a coach is a huge benefit but to just get started you don’t have to be coached. But talk to people who have been in the sport for years and have numerous races under their belt. There’s so much knowledge out there that if your willingness to ask and listen, will be of so much benefit in training and racing. Also get good equipment, get shoes fitted to your stride and foot strike. Get a bike and have it fitted to you, this will make you actually want to go bike when you feel good on it.

Cody, thanks for sharing and CONGRATS on an awesome first IRONMAN! We’re looking forward to sharing the journey with in 2022.

Learn about all of Playtri’s coaching programs at www.playtri.com/coaching.

Race Weight Happens in the Pre-Season

By Coach Chad Carpenter

It’s common to hear about athletes working to hit their “Race Weight” in the weeks leading up to their big ‘A’ race with the idea that weighing less will make them faster. While there is some consistent correlation that shows faster triathletes having lower body fat percentage1 and lighter runners having faster splits2, I have unfortunate news – dropping weight in the weeks right before your big race is a huge mistake.

THE COMMON PATH IS NOT NECESSARILY THE BEST PATH

Following the last big race of a season, a triathlete will typically enter what is commonly referred to as the Post-Season. This is a period to focus on the physical and mental recovery of the accumulative training leading up the race as well as the race itself. For Ironman athletes, this can last for about 2 – 3 weeks. Following this recovery period, we enter a Pre-Season phase where we will often focus on some of our limiters, maybe work on our aerobic base or high-end speed, but the overall load and training volume is still relatively low. The length of this phase is dependent on when your next ‘a’ race is among other factors, but the typical range is somewhere between 8 – 16 weeks.

After a solid Pre-Season, we then enter another 8 – 16 week ‘Build’ phase where we start increasing the training load and volume. This is when we really try to push that fitness and performance needle. With the exception of intermittent recovery weeks, this load continues to increase until it’s time to taper before the big race. Athletes can struggle to adapt their eating habits enough to compensate for the increase caloric expenditure that is needed for the uptick in training and needed recovery. Even worse, some athletes can even intentionally hold back nutrition in order to hit race weight. They may hit their magical number of weight, but they are going to be quite disappointed come race day.

WHY SHOULD YOU MAINTAIN YOUR WEIGHT BEFORE A BIG RACE

The build phase should be some of the heaviest training loads you will endure. Your body needs to recover from all of this training, and it needs calories to do so. If you are under-fueling your body throughout these hard training days to lose weight, your recovery will suffer. Ignoring this needed recovery long enough can result in prolonged fatigue at best, as well as illness or injury at worst.

Some athletes continue their calorie deficit throughout the race taper with the reasoning of “Well, I’m not training as hard, so I shouldn’t be eating as much”. However, your body is still recovering throughout that taper. The tissue and muscle repair takes days to fully recover. Additionally, your hormonal response can be negatively affected when in a constant calorie

deficit due to the chronic increase in cortisol from the extra stress. If you are trying to drop weight in the few weeks leading up to your race, you are setting yourself up for underperforming after all the hard work you have done.

WHEN AND HOW TO WORK ON BODY COMPOSITION

The good news is there is still a perfect phase of training to work on your body composition, and that time is the Pre-Season. During the Pre-Season, our training loads are much lower than build phases. With the reduced stress on our bodies and more importantly, less recovery needed, we have a much better opportunity to reduce body fat. First and foremost, you need to understand what your body burns in terms of calories. I highly suggest getting tested for your resting metabolic rate as well as your metabolic rate during training. At Playtri, we can measure both and give you the information you need to understand where you are, calorically, on a day-to-day basis.

I also want you to implement two key strategies that not only reduce body fat but also enable you to be a better endurance athlete. Strength training can assist in growing lean muscle and increasing your resting metabolic rate as well as increasing your strength endurance and form throughout a race. Additionally, strategic fasted workouts not only help reduce body fat but also improve the body’s ability to use fat as energy.

TWO STRATEGIES FOR LOSING WEIGHT DURING THE PRE-SEASON

Emphasize strength work two to three times a week. I cannot promote this enough during the Pre-Season. It is a simple fact that muscle is calorically expensive, or in laymen terms, muscle burns fat. The immediate calorie expense of strength training may not be as great as your typical cardio-driven runs or bike rides. However, the repair of muscular tissue increases the metabolic load throughout the day or even days afterward, depending on how stressful the strength session is. While you should be constantly working your stability muscles throughout the entire year, the Pre-Season is a great time to focus on the larger muscle groups in your legs and lats. This will not only help improve your power production needed in triathlon, but you will get more calorie burn from working the larger muscles in comparison to the smaller. If you want extra credit, lift heavy. The greater the strain we place on our muscle, the greater the growth hormone response we will get3. Of course, you should always start with good form and technique when introducing a strength program into your training. Work with a coach if you’re not sure what that looks like or new to strength training.

Implement fasted workouts twice a week. Burning more calories than one consumes is an obvious path to reduced body fat, but utilizing fasted workouts or workouts with low caloric consumption can have additional benefits beyond the direct weight loss. Endurance athletes need to achieve a certain

adaptation to burning fat for energy. The more time we spend training in a carb-deficit state, the more adapted we become to burning fat. With a higher efficiency to utilize fat, athletes will have less of a dependency on carb consumption during a race which is the usual culprit of the dreaded ‘bonk’. However, shifting your fat/carb adaptation takes time and the sooner you start this process, the better, which is why the Pre-Season is a great time to start. Including fasted workouts does come with a few precautions. DO NOT FAST BEFORE EVERY WORKOUT. Constantly training while fasted can have detrimental effects on your hormones in the long term. You should also avoid fasting before any workouts with high stress or hard intervals. Instead, fasted workouts should be targeted for the lower stress workouts. Examples would be 2-hr or less easy bike ride on the bike or a 1-hr or less easy run (think a ‘go-all-day’ kind of pace or heart rate). Do not forget to hydrate with the proper electrolyte concentration. Of course, you need to fuel immediately after the workout. Staying in a fasted-state will hinder your recovery and prolong higher levels of stress hormone in the body.

If you need additional guidance into how to include strength work into your endurance training, please reach out for a consultation or talk to me about one-on-one coaching. Additionally, Playtri has great resources to determine your current metabolic demands in terms of how fat dependent you are and how many carbs you need to consume for a particular race. Checkout the VO2 metabolic testing service that we offer to see where you currently stand and how to better fuel during training and race day. Also, don’t forget to look into the Resting Metabolic Rate Assessment which let’s you know how much carbs and fats your body need regardless of your training or lifestyle.

Coach Chad is a Level 2 Playtri Coach and IRONMAN World Championship qualifier. He brings a strong strength and conditioning background to his coaching programs. Learn more about Coach Chad at www.playtri.com/chad-carpenter.

Understanding Pool Markings: Tri Tips from Coach Jim

For many adult-onset triathletes, swimming is the most challenging discipline of triathlon. Swimming does not come as easily as running or biking, can be fear inducing, and can also be intimidating when you first start pool swimming. Working with a coach is the best way to make improvements as a swimmer. However, to become more comfortable in the pool and make swimming more enjoyable, it is helpful to understand the different markings of a pool.

There are two distances for competitive swimming pools; short course and long course. The standard short course pool is 25 yards (or 25 meters) long and has 6-10 lanes. Short course pools are most commonly found in public swimming locations and high schools. Long course pools are 50 meters long with 8-10 lanes and normally found on college campuses and higher-end swimming facilities. Although the length of pools vary, the markings in and around the pool do not. Lane lines, backstroke flags, swimming lines, and turn targets are the four symbols that can help you in your training.


Lane lines are the small plastic buoys connected to each other by a wire cable that separate each lane. In both short and long course pools, the floats will change color at approximately 15 feet from the wall, alerting you that the wall is getting near This is particularly helpful for breast stroke and butterfly since your head is consistently coming above the water line in these strokes. If you know how many strokes it takes to get to the wall from 15 feet out then you can keep your head down and focus on your stroke instead of looking up to make sure you don’t hit the wall.


Likewise, backstroke flags are positioned above the water 15 feet from the wall so that you don’t need to look behind your shoulder as you approach the wall. If you know how many strokes it takes to get to the wall from 15 feet out, then you can count the number of strokes at 15 feet out, allowing yourself to stay more streamlined and focused.


But unless you are planning to swim backstroke, breast stroke, or butterfly in your next triathlon, then you will be spending much of your time looking at the swimming line (or black line) on the bottom of your lane. If you are sharing the lane with another swimmer, then this lane can be used to divide equally. If you are planning to join a lane that already has a swimmer, please don’t just jump in and start swimming. Sit down on your butt and dangle both legs in the lane, off to the side near the rope. If they don’t acknowledge you, then get all the way into the water and stand in the corner of the lane. Only start once they notice you.

And if you are sharing the lane with multiple swimmers, then you can swim in a rotating, counter clockwise pattern. Essentially keeping to the right of black line. Enter the pool in the same way and if you feel another swimmer tap your foot while swimming, it is a sign that they want to poss. Simply pull into the corner of the lane when you reach the wall and let them pass.

If you are lucky enough to have the lane by yourself, then you can use the black line to help you swim in a straight line and even to work on improving your stroke. For example, if you have a tendency to cross over your body with your arm, then make sure your hand enters the water and pulls back without crossing the black line. And if you have a tendency to not swim in a straight line in open water, then you can work on that by starting above the black line, closing your eyes, and taking 5-6 strokes before opening your eyes again. Each time working to stay on top of that black line.

Turn Targets and the “T” at the end of each black line are meant to help you gauge the distance to the end of the pool during freestyle. Each “T” stops about 5 feet from the wall, alerting you to take 1-2 more strokes before beginning your turn. And Turn Targets are especially helpful in doing flip turns as they provide a mark for your feet as you initiate your flip turn.

Knowing how to use the markings in and around the pool (plus following polite, pool etiquette) can make swimming an enjoyable and help you improve as a swimmer.

Coach Jim Rowe is a Playtri Level 3 and USAT Level 1 Coach. He coaches age group athletes of all ability levels from first time finishers to IRONMAN World Championship qualifiers. Learn more about Jim at www.playtri.com/jim-rowe.

Coach Chad's Holiday Wish List

#1 Garmin Watch, specifically the Fenix series with sapphire face.

I'm always a huge fan of the Garmin watches. The forerunner 935s and 945s are constantly at the top of most 'best tri watches' lists, but I prefer the Fenix models. I have a Fenix 5X now, and I'm waiting for some hopeful holiday pricing to get the 6X pro or for Garmin to get off their butt and release the Fenix 7 series already. The solar models are cool, BUT if you are like me and bang your watch on what seems like everything, you should go with the sapphire face instead of the solar for a little extra protection. While Wahoo and Polar have their own somewhat comparable models, it's hard to beat the features of the Garmin models and what seems like reliable, seamless integration with all the new upcoming technology. Did you get some fancy Form goggles? Garmin syncs with it. How about those new CORE body temperature sensors? Yup, Garmin syncs with that too. It does all the things and pairs with all the things. They are not cheap, but you get what you pay for. Shop Garmin at Playtri.

#2 Hoka's Carbon X2

If you want to increase your cushion without sacrificing your run speed, look no further than Hoka's Carbon X2. These things are super light and pack plenty of cushion for marathon-distance runs. The stack is a little high if you are new to Hoka, but the heel-to-toe drop is fairly mild at 5mm. After a session or two with these, you will barely notice the taller stack. Your feet will feel great and your splits will be even better. Shop HOKA at Playtri.

#3 Wahoo Kickr

Let's face it. Cycling in the cold during the winter months suck. Fortunately, it is a great time to take your ride indoors and work on some controlled power efforts. The Wahoo Kickr is one of the best smart trainers you can get. No calibration needed, pairs with just about every device or platform (Zwift, Rouvy, etc.), and fits about every bike frame. It's also fairly quiet, especially compared to the more traditional fluid and magnetic brake trainers. By the time the warmer spring and summer months roll around, you will be hitting the road with more power. Shop Wahoo at Playtri.

#4 Swiftwick Socks - absolutely the best!

Get all these items and more at Playtri! Not sure what your athlete wants/needs? Gift cards are always available. Shop Now!