Combat Open Water Swim Anxiety

The swim portion of the race can cause great anxiety for new and experienced swimmers alike. The anxiety can come from different sources, so you need to address it accordingly to overcome it.


Fitness/Technique

Open water swimming requires a higher level of swim fitness than pool swimming. There is no 100% passive way to recover on the swim like the bike and run. You need to understand technique and pacing to get yourself through an open water swim. This can best be accomplished through 1-on-1 lessons with a coach as well as practice in the open water leading up to your race. At Playtri, we get athletes in our Endless Pool so we can provide them immediate feedback based on what we are seeing above and below the water. You will understand a pace that you can maintain while also maintaining good technique to reduce energy expenditure. We also have the longest running Open Water Swim in the DFW Metroplex to get your prepared between March and September.

Schedule your lessons here.


Open Water Fears

The open water can be daunting. Dark water can cause anxiety because you can’t even see your hand in front of your face. Your mind immediately tells you there’s a shark or a gator just below you and you can’t shake that feeling. Forget about when another athlete or some floating debris touches you! Athletes should practice visualization before entering the water of how they want to swim and exit the water in a calm manner. I recommend athletes practice resetting by turning over on their back and floating or gently swimming elementary back stroke to continue forward movement. They should use diaphragmatic breathing and 4-4-4 breathing pattern to settle their breathing down. They should have positive self-talk and go back to that visualization from before the swim to remind themselves they have done this before and can do it again. When they do all of this and are ready, turn back over and bring it home.


Cold Water

Preparing for the race with appropriate gear including wetsuit, bootie, gloves, and a hood are important for cold races. If you have the gear, you still want to fight hyperventilation by dunking your face in the cold water without goggle for a few seconds until you feel the tightness in your chest leave and feel the sense of calm return before you start the race.

Consider renting or buying a wetsuit for your next swim.


If you have any questions, please email headcoach@playtri.com


5 Things I Learned as a Triathlon Coach this Season

I got into the sport of triathlon in 2016 at a local sprint race that my aunt roped me into.  6 years later, I consider myself an avid triathlete, and have officially completed my first season of triathlon coaching.  I am combining my 10 years of swim coaching experience and collegiate track running to triathlon coaching. Here are some things that I learned this year as a coach.


Swim Frequency is More Important than Duration


2 swims per week for an hour each session will not be as beneficial to a new swimmer/triathlon as 3 or 4 sessions a week for 35-40 minutes each.  The feel for the water is something that is lost quite quickly for an athlete who is not used to consistently swimming. The more an athlete can get into the water, the quicker they will develop and improve their fitness as a swimmer.


Contrary to running and cycling, an athlete cannot simply “try harder” in swimming to get faster.  1-on-1 lessons provide the necessary feedback to make minor changes to bring about major improvement.


Swim Equipment Builds Swim Specific Strength


Athletes should know the reasons why they do something.  Using fins may help the athlete with their leg strength in kicking, as well as fixing the form of the kick and hip position.  A kick focused training session will establish proper body position and reduce drag. Paddles will improve the catch of the stroke, as well as build swimming specific muscles. These items can be found on our online Playtri store.


Coaching is More than Workouts


As a coach, it is imperative that we build a plan specifically for an athlete.  Frequent communication helps build a personal relationship which helps ensure each athlete gets an individualized plan and is equipped to achieve their goals. The more communication I can achieve with an athlete, the more likely I am to get a deeper understanding of their process in the sport of triathlon.


Nutrition is Truly the 4th Discipline of Triathlon


Nutrition is something that swimmers deal with before and after workouts or meets. A triathlete must hone the skill of nutrition before, during, and after workouts, and ESPECIALLY races. This is something that is trained as frequently as swim, bike, and run. The idea of a scientific approach to a triathlete’s training is something that many athletes will look past until they have a massive bonk during a race or hard workout session.


As a Playtri coach, we have the resources necessary to run so many different kinds of tests, such as VO2 calorie expenditure, sweat composition, and blood lactate testing to ensure the scientific approach to all our athletes. 


Time in the Saddle is Irreplaceable


Simply spinning your legs on your bike will not make you a great cyclist. The more frequently an athlete can get on their bike with targeted workouts, the better their overall fitness will become. The strength work that an athlete endures on the bike not only builds strength physically, but the mental strength is something that can be carried over to both the swim and the run. The leg strength and continuous use of the legs does not match one to one with running, but it is one of the more productive activities that an athlete can do to improve their fitness.


Stay tuned for Coach Michael’s follow-up articles going deeper into each of these lessons!


Coach Michael Rourke is a Level 2 Playtri Coach and an American Swim Coaches Association Level 4 swim coach. He coaches junior and adult triathletes of all levels, as well as high school elite swimmers. He is also a 70.3 World’s Qualifier.

Accurate Heart Rate + Power Zones with Blood Lactate Testing

Regardless of the goal, every endurance athlete wants to train more efficiently. Trying to finish an IRONMAN on 8 hours of training a week? Be efficient. Trying to win the Olympics? Be efficient. Trying to maintain a long-term healthy lifestyle? Be efficient. No one wants to do work that doesn’t move the needle forward - that’s why Playtri Blood Lactate Testing is at the core of the Playtri Coaching model. Our unique blood lactate testing protocol and analysis has been developed over 20 years and tested on thousands of athletes for one thing: effectiveness in training and competition.


First, a quick science lesson. Our bodies use a combination of three metabolic systems to convert fuel into energy to create muscle contractions: aerobic, anaerobic and phosphagen. The aerobic system is extremely sustainable as long as it is provided with fuel and hydration, making it great for endurance (think IRONMAN). The phosphagen system is only for very short/intense efforts (think 10 seconds or less) and therefore little-used in endurance sport. The anaerobic system, however, is frequently accessed in endurance sport (think Sprint or Olympic distance competition) but is not nearly as sustainable as the aerobic system.

Blood lactate, a useful part of the metabolic process and a byproduct of the anaerobic system, is a simple indicator for athletes and coaches of the sustainability of an athlete’s effort. OBLA (onset of blood lactate accumulation, often referred to as lactate threshold or LT2) is the point at which your body produces more lactate than it can process at the same rate, meaning it begins to accumulate. This accumulation starts a ticking clock for the athlete because above OBLA it is only a matter of time (usually a maximum of 2-3 hours) before acidosis in the blood caused by the increasing presence of other metabolites (which correlate with accumulating lactate) puts a stop to activity (and dramatically increases necessary recovery time post-workout).

OBLA and other markers shift over time depending on the amount and type of work athletes are doing, so our Playtri athletes have blood lactate testing done for bike and run 1 or more times a year (typically at the beginning of the season, and again right before “A” races) to ensure they are getting the intended benefits of their sessions - not under-working or over-working. We utilize the zones (heart rate and power, based on OBLA and observed lactate tolerance) from these tests in training and competition, allowing our athletes to make informed decisions, instead of playing guessing games with their performance.


Each training session should have an objective. Extensive endurance training is intended to induce peripheral adaptations that enhance the rate of oxygen delivery and utilization of appropriate muscle fiber types. This method of training will increase the number and size of mitochondria and improve capillarization, blood shunting abilities, lactate removal rates, and the rate of fat metabolism among working muscle fibers. Accurate heart rate zones give you accuracy in the intensity you are training at to achieve these training objectives. Most athletes tend to train too frequently at heart rates above OBLA, and while they may see some gains made in short intervals, will struggle to achieve long-term adaptation in the sport.

What is a blood lactate test like? At Playtri our test consists of two consecutive builds (either on a stationary trainer or treadmill) based on heart rate, and 5 to 8 capillary samples (finger pricks) over the course of 45-60 minutes. You do not need to be a highly trained athlete to have a blood lactate test done at Playtri - however you should be comfortable with 45 minutes of activity in the discipline the test is being performed on. Results typically take 1-3 days and are outlined in a two-page document emailed to the athlete that includes our in-house zone system, as well as a more widely used 6 zone system. Results do not include raw blood lactate data due to the proprietary nature of our testing system.


The good news - even if you’re not a Playtri coached athlete, you can still access our testing to train smarter with better zones. The even better news - we always make sure that we have enough coaches on staff to accept new athletes throughout the season, so you can start training smarter with a Playtri Coach as soon as you are ready.

If you want to schedule an initial blood lactate test, or need to update your zones, schedule your test here.

Interested in testing, but still not sure how it applies to your goals? Click Here to schedule a free testing phone consult.

Learn More About Playtri Testing

IRONMAN & 70.3 Essentials

Getting into the sport of triathlon can seem overwhelming with all the equipment and deciphering which items are needed and which are nice to have. When an athlete approaches me with a goal of completing an Ironman I discuss the following items with them. These items are necessary to have a successful training and racing experience.


A Plan!

Long Course Triathlon such as Ironman is a serious undertaking and you should not go after it alone. Playtri has Group Workouts, Individual Coaching, 1-on-1 Sessions, and a training app to help you get to the finish line safely. Consider recruiting one or all of these to get you to your finish line.


Swim:

Swimsuit

Swim goggles

  • Clear for overcast days and tinted or polarized for bright sunny days, such as these

  • Should fit without leaking and provide wide range of view

  • Multiple lens options for varying outdoor conditions.

  • Smart goggle for consistent feedback (Read detailed review here)

Anti-fog for goggles

Kickboard

Snorkel

Pull Buoy

Hand Paddles

Wetsuit


Bike:

Bike with professional fit

  • Aero position is only good for as long as you can hold it and run off it.

  • Common injuries and poor run performances come from poor fit.

  • Bike Fit Options

Road bike

  • Entry point - Good enough to get started but going to leave a lot on the table because of aerodynamic penalty of upright and wider position. Closed hip angle will make running more difficult after the bike.

  • 700c x 23-30c wheels

  • Can add clip-on aero bars

  • Road bikes                

Aero bars

Triathlon bike

  • Opens up hip angle to run better

  • Moves rider forward to engage quads and save hamstrings for run

  • Sets you up to run better off the bike

  • Position of ride will be lower and more narrow which improves aerodynamics

  • Triathlon bikes

Clipless Pedals

  • Better power delivery

  • Maintains fit exactly

  • Enables you to pull through bottom of pedal stroke

Helmet

Hydration & Nutrition

  • Bottles can be stored on down tube and seat tube on most bikes. Additional bottles can be added to increase the fluids you can carry to fuel your race so you can make less aid station stops which will increase overall performance on race day.

  • Behind the Saddle (BTS)

  • Between the Arms (BTA) - These can include bottles with straws so you can drink without the penalty of sitting up to reach for bottles.

  • Top Tube bags can store food and be accessed while still in the aero position so you can fuel your performance and maintain speed on the bike.

Cycling Shorts

  • Proper pad (known as a chamois)

  • Bib shorts ensure a secure fit

  • Non-bib shorts may be more comfortable for you

  • Cycling shorts are specifically for cycling and help fit you on the bike in a way saddle manufacturers intend you to sit on the saddle.

Cycling jersey

  • Pockets for nutrition, phone, flat kit, etc.

Flat repair kit

Cycling water bottles

Bike pump

Bike computer


Run:

Running shoes

Socks

  • Avoid cotton – collects moisture, causes blisters

  • Merino wool – regulates temperature, moves moisture, and resists odor

  • Mix of synthetic – nylon, polyester, spandex – good value/durability, prevents friction

  • Example

Running shorts

  • Comfortable specifically for running (material: polyester, elastane, spandex, nylon)

Running shirt

  • Synthetic fabrics: polyester, nylon


Triathlon Specific + Nutrition:

Watch & Heart Rate Monitor

Trisuit

  • Reserved for racing and key workouts

  • Partially hydrophobic for fast swimming

  • Wicks sweat

  • Material reduces chafing

  • Small pad to help with cycling comfort (may impede running for some athletes)

Race belt

  • Holds race number

Nutrition

Chamois Butter

Body Glide


Coach Ryan Siebert is a Level 2 Playtri Coach and a USAT Level I Coach with Long Course Area of Focus. He coaches juniors and adult athletes of all levels and is a bike fitter and performance tester at Playtri Dallas. He is also 70.3 Champion and WC Qualifier.

You can reach him with any questions at ryan.siebert@playtri.com

Preparing & Performing Under Pressure

By Dr. Nina Rios-Doria

5 mental tools to help you along the way:

1. Visualization - One of the most effective ways for you to prepare for an event is to realize and activate your imagination. The more you develop and practice visualization, the more effective and impactful it will be during competition. Remember visualization or imagery is the ability to picture yourself performing at your best. Practice visualizing the steps you will be going through before and during the competition. Use all your 5 senses when you practice visualization. The clearer the image - the more detailed- the greater the effect on the body.

2. Confidence - Remember your ability. Remember your preparation. Reflect on past successes and positive experiences. The two primary ways to gain confidence is to remember the quality and quantity of your training. How you’ve prepared? What you’ve done? The greatest obstacle on the road to confidence is fear. Fears come from uncertainty and the uncertainty indicates a lack of confidence. No one can make us feel as if we’re failures without our own consent. Confident people never consent.

Tale of Two Wolves:

An old Cherokee chief teaches his grandson about life. “A fight is going on inside me,” he said to the boy. “It is a terrible fight between two wolves. One is evil — he is anger, envy, sorrow, regret, greed, arrogance, self-pity, guilt, resentment, inferiority, lies, false pride, superiority, self-doubt, and ego. The other is good — he is joy, peace, love, hope, serenity, humility, kindness, benevolence, empathy, generosity, truth, compassion, and faith. This same fight is going on inside you — and inside every other person, too.” The grandson thought about this for a minute and then asked his grandfather, “Which wolf will win?” The old chief simply replied, “The one you feed.”

3. View this event as a challenge not a threat. When you view this as a challenge it starts with a perception of the situation as an opportunity to push yourself, get out of your comfort zone, seek out your limits, achieve your goals, and reach a new level of excellence. With this perception, you are focused on pursuing your athletic goals with complete confidence, courage and commitment and without doubt, worry or fear. Challenge associated with you embracing the process of your sport rather than fearing the results of your efforts. You will feel energized and your muscles will feel loose and your breathing will be deep and controlled. Remember your fundamental goal is to face and conquer the challenge.

4. Breath control- “Your breathing determines whether you are at your best or whether you are at a disadvantage.” Carola, author and teacher of breathing practices.

Box breathing is one simple technique to practice breath control. Drawing a box with your finger: Breath for five seconds, hold for five seconds, breathe out for five seconds, and then hold for five seconds and repeat

You can also breathe in through the nose for a count of five hold for two to three seconds and then breathe out for a count of five and repeat.

Make sure when you’re breathing that your belly expands during inhalation and relaxes during exhalation. Proper breathing helps relieve the stress and tension from your system and brings you back into the present moment.

5. Neutral thinking. Work on decreasing negative talk and focus on neutral talk. Be aware of the chatter in your head and modify it as needed.

Remember when you downshift to neutral, you are choosing your next right step for you. You accept the past, but you also accept that it's not predictive of the future. Remember your behavior will supersede your emotions when acting in alignment with your values and practicing neutral thinking in emotional situations.

Do your best to focus on the present moment, what is in your control, and not allow negative thinking to be a part of your conversation within yourself or with others. Focus on the facts, move forward, and take action steps with things within your control.

Finally, As you go into this next competition, have a mantra, phrase, or a word that will continue to encourage and inspire you in the present moment while you’re competing. Repeat this mantra throughout your competition.

Remember….enjoy the process and have fun!

Dr. Nina Rios-Doria is a Licensed Counselor and specializes in mental performance and mental health for athletes. Learn more about Dr. Nina and her practice at https://www.drninacoach.com/.

References:

  • The Champions Mind by Jim Afremow

  • Getting to Neutral by Trevor Moawad

  • The Mental Game of Baseball by H.A. Dorfman

  • Train your Mind for Athletic Success by Jim Taylor

Taking the Guesswork Out of Your Nutrition Plan

If you are reading this article, you’re probably wondering how you can recover better, train more consistently, and race faster. Whether you are a single sport or multi-sport endurance athlete you need to know how to fuel your engine more effectively. The body primarily utilizes fat and carbohydrates as fuel to create energy for muscle contractions. Your “engine” has two fuel “tanks”. One contains the carbohydrate calories and the other contains the fat calories and the rate at which your engine draws from each varies with effort. If you know this rate you will know how to effectively refill the appropriate tanks. These numbers will reflect how you should be pacing in long course racing and how to train so you can improve your “fat efficiency.”

The leanest, lightest marathon runner can have 80,000+ calories in their fat fuel tank, while their carbohydrate tank could have only 1600-2500 calories available. Athletes commonly burn 400 to 800 calories/hour, which will empty their carbohydrate tank rather quickly if the body is pulling heavily from that source. At low levels of exertion, an athlete’s engine will burn more fat but as the effort increases will become more dependent on the carbohydrate tank. Carbohydrates are more bioavailable as “quick fuel” compared to the slow burning fat.

Performing a VO2 Calorie Expenditure Test at Playtri will produce several useful insights. It will give you specific, usable data at varying heart rates, including how many calories you are burning per hour, and how much is coming from carbohydrates versus fat. Overuse of carbohydrates is a common issue for endurance athletes (whether due to general inefficiency of fat use, or poor pacing decisions in a specific session or race), especially in longer distance events. You may be an inefficient fat burner and begin burning your carbohydrates early in the effort curve. The earlier your engine leans on the carbohydrate tank, the earlier you will run out of fuel and experience a “bonk.” “Bonking” is what marathoners and IRONMAN athletes experience when they talk about “hitting the wall.” You feel lethargic and can’t push your body beyond the fat burning effort because you are out of carbohydrate fuel.

The good news is that you can train your fat efficiency. When we have an athlete who discovers this limiter, we adjust their training in a few ways. First, we stress to them the importance of having a good daily balance of calories from healthy macronutrient sources to include a variety of macronutrients and micronutrients at each meal. We can help them periodize nutrition based on training and competition by ensuring they are following adequate macronutrient timing to fuel hard workouts with carbohydrates and have them perform some low intensity activities fasted. These efforts are all assigned based on the heart values from the test that we know are burning primarily fat. We only use this method with athletes that are disciplined enough to stay in their heart rate zones because otherwise they can deplete themselves greatly and need a long recovery period to prevent injury and/or illness, meaning we aren’t able to get the training we need.

 Vo2 calorie testing with Playtri can also revolutionize the way you plan your race nutrition (we call it our “secret weapon”). We always encourage our athletes to have this testing done 1-2 weeks prior to long course races, and directly apply the information we get to our pacing and nutrition planning. We aim to replace carbohydrate calories on a one-to-one basis, and pace so that we are able to absorb enough fuel for this purpose. Fortunately, a substantial body of evidence suggests that the GI system is highly adaptable and can be trained to achieve your fueling goals. If you have a heart rate target for your race, this test will give you a carbohydrate fueling target. If you don’t feel comfortable consuming that many calories right now, you can work your way up.

In long course triathlon racing, nutrition becomes the “Fourth Discipline”, and you must train it to be successful in the same manner you train your swim, bike, and run. Once you have your caloric needs identified you will need to begin training your gut to handle the volume and trying different flavors and consistencies to find what plan works best for you. We have athletes that get tired of gels and need more solid foods and others that can handle all gels but get nauseated by a flavor after so many. At Playtri, we carry a variety of brands and products so you can maintain the variety in your fueling plan.

Visit the online store to view just some of the products we carry. Visit a location near you to see more products.


Click Here to Learn More about Playtri Testing


Athlete & Coach: What We Have Learned This Season

Brian Shiels and I started working together on his goal of completing an Ironman last year. Brian came to this goal with no previous triathlon experience, a lot of experience in rucking and running, a full time job that requires travel, and a supportive family of four. As a coach with a young family and who regularly competes in Sprint, Olympic, and 70.3 distance triathlons, I had a good understanding of what Brian’s training was going to look like; early morning or evening workouts and bigger miles on the weekends. Still, as with any new triathlete it is important to manage the family and mental load as much as managing the training load. During our time together we have learned (or been reminded) a lot about triathlon as athlete and coach. Here are a few of the things we have learned.

Brian’s list

  1. You’ll never know what you don’t know, until you talk to someone who really knows. Turning to Playtri and having a coach has shown me that taking the time to invest in proper education and training is the most effective path to achieving my triathlon goals. (Click here for information about our coaching options.)

  2. There is more to each of the three (3) disciplines than merely doing them. While an experienced runner, I naively considered myself a capable swimmer and cyclist when I came to Playtri. I learned right from the start that swimming and riding a bike are not remotely the same as competitive open water swimming and road cycling.

  3. Being kind with myself. I have participated and raced in running and rucking endurance events for decades, but have always taken a harsh approach with myself to ensure training and event execution. With the guidance of a primary coach and the support of the entire coaching team, staff, and the general participant community at Playtri, I have learned to pursue progress, not perfection, and improvement as an acceptable result.

  4. Specifically, a measured, scientific approach to training will yield more impactful and safer results. The use of blood lactate testing, sweat testing, and establishing my optimal heart rate zones have given me information to guide everything from basic nutrition and electrolyte needs to employing the most effective training and race day strategies. (For information about our various testing options, click here.)

  5. The best way not to sweat the small stuff is to have taken care of it ahead of time. Knowing how to set up your transition area during a triathlon is key to ensuring a smooth process when moving between activities. Planning out water, energy, and electrolyte needs before an event reduces the likelihood of deficiencies in these areas.

  6. Use chamois butt’r. A lot of it. Everywhere.

Coach Jim’s list

  1. Coaching is more than just the workouts. This includes conversations about kit, gear, nutrition, hydration, pedaling efficiency, running form, swim form, transition set up, etc. I speak on the phone or zoom with all my athletes on a weekly basis. Our conversations regularly include data and video review of swim, bike, or run workouts.

  2. Every athlete has unspoken expectations for race day. Throughout the build and before each race I talk with my athletes about what my expectations are for race day and I ask them what there expectations are also. Even if an athlete says, “I just want to finish” often times they have specific time goals in their mind. These need to be spoken and shared so everyone is on the same page.

  3. Adopting an attitude of gratitude is a game changer for athlete and coach. Training and racing while being thankful for the ability to do this sport goes a long way when things get rough. As a coach, it is important to grateful to be entrusted with helping people reach their goals. I end all emails to my athletes with this: “Thanks for allowing me to be your coach!”

  4. Trust the work of other coaches. Playtri has a great group of capable coaches. If I can’t have my eyes on an athlete, I’m thankful that my athletes get the opportunity to work with other amazing coaches at weekly Open Water Swim, pool workouts, strength training, group rides, and at the track. (Click here for a list of the weekly workouts available to Playtri athletes.)

Jim Rowe is a Playtri Level 4 Coach, a USAT LI Certified Coach, and NASM Certified Personal Trainer who works with adult athletes of all abilities from beginners to IRONMAN World Championship qualifiers. Learn more about Jim at www.playtri.com/jim-rowe.

FINIS Smart Goggle powered by Ciye

Benefits for triathletes (as opposed to purely pool swimmers)

a.     Many triathletes rely on an assortment of pools to get their training done. Sometimes the pools are not set up for pure swimming, so clocks are not optimally placed. I found that these goggles provided me a clock in the heads-up display (HUD) that I could rely on to get my workouts completed. Having the goggles count laps for long reps was also a great value! The device displayed my lap times, set times, number of laps, number of sets.

b.     In the open water I found that these goggles will register 180° turns and display your splits. I found this to be an adequate compensation for not having GPS. GPS is often inaccurate in the open water anyway. With the goggles registering split times every time I made a 180° turn, I was able to swim a consistent course and know how I was swimming relative to other times I swam that course. A triathlete can set up a couple buoys and set a baseline to build their workout around. This is much more reliable than GPS because you can also not worry about current, waves, etc. and instead just compare your effort to your split times.

c.     Triathletes and open water swimmers will also benefit from having the elapsed time in the HUD because they can see how long they have been swimming relative to distance covered if they know the estimated distance between buoys or at turn buoys. For example, in Ironman branded races, the color of the buoys typically changes at the halfway point so you can see your time at the halfway point without breaking stroke.

d.     Triathletes and open water swimmers can also gauge their effort by stroke rate which can be selected as a HUD in addition to elapsed time.


Would you recommend them to your athletes? (why or why not)

Yes, I would recommend them to my athletes. I have found them to be valuable in the open water swims but also in the pool. It has given me more data to analyze and find places to improve. I find the data it gives is insightful and not “just noise”. In the open water I can see split times around a consistent distance as well as stroke rate. I can use this data to see how I trend in terms of pace and stroke rate. Do I start with a high turnover and get lazy? Or if my stroke rate is the same but time gets slower, should I consider focusing on my sighting?

In the pool, I know the distance, so these metrics are even more significant. While I am swimming, I can see my split times easily as I am swimming instead of craning my neck around to find a clock mid-stroke. I found that I quickly became spoiled by seeing my split times in the HUD. After the workout, I was able to see how my pacing was through the workout and through each set. On my 400s, I could see if I faded or built into the effort like I intended. There was no rounding or justifying times. The app has a friendly visual display to view a graph of your splits over a set.

These goggles give an athlete the ability to track important data so I will recommend my athletes get a pair if they want to find gains in their swim.

Do you feel the price is worth the value of the product?

Yes, I feel the value is worth the price. I find the goggle itself to be a high quality goggle that I would like to wear on it’s own. The Ciye smart device has improved the quality of my training so far. If you compare this to a power meter for cycling, it is much less expensive. If you compare it to a power meter for running (like Stryd) it is on par, except with this you also get the added value of a great goggle. The Ciye device can also be taken out of the goggle and put in another goggle so you can replace goggles after time, wear, or for a different tint without replacing the device. Another advantage of the device is that you can adjust your HUD based on personal preference or training objective.

What were the top three things you liked?

1.     Registering splits at 180° buoy turns in the open water

2.     Seeing stroke rate in the HUD

3.     Dissecting data in the app after workouts


Anything athletes should keep in mind?

1.     Nose piece is very adjustable and can slip when you are putting the goggles on - goggles are very secure once on.

2.     The device can take about 5 seconds to register you are resting at the wall, so if your rest is shorter than that it will not pick up the new interval. This could be an indication that you need to adjust your recovery time for sets. 

3.     The Ciye device covers about one-third of the goggle to the far-left. The only obstruction I have noticed so far is that it can make tracking swimmers to your left more difficult.

Finis Smart Goggle powered by Ciye will be in stock soon. Check the store online.

If you have any questions, please email headcoach@playtri.com.

Why Strength Training Matters for Triathletes

Triathletes, in the experience of this coach, often consider strength training as an unnecessary aspect of successful triathlon training. It is often the first workout dropped from the schedule if a triathlete is pressed for time. When it is done, strength training is done in a rushed fashion as the athlete tries to get through the workouts as quickly as possible so they can do other things. This rushed approach to strength training opens the athlete to injury and creating muscular imbalances.


When I first start working with an athlete and I say that we will be including strength training in their program, I often hear the “I don’t want to get big” excuse. Strength training is different from weightlifting or body building, in that the focus of the exercises prescribed is on improving general fitness, power, sport-specific strength, and neuromuscular pathways and not on growing the biggest, strongest, showiest muscles possible. Triathletes don’t win races because of the size of their biceps. Rather, they win races or make individual improvements in the sport through improved economy, cardiovascular endurance, and explosive power.


Because of these performance improvements that can come from strength training, I assign weekly strength training for all my athletes. During the preparation and base portion of the season, strength training happens 2-3 times a week (depending on the athlete). During the build portion of the season, strength training can happen 1-2 times a week (again depending on the athlete) and during 2-3 weeks before an “A” race strength training happens 1 time a week. I tell my athletes that these workouts are incredibly important to their continued success in this sport, especially as they age. After the age of 30, we lose 3-5% of our muscle mass every decade. Not only does strength training help delay this loss, but it also decreases your risk of falls and fractures.


If that amount of strength training sounds daunting, know that we Playtri coaches have a holistic approach to strength training. We aren’t advocating that you spend 60-180 minutes per week in the weight room. We know that you have limited time to reach your goals. So we maximize the training time we have by incorporating strength work into your swim, bike, and run training through pull sets with paddles (like the Finis Manta Paddles) in the pool and hill repeats on the bike and run. And our standalone strength training workouts last approximately 20-30 minutes and often focus on improving muscular stability and core strength, since these are the two main issues most age-group athletes have.


In addition, I lead a weekly 30-minute virtual core strength and mobility workout Tuesday mornings at 5:30 am Central, which gives athletes an opportunity to gain knowledge and receive a coached workout that will help them improve year-round. This weekly workout requires limited tools such as mini bands, a foam roller, a lacrosse ball, and a chair or wall. In 30 minutes, we break a sweat and gain much needed core strength (including some focused work on the posterior chain which is often weak amongst age-group triathletes). 


If you are looking to build a triathlon specific strength tool collection to use at home, I suggest the following: mini bands, resistance bands, a pull up bar, a set of dumbbells (up to 50 pounds depending on the athlete), a jump rope, a foam roller, a lacrosse ball, a yoga ball, and the Finis Dryland Cord and (if space allows) the Finis Slide Dryland Trainer. The Dryland Cords fit easily into your swim and race bags for warmups and the Slide Dryland Trainer is an excellent tool for improving overall upper body strength for the swim.


If you would like to attend the weekly core strength and mobility workout, want to know more about building your at-home strength tool collection, or would like to schedule a one-on-one strength session, please reach out to me. Strength training is an essential part of triathlon training that should not be dismissed easily.


Jim Rowe is a Playtri Level 4 Coach, a USAT LI Certified Coach, and NASM Certified Personal Trainer who works with adult athletes of all abilities from beginners to IRONMAN World Championship qualifiers. Learn more about Jim at www.playtri.com/jim-rowe.

Kind regards,


Coach Jim Rowe


Playtri Level 4 Coach

USAT Level 1 Coach

NASM CPT

IM 70.3 WC Qualifier


PLAYTRI | The Official Triathlon Store of IRONMAN & USA Triathlon

Open Water vs. Pool Swimming

If you are like most triathletes, swimming is arguably the most challenging part of both training and racing.  Most athletes will wake up early and hit the cold water of their local lap pool before the workday starts, and we all know the hardest part of the day is gathering up the courage to jump into a cold pool.  But once we get over that initial jump, we can generally get through the swim workout prescribed for the day.  A swim workout is just you, the time, and the seemingly endless black line at the bottom of the pool.


Why is it that an athlete can be so confident with their abilities in the pool, but end up panicking in the open water?  The number one detail that athletes should understand is that open water and pool swimming are two different sports with different skillsets.  In the pool, you have your own space and you do not have to worry about other athletes around you, waves, buoys, etc.  In the open water, you have a lot of uncontrollable factors that could derail your race at any moment. 


Pool Swimming


The temperature and environment of pool water is mostly very comfortable and very predictable.  The pool water temperature predictability is something that all athletes are expecting as they jump into the water, and each athlete is used to swimming in their own lane, or with one other athlete splitting the lane.  The sense of familiarity can help those beginner swimmers feel more comfortable in the water.


Apparel and equipment in which athletes train in are pretty much the same on a day to day basis at the pool; all of which can be found at any Playtri location or online at the Playtri Website.  Men will generally wear jammers or briefs, with the occasional buoyancy short to simulate wearing a wetsuit and keeping the hips elevated.  Women will train in a one piece or a two piece training suit.  Equipment will vary from athlete to athlete, but most swim bags will consist of paddles, buoys, kickboards, snorkel, and swim fins.  Each athlete will have their own personal preference on types of equipment, but these are tools athletes will use to focus on various parts of their strokes.


To use lap swimming to best prepare for open water swimming, an athlete must alter their stroke and habits.  For example, former swimmers who utilize dolphin kicks off their walls should not do this when preparing for an open water swim because there are no walls or opportunities for dolphin kicks in the middle of a race.  Experiment with a breathing pattern that you are comfortable with for the duration of your race distance and practice that pattern until it becomes second nature.  One example is an athlete who breathes to their right side only; they breathe every other stroke, and sight every 3rd breath.


Open Water Swimming


The environment and predictability of an open water swim is very different from that of a pool swim.  There is no enclosed area that you can call your own like the lane you would swim in at the pool.  The vast openness of the body of water you are about to embark on can bring about thoughts of anxiousness and nervousness in even the most seasoned swimmers. 


In the open water, athletes generally will not be able to see the bottom of the body of water.  This fact alone can bring about thoughts of uneasiness because this takes away the idea of being able to control what is going on around you.  Practicing sighting and being aware of your surroundings is important in your swim sessions.  This can be completed in pool training sessions by focusing on objects around you, looking a little more forward than down, and practicing your sighting.  Having a coach is a great way to get some feedback as it pertains to specifics about your stroke and how to adjust from pool to open water swimming.


Open water swimming can be very cold, which will change a lot of factors compared to pool swimming.  For one, the temperature alone is enough to bring about that initial gasp of air as you enter the water.  Athletes will generally start to swim as fast as they can to try to warm their bodies up.  This will quickly raise the heart rate and trigger those anxious thoughts and possible panicking scenarios.  I suggest to all my athletes that they take the first couple of strokes nice and smooth so they can find their rhythm while their heart rates are still in a controlled state.  It is important to make sure to remember that you can control your race but not your environment.


In a cold open water swim, athletes will mostly opt to wear a wetsuit, which not only keeps heat in, but changes the position of the body in the water.  It is important to practice in a wetsuit or swimskin before competing because you should never try something new on race day.  If you cannot get to an open body of water to practice open water swimming, wear your wetsuit in the pool for a little bit of time, if you can.  Get to know the position your body will be in when you have the wetsuit on and get comfortable with the fit for a longer duration of time.


How to Prepare for Open Water


The best option would be to go find an open body of water near you and practice your open water swimming.  Do NOT practice open water swimming alone, and I also suggest a brightly colored buoy, such as the Playtri Buddy Bag Swim Buoy so that people around you can see you. 


You can practice sighting in a pool by altering your breathing pattern to match what you will do in a race.  One suggestion would be to do a set of 100s where you sight every 4-6 strokes.  Find a point in front of you on both ends of the pool and quickly get your head up to sight that given point; this will act like the buoy you will be looking for in any given race.  Practice with a wetsuit or sim shorts so that you can get used to the position of having your hips assisted to the top of the water.  You can also mimic this position using a pull buoy.  Finally, work on your initial breathing when you first get into the water.  Mental preparedness is arguably the most important aspect of sport, so if you are mentally prepared for the jump into the water and have a plan on how to execute, then you will be on your way to a successful swim leg!


If you have any questions about swimming, whether that be pool or open water, you can contact me at michael.rourke@playtri.com.  As a head high school swim coach, and triathlon coach for all level athletes, I have worked with athletes of all skill levels, from National ranked athletes to brand new swimmers.  Please do not hesitate to reach out if you have any questions at all!  Happy swimming!


Learn more about Michael Rourke.

Best Bike Upgrades for Improved Speed and Endurance

The two most common cycling related questions I receive as a coach are: “How do I get faster on the bike?” and “How can I ride longer and sustain my speed/power?” With deference to the great Eddy Merckx, who said “Ride up grades, don’t buy upgrades” when he was asked about improving as a cyclist, here is my list of upgrades that will help you improve your overall bike speed and endurance as a triathlete.

Get a bike fit. Before you start putting money into upgrading your bike, it is worth it to make sure that your bike fits your body properly. A proper bike fit will help with injury prevention, comfort, and the ability to train and race longer and more consistently.

Get a coach. Very few people can truly be objective with their own training. Most triathletes have type “A” personalities and having a coach who works closely with you to develop a training plan based on what your life dictates helps provide accountability, motivation, and a reality check on your goals. Individual coaching at Playtri starts at $150 per month.

Buy a power meter. Training with power can have a huge impact on the way you race. Training in determined power zones will help build your “engine.” Unlike speed which can be variable due to terrain, dehydration, wind, road surface quality, etc., riding to power means you can manage your efforts in a race so that you can set yourself up for a quality run. I’m impartial to the Garmin Rally RS200 or RK200 because each pedal reads power and they are easy to switch between bikes.

Use an Aero Helmet. An aero helmet smooths the airflow around your head and reducing drag. Approximately 90% of the energy your produce while cycling is used to overcome the air resistance produced by your body and bike. On a tri bike your head is one of the first things air resistance meets, an aero helmet helps make that meeting smooth and fast. For hot and humid races, I prefer aero road helmets like the Lazer Bullet or Kask Utopia.

Upgrade your wheels, tires, and tubes. These are the first point of contact between your bike and the road surface. Aero wheels are a proven energy-saving upgrade as they are designed to cut through the wind, and upgrading your tires and tubes (unless you run tubular or tubeless tires) will help cut down on rolling resistance. Lowering the rolling resistance of your tires and tubes means going faster while producing the same amount of power compared to tires and tubes that have higher rolling resistance. Some of the best aero wheels come from companies like Zipp, Enve, or the more affordable Reynolds. For tires, I’m a fan of the Continental Grand Prix 5000 Clincher Tire which has low rolling resistance, low weight, and decent puncture resistance. If you run tubeless, then consider the Vittoria Corsa Speed Graphene 2.0 for racing which is the fastest tire on the market. And the fastest tubes on the market are latex tubes.

Coach Jim Rowe is a Playtri Level 3 Coach, and also holds a USA Triathlon Level I Coaching Certification specializing in Long Course Racing, a UESCA Triathlon Coaching Certification, and a TRX Coaching Certification. He is available for individual coaching, one-on-one sessions, and performance testing. He can be reached at jim.rowe@playtri.com.

Why Advanced Sweat Testing with Playtri?

Humans are the reigning pound for pound World Sweat Champions. It is believed that high sweat rates were promoted in the gene pool when hunter gatherers were spending their days on the hot, dry African Savannah. They were able to compete with the animals in the area by gathering in the daylight while the animals who could not sweat stayed in place in the shadows until the temperatures cooled. They were also able to hunt animals through a method called “endurance hunting”. Animals that they hunted could outrun them over short distances from shade to shade. Like the tortoise and the hare, the humans would eventually catch up to the animal until the animal inevitably overheated and could not make it to the next shade and would provide sustenance for the humans.

Humans still insist on performing endurance activities in the heat and even though the stakes are lower, we want to optimize that performance to the best of our abilities. Significant sweat loss leads to decreased performance as you lose the ability to regulate internal temperature, decreased blood volume and increased cardiovascular strain, and loss of large amounts of electrolytes which can lead to muscular cramping. To prevent these from happening as you train or race for multiple hours you need to know the volume of sweat and the sodium concentration that you lose. If you know these values, you can pre-load, maintain, and top-off so you can fuel and recover well and avoid significant drop-offs in performance hour-after-hour, day-after-day.

I have my athletes measure the volume of sweat they are losing by keeping a log of body weight lost, fluids consumed in weight, and weather conditions. The simplest method is to weigh yourself naked, run outside for an hour without taking in any fluids or nutrition or using the bathroom, and weighing yourself naked after. The chemical composition of that sweat lost is much more difficult to measure but has been made easier thanks to Precision Fuel and Hydration’s Advanced Sweat Test, which is a non-invasive test that tells you how much sodium per liter of sweat you are losing.

This number is important to test and know, because it may vary up to over 500% between athletes - we have had athletes who lose 200-400mg of sodium, those who lose 2,000 to 2,200mg of sodium, and everywhere else between. If you are replacing your sweat loss with inadequate levels of sodium, you are diluting your blood’s sodium concentration. This study which gave athletes salt tabs or placebo tabs and had them drink the appropriate volume of water or sports drink, found that the group which replaced a significant amount of salt went 26 minutes faster on average over a 70.3 compared to the placebo group.

Sodium is the electrolyte that you lose in the greatest concentration, in addition to (unfortunately) being the most important to help you absorb and retain fluid in your blood. At the end of the test, you will sit down with one of Playtri’s coaches and review the provided racing and training hydration plan. Playtri’s 20+ years of experience and nutrition/hydration inventory will help you reach your potential.

Product recommendations:

Skratch Labs Hydration Mix. This mix has a relatively low flavor profile and carbohydrate concentration so you can tolerate many servings through your activity and the water and electrolytes will be digested efficiently.

SaltStick Elixalyte. This can be added to your hydration mix to meet your electrolyte needs without adding anything else. There are no calories or flavors. The sodium comes from Sodium Citrate which is digested comfortably by your gut unlike Sodium Chloride.

Visit https://www.playtri.com/testing to read more and schedule your test.

Coach Jim's Tri Tips: Cooling Strategies for Hot Training + Racing

It is hot and humid outside pretty much everywhere these days. As you work on becoming more acclimatized to the heat, remember to slow your pace, keep on an eye on your heart rate, avoid the hottest parts of the day, and increase your hydration while training.

Controlling your core body temperature is essential for pacing in any sport in the heat. When your core body temperature increases, you also experience cardiac drift, where heart rate increases and your pace stays the same or decreases. Furthermore, when your core body temperature increases, your body increases sweat and skin blood flow to help control that increase and takes the necessary blood flow away from working muscles. When this happens, we start to feel like we are expending more energy when we are actually not. The energy has just been diverted. As the energy has been diverted to cooling the body, if we do not slow down and address the increased core body temperature then we are at risk for heat exhaustion and heat stroke.

During competition and training we can address this increase in core body temperature by hydrating (make sure and check out our Advanced Sweat Testing at www.playtri.com/testing for your best hydration strategy), maintaining electrolyte balances, and acclimatizing to the heat. However, these are not the only practices to adopt for training and racing during the summer months. Pre-cooling to slightly lower your core body temperature before you start can extend the amount of time you can train or race before you hit that critical temperature threshold that causes your performance to decline.

If you watch any of the Grand Tours in professional cycling, you can see the athletes applying different pre-cooling strategies during their warm up protocol before time trials. They use ice vests, stockings filled with ice placed on the back of their necks, fans, shade, and water mist to help regulate their core body temperature.

At Playtri we use pre-cooling strategies to help athletes lower their core body temperature before they start training or racing, which can extend the amount of time before they hit that critical temperature threshold that causes performance to decline. Here are three pre-cooling strategies that I use with all my Playtri athletes when the heat and humidity show up.

  • Freeze a paper cup of your favorite hydration product, such as Skratch 10-20 minutes before your next workout or race in the heat, drink your hydration product slushy and get on your way.

  • Wet a few hand towels, place them in the freezer overnight. Then put them on your neck, head, back, and between your thighs 10-15 minutes before your workout. Then put them back in the freezer so that they are ready for you when you are done with your workout.

  • Cold Water Immersion. Take a cold shower or bath before your next training session in the heat. This is not practical for race day, so an alternative for race day is those frozen hand towels.

Pre-cooling is very effective, but the positive performance impacts last only about 20-25 minutes. Once those performance impacts wear off, you can use some of these strategies in addition to hydrating and maintaining electrolyte balances to regulate your core body temperature.

  • Keep your kit wet on the bike. Take water hand offs at all aid stations and get your kit wet.

  • Put ice on your torso during the run. Put ice in your sports bra, in your pockets, and down the front and back of your race kit.

  • Ice your neck and head during the run. Wear a hat (not a visor) and a neck cooler or bandana to hold ice in these locations. Add water and ice to these at all aid stations.

  • Ice peripheral arteries during the run. Put ice in your arm coolers (if you are wearing them) and hold ice in your hands.

  • Wear light colored kit for hot races. (Google Torbjørn Sindballe and look at the white kit he wore in Kona 2007, including one latex glove he wore to hold ice.)

Remember that it is important to try these pre-cooling and core temperature management strategies during training before you try them on race day. For my Playtri athletes who have upcoming hot and humid races, I encourage them to try out these core temperature management strategies at least 2-3 times before race day by setting up a loop or out-and-back course for their bike and run training that will bring them back to their house where they have a cooler stocked with lots of ice and cold water. Learning how to manage the heat is a part of summer racing that can be developed with practice.

If you have questions about how to beat the heat, or want to know more about coaching options, you can email me at jim.rowe@playtri.com, or visit my bio linked below.

Jim Rowe is a Playtri Level 4 Coach, a USAT LI Certified Coach, and NASM Certified Personal Trainer who works with adult athletes of all abilities from beginners to IRONMAN World Championship qualifiers. Learn more about Jim at www.playtri.com/jim-rowe.

Coach Jim's Tri Tips: Improving Your Short Course Racing

It seems inevitable that when you tell someone you are doing a triathlon they ask about Kona. “Oh, are you doing the one in Hawaii?” It’s the race that put triathlon on the map for most people. However, don’t let their misunderstandings about the sport get you down. Short course racing is not just a steppingstone to the “real thing.” Short course racing is fast, intense, and hard - something we frequently encourage for our Playtri athletes to improve skill and execution. Here are four tips to help you improve your short course racing this season.

Practice your transitions.

Short course racing is fast from the get go. If you put all your training focus into swim, bike, and run and don’t practice your transitions then you are losing out on free speed. Depending on the size and strength of the age group, a slow transition can mean the difference between a podium spot or middle of the pack. Develop a routine for transitions and then practice practice practice until you can transition from swim to bike and bike to run smoothly, efficiently, and as fast as you are able. The goal for age group athletes in T1 is less than 10 seconds at the rack. 15 seconds at rack is a good goal for T2.

At Playtri we even offer private lessons for transition skill development.


Your easy days should be really easy.

Even though short course racing is fast, it is important to remember that short course triathlon is still an endurance sport. Newer triathletes (and even veterans trying to get faster) often neglect this aspect of training. Easy days are opportunities to work on form, cadence, developing fat efficiency, and active recovery while building a strong aerobic foundation. Here are some of my favorite easy day workouts to use with my Playtri athletes:

Swim: 15 minutes warm up. 15 minutes as 25 drill / 25 swim with 15 seconds rest. 15 minutes pull with snorkel, buoy, and paddles. 15 minutes easy swim with snorkel. Focusing on good form the whole time.

Bike: 2 hours at Below Training Pace or lower half of Training Pace heart rate. Keep cadence at 80-95 rpm. Practice getting in and out of your shoes while they are still clipped in if you need to improve that transition skill.

Run: 1 hour run with walk breaks. Warm up for 5-10 minutes gradually moving from a walk to a run. Run 4 minutes keeping HR in lower half of Training Pace and cadence above 170-175 steps per minute, walk 1 minute. Repeat 9 times. Walk 5 minutes for cool down.


And your hard days should be really hard.

The flip side to your easy days is including really hard intervals in your training with really easy recovery between the intervals. Far too often endurance athletes end up in the in-between space where easy is too hard and hard is too easy because we haven’t recovered fully from the last interval. Here are some of my favorite intervals for short course racing.

Swim: 200 repeats at race pace with 20 seconds rest. AND 50s (Odds 25 really fast / 25 really easy and Evens 25 really easy / 25 really fast) with 15-20 seconds rest

Bike: After a thorough 15 minute warm up, do 1.5 minutes Below Training Pace heart rate, then 30 seconds at 100-150 watts above your Vo2 power. Repeat for a total of 30 minutes. End with 15 minutes of spinning the legs at 90-100 rpms with your heart rate Below Training Pace.

Run: Warm up for 10-15 minutes. Then do repeats of 3 minutes really easy jog (or walk) followed by 2 minutes at 1 mile pace. Repeat for a total of 40-45 minutes. Walk for 5-10 minutes to cool down.


Work on the mental game.

Since short course racing takes less time, it is easy to think that the mental aspect of racing is not as important. However, with the intensity and speed so high the mental aspect is even more important. During your easy training sessions and in the weeks leading up to your race, spend 5-10 minutes each day visualizing what a good race day will look like for you. Visualize how a good day will unfold from the moment you get up until you cross the finish line. Then visualize how you will calmly and quickly handle any race day mishaps: a flat tire, leaky goggles, dropped nutrition.

Again, don’t let anyone (including yourself) dismiss short course racing as something lesser than long course racing. Short course racing is hard, intense, and fast. Check out upcoming races with Playtri, and talk to your coach about working some fun, fast local races into your training schedule!


Jim Rowe is a Playtri Level 4 Coach, a USAT LI Certified Coach, and NASM Certified Personal Trainer who works with adult athletes of all abilities from beginners to IRONMAN World Championship qualifiers. Learn more about Jim at www.playtri.com/jim-rowe.

Making Cycling Safer

It’s warming up and everyone is happy to be out and about. So an increased number of drivers and cyclists are getting out on the road.

While there are health and environmental benefits to cycling, the road can be a very dangerous place when it’s not shared responsibly. According to The U.S. Department of Transportation, there’s been a steady increase in bicyclist fatalities since 1991, with 2016 reported bicycle deaths (840 fatalities) increased by 1.3 percent.

It’s critical that both cyclists and drivers take necessary actions in order to keep themselves and each other safe. Cyclists need to defend themselves with preventative measures and strategic ways of riding. Drivers, on the other hand, need to be extra vigilant and respectful of the additional cyclists that are inhabiting the lanes. Here are some tips to keep in mind when sharing the road.

CYCLISTS

Protect Yourself Before You Ride

  • First and foremost, always wear a helmet. While wearing a helmet is not a cure-all, it’s one of the easiest ways to prevent major injuries. But it’s equally important that you ensure a proper fit and wear a helmet properly so your helmet can best protect you. Any of our Playtri staff can help access and advise on bike helmet fit.

  • Make sure to keep your bicycle in riding condition with correct air pressure and working gears to avoid equipment failures as much as possible. 

  • Tuck and tie your shoelaces and pant legs so they don’t get caught in your bike chain.

  • Plan your route—if driving as a vehicle on the road, choose routes with less traffic and slower speeds. Your safest route may be away from traffic altogether, in a bike lane or on a bike path.

  • Don’t go onto the roads if you don’t feel confident with your riding abilities. We suggest joining a group ride to get started or to take classes to learn about new advances in cycling safety.

Make Yourself Visible

While it might seem obvious, it’s critical to remember that you’re more in danger as a cyclist on the road because drivers may not see you.

Best tips:

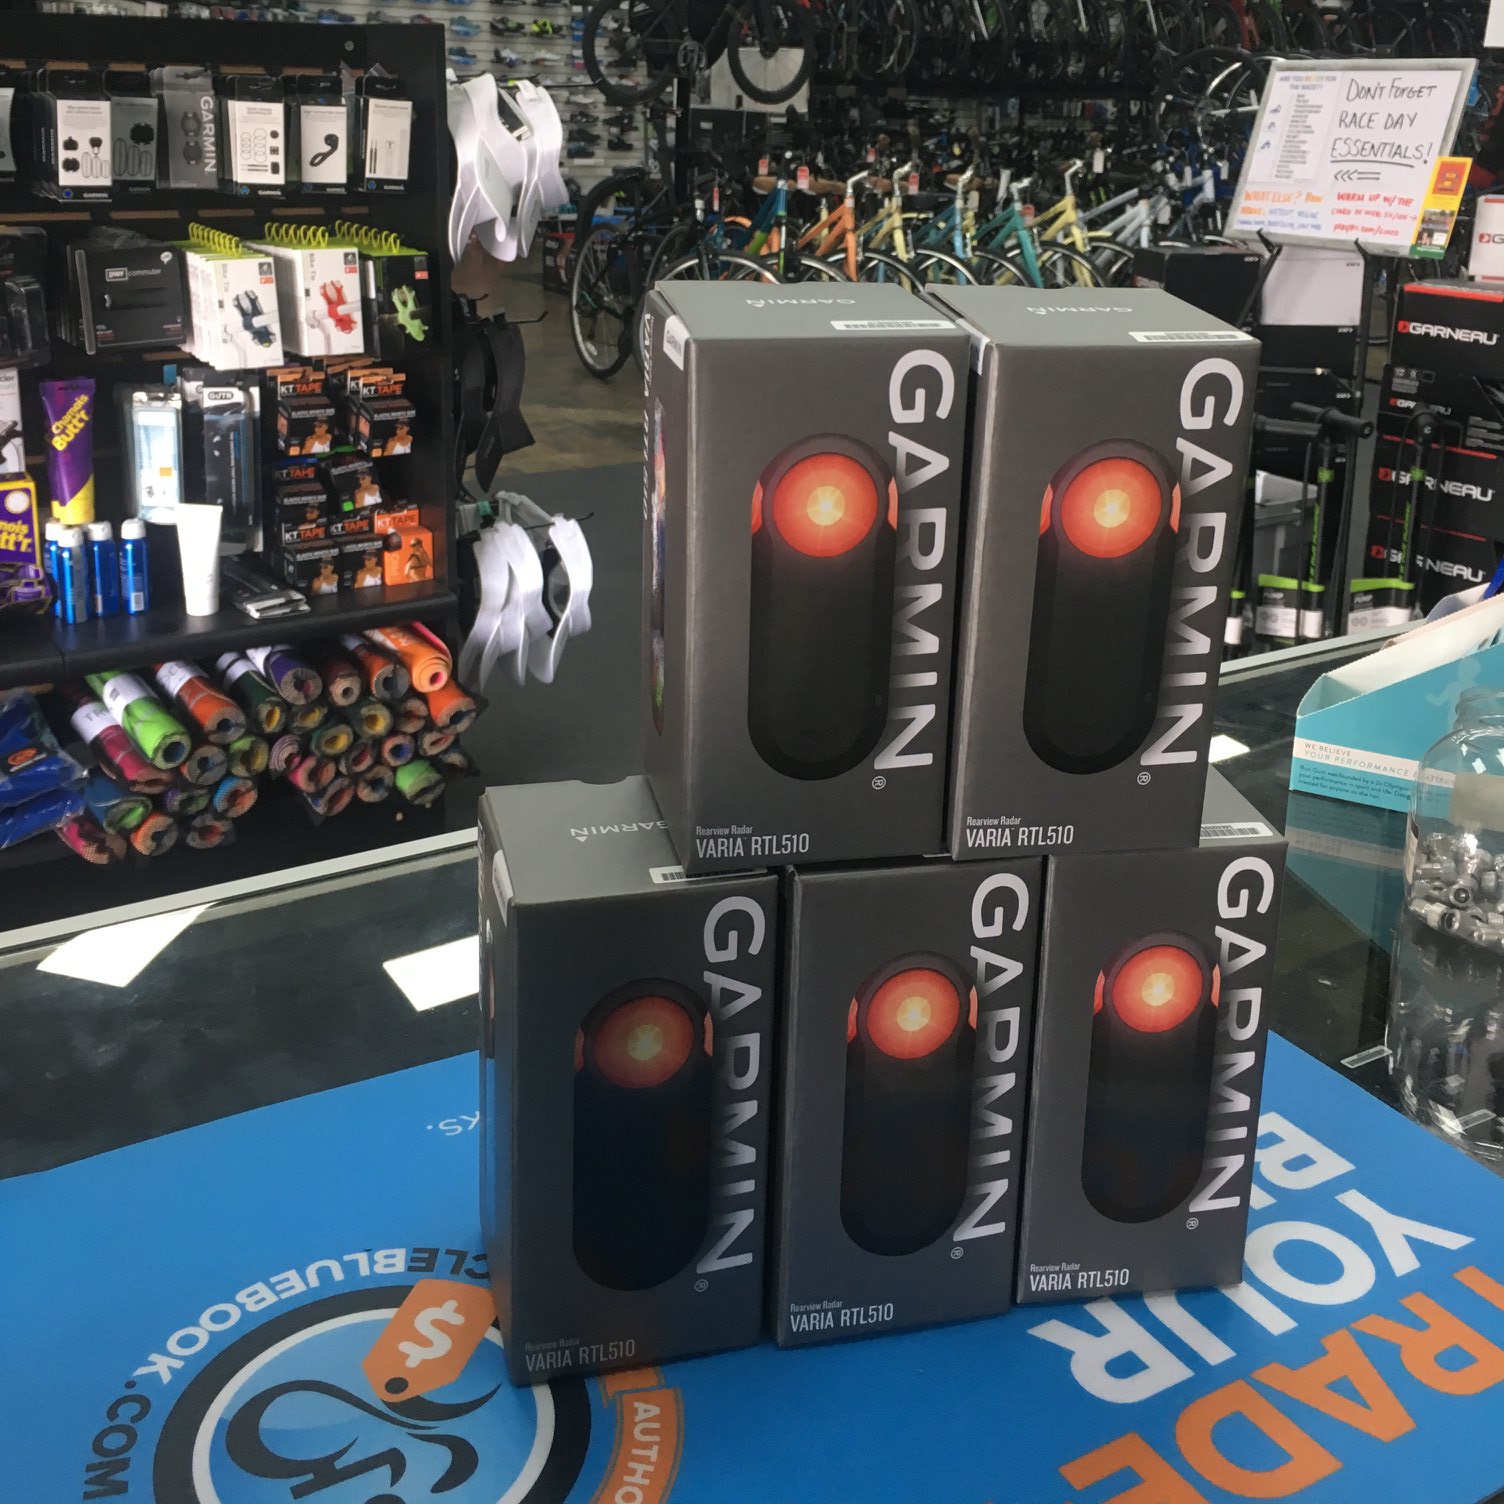
  • Be extremely visible by using bright flashing lights along with reflective tape anytime but especially important for dawn and dusk riding. Consider newer technology to alert cyclists when a vehicle approaches from behind:

rearview radar.jpg

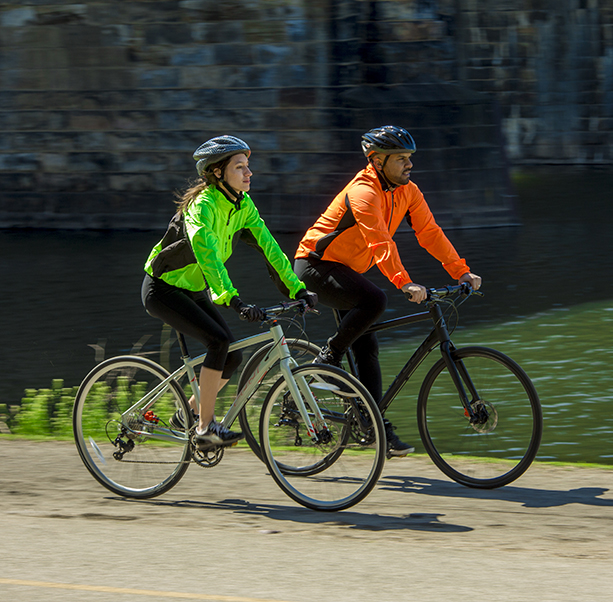
  • Wear bright colors and reflective gear:

fuji absolute.jpg
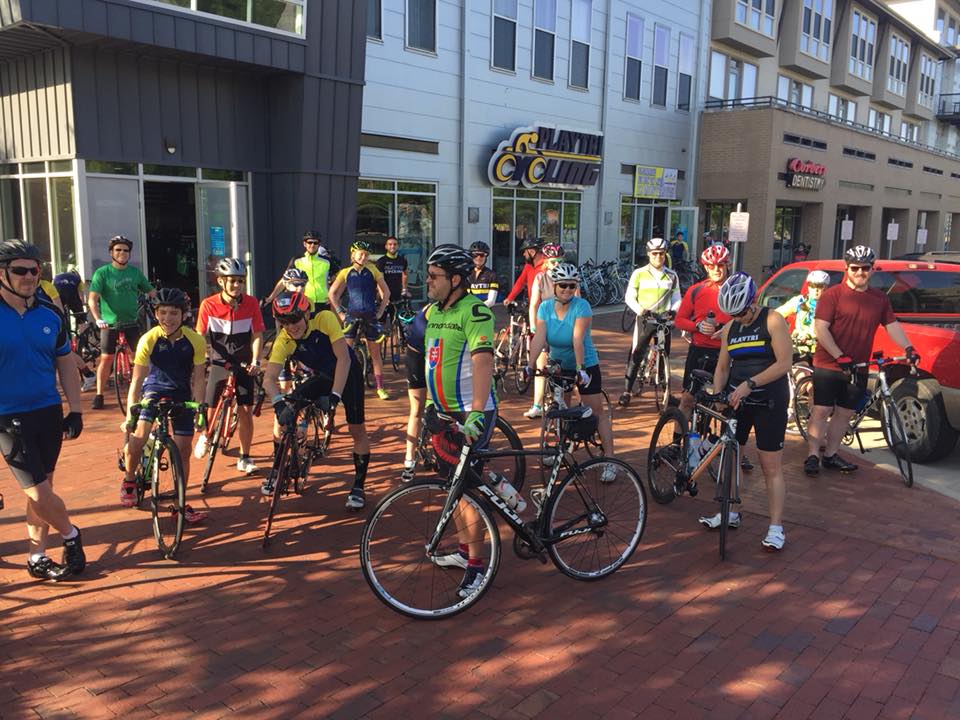
  • Ride with others in a group when possible: 

groupride.jpg
  • “I didn’t see the cyclist” is, unfortunately, a common statement in cases involving motorists and cyclists.  That’s never an excuse, but it’s imperative that you, the cyclist, make yourself as noticeable as possible.

Ride Predictably and Responsibly

Many communities post signs that cyclists have the right to share the road. Often, the safest thing to do on a road that is below 35 miles per hour is to take a whole lane. Because the side of the road can get pretty dirty, you’re better off riding predictably in a straight line in the middle of a lane than making sudden movements to get around puddles or debris on the shoulder.

It is recommended that cyclists avoid riding on the sidewalk so that pedestrians are also safe.

Cyclists follow the rules of the road at all times. While it’s tempting to ride through a stop sign, it is imperative to your safety that cyclists come to a full stop.

Use bike signals with your arms for turns and stops or simply point to where you are turning ~ it's okay to over-communicate your intentions to other cyclists and drivers on the road.

DRIVERS

Be Mindful of Intersections

Intersections are one of the most dangerous places for a cyclist.

One of the most common situations that lead to cyclist injuries on the road is when a cyclist is going straight and gets hit by a car making a right turn by crossing over the cyclist’s path of travel.

Drivers need to signal early and cyclists who are traveling straight through an intersection need to be sure to not pass cars on the right if the cars have their right-turn signal on or appear to be veering right to make a turn. Bikes should pass on the left in these instances.

Pass With Care

Cyclists should always try to ride as predictably as possible. There are circumstances that force a sudden movement by a cyclist. It’s important for drivers to keep this in mind while passing bicycles on the road. The law in most states dictates that a driver must give a cyclist three feet space while passing.

It’s a good idea to be extra cautious when passing a cyclist — by driving slowly and giving sufficient distance — you never know when a cyclist might need to veer unexpectedly.

Be Patient

Getting stuck behind a cyclist may slow a driver down a few minutes, but the reality is that cyclists have virtually the same rights as motorists in nearly every state and need to be treated that way. Getting road rage behind a cyclist is a recipe for disaster for all involved.

The safe course of action for both cyclists and drivers is to be patient and respectful of each other’s existance and right to the road.

Ride happy and stay safe.

get out and ride 3.jpg

Find cycle gear and accessories at any of our Playtri locations.

Find a group ride within your community. Playtri offers weekly rides at most locations.


Coach Jim's Tri Tips: Positive Self-Talk

Race season is upon us and with its arrival self-effacing talk shows up for many athletes. I often hear rookies and veteran endurance athletes alike say things such as, “I hope I survive the swim,” or “I don’t think I’m going to do very well on race day,” or “I made a lot of mistakes during training so I don’t know how this race will go.” These are prime examples of negative self-talk and when this happens it present an opportunity for endurance athletes to drastically improve their training and racing by improving their mental strength.


Mental strength is the ability to produce consistently at a high level of performance despite challenges, setbacks, and adversity. And mental training is often a part of endurance sports that is neglected. There are multiple facets to mental strength, one of which is positive self-talk.


When you are faced with a challenging workout or race day conditions are less than ideal, what do you say to yourself about yourself? Do the challenges overwhelm you or do you focus on what you can control? When we are placed under pressure in training and racing, we are more susceptible to negative self-talk telling us that we aren’t very good or won’t finish or shouldn’t have started in the first place. These words, although not usually spoken out loud, can bounce around in our heads and impact our performance in training and racing. And if you don’t practice positive self-talk in training, then you are more likely to experience negative self-talk when things get tough.


Tough workouts provide excellent opportunities to improve your headspace before race day - develop short phrases related to each sport or discipline, then repeat these to yourself when you are struggling. For the swim, you can say something like “Stay Smooth” or “Long and Strong.” For the bike, you can say something along the lines of “Pedal circles.” For the run, perhaps you say, “Run strong” or “Stay tall” or “Lift your knees.” And, of course, “You’ve got this!” is a fail-safe phrase at any moment when you feel particularly challenged. Short, second-person phrases like these can provide cues to get you back on track or lift your spirits when the negative self-talk shows up.


Positive self-talk is an important aspect of preparing yourself to race well and actually racing well, no matter the distance. More often than not you will likely be saying these things silently to yourself, but don’t be surprised if you find yourself speaking these affirmations out loud. Who knows? Maybe your verbal self-talk will lift the spirits of another athlete who needs to hear the same thing.


Because mental strength plays such an important role in training and racing, this is a regular topic of conversation at our camps and during the regular communication between athlete and coach. Our goal as Playtri coaches is to help you achieve your goals in a way that is as healthy and well-prepared as possible. We don’t just coach the workouts - we coach the athlete!


Jim Rowe is a Playtri Level 4 Coach, a USAT LI Certified Coach, and NASM Certified Personal Trainer who works with adult athletes of all abilities from beginners to IRONMAN World Championship qualifiers. Learn more about Jim at www.playtri.com/jim-rowe.

Orange Mud Product Review

Orange Mud Product Reviews

It’s inevitable that any runner trying to build mileage and run longer eventually faces the dilemma: how in the world do I stay hydrated during these sessions? Whether it’s getting hotter, water fountains have been turned off for the winter, or there’s simply not any source where you’re training, not having access to proper hydration methods is a classic mistake many athletes make. Thankfully, Orange Mud has come out with some great products for tackling longer miles and sessions, and not just for running. Whether you’re riding your bicycle, hiking, taking out your stand-up-paddleboard, or just out for a random adventure, the hydration packs and flasks from Orange Mud are a great addition to any active person. Their products are incredibly effective and comfortable at maintaining a way to stay hydrated for training sessions and racing.

After years of running with a handheld bottle (specifically the Orange Mud handheld), a couple of years ago I made the switch to running with hydration vests after I started long distance running. Without the ability to get aid and support during sessions and races, I turned to Orange Mud’s “Gear Vest 1L Bladder” pack. By putting all of my hydration squarely on my back, my nutrition readily accessible via the velcro pockets on the shoulders, and front pockets large enough for my phone, extra flasks, and “leftovers”, this vest quickly became my best friend out on the road and trails. I couldn’t believe how comfortable the pack was, and was incredibly surprised that my fear of chaffing as the bladder jostled during runs never occurred. The freedom of having full range of motion in my arms, the added weight comfortably behind me, and the ability to sustain myself without needing pitstops has become crucial.

Shorter runs, however, really don’t need 33oz of fluid and space. So recently, I tested Orange Mud’s “PFV 2.0 Hydration Vest” for my runs that still required being able to hold my nutrition and accessories. Equipped with a 17oz soft flask, the Phone.Flask.Vest 2.0 is a comfortable way to carry some fluid on your person, your phone and keys in the back zipper pouch, and even nutrition comfortably via the shoulder pockets while also allowing handsfree activity. Designed for activity less than 2 hours, the pack is a great way to carry your essentials on quick workouts. Though incredibly comfortable like other Orange Mud vests I’ve tried, for me this vest would be best for activities that don’t require a lot of vertical movement. Where this pack will continue to be a go-to for hiking and low-key adventures, it wasn’t as comfortable as I’d hoped for run training. The flask jostled around a little too much, and became quite distracting. Interestingly though, even though the flask moved, the vest itself stayed perfectly still, again avoiding any chafe. For shorter runs, I think that Orange Mud’s “HydraQuiver Single Barrel” is still the better choice for less fluid carried (with the bonus of using a regular water bottle instead of bladder or flask).

All in all, Orange Mud has really put out some solid products these past few years, and each new version just boasts incredibly thought-out changes that help with one main goal: worry about running, not the accessories on you. Orange Mud has made it incredibly easy to stay hydrated and carry all of your nutrition without taking away from the task at hand: running.


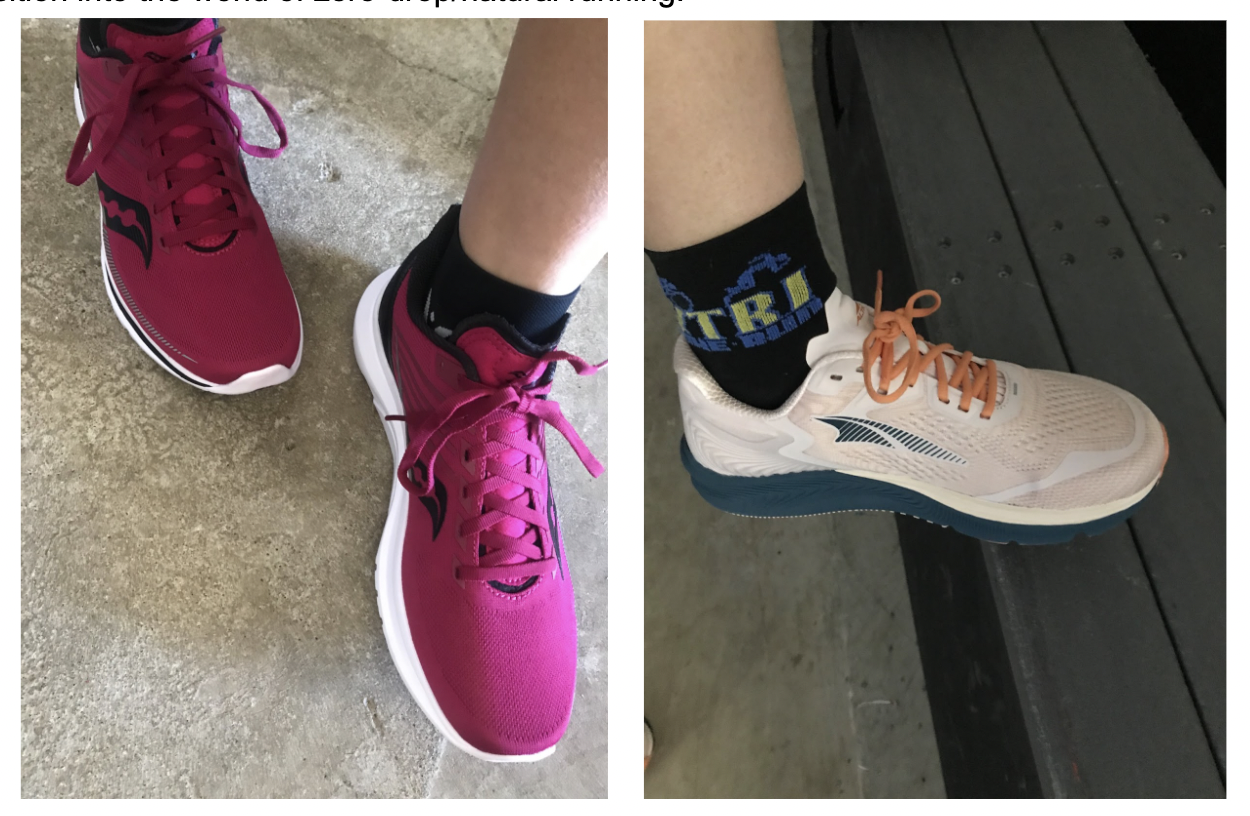
Saucony Kinvara and Altra Torin Review - Heel to Toe Drop VS. Zero Drop

Saucony Kinvara and Altra Torin Review - Heel to Toe Drop VS. Zero Drop


Trying to find the ideal running shoe these days can feel like looking for a needle in a haystack. Words like light, stiffer, flexible, neutral, stability, pronation, rocker, and heel drop stats are just a few examples of words peppering packaging boxes and product reviews. With all the choices out there, it’s easy (and common) for many athlete’s to just end up picking something that “feels comfortable” and/or “looks cool”. And a few miles later, we start to suffer the consequences of those choices.

As a runner that tends to fall in line with the majority of people, I run in neutral shoes for road running. This means that the shoe itself doesn’t have any structural changes that promote compensation in the sole of the shoe pitch to the inside or outside of the foot. And recently, I spent some time testing out and comparing the difference between two popular neutral shoes - the Saucony Kinvara 12 and the Altra Torin 5.

This 12th generation of the Kinvara has brought some great looks while shedding some weight in the simple upper, and kept the “fast, flexible feel” that long-time fans have loved. With a heel offset of 4mm, it is one of the more “natural” feeling shoes while still great ground feedback. I really love how natural the shoe feels while not compromising my calves and ankles on longer runs. Though traditionally made for shorter, faster runs, this shoe was a fantastic partner in a 50k run, and the subsequent training to it. Whether a quick jog on the treadmill, or long road miles, this shoe held up beautifully. And at only $110 MSRP, it’s one of the lowest priced, high performance shoes on the market.
Positives: The flat laces cinch tight, and it truly felt like nothing on my feet.

Negatives: The slimmer toe-box required me to move up a half-size for longer running. 


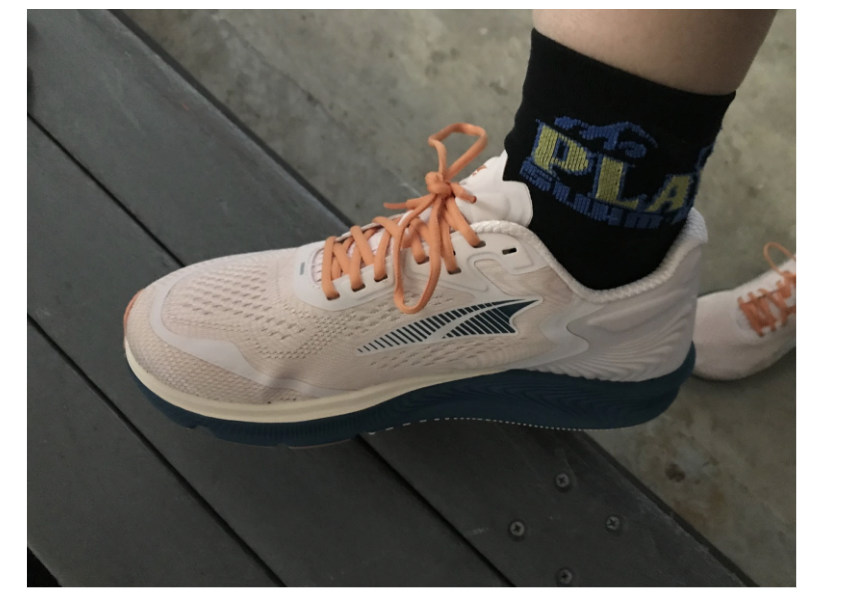
Altra’s flagship neutral road shoe, the Torin, has had many changes since it’s first introduction. The Torin 5 is the latest in the progression of a company always working to bring the most comfortable and supportive feel to the world of zero-drop shoes, while maintaining their Signature Footshape, a wide toe-box allowing for a more natural spay of the foot as it hits the ground. Compared to the more narrow toe-box of the Saucony, I loved the wider design in Altra, as it allows runners to wear their “true size”. With an increase to the heel collar padding, I really could feel comfortably “locked-in” to the shoe, and quickly fell in love with this “natural” shoe. Just remember, if you’re not used to wearing a zero-drop shoe, I’d recommend cycling it into your run routine with shoes that you’re body is used to as your calves adjust. Hesitations: Though the shoe had a flexible, thin tongue, it seems higher than normal, and I was hesitant I wouldn’t have issues. Much to my surprise, the tongue was not an issue tested up to 10k (though extremely long runs might prove otherwise). Heftier price at $150MSRP.

Positives: Immediate comfort that feels supportive but light. True to size.

Negatives: Slightly heavier than the Saucony Kinvara, tongue a little invasive.


All in all, if you’re a neutral run-shoe athlete, these two are great choices for your everyday road running. The Kinvara would be a great speed companion, while the Torin would be a great transition into the world of zero-drop/natural running.


Heat Acclimation & Heat Training

By Playtri Coach Chad Carpenter

As we exercise, our bodies produce heat. This is why some of us are completely comfortable running in shorts and t-shirt when it’s 50°F or lower outside. However, when the weather starts to heat up, our ability to shed heat diminishes. During Ironman Coeur d’Alene in 2021, temperatures reach 101°F. Most athletes, including pros, struggled to perform in that kind of heat.

Fortunately, the human body is an adaptation machine. we have a few tricks up our sleeves that assist in acclimating our bodies to heat. In fact, some studies suggest that heat acclimatation can lead to the same physiological benefits as altitude training[1]. Without getting too heavy into the science, I want to provide a few key benefits of heat acclimation along with some suggestions of how to incorporate heat acclimation into your race build (I still include a few references for my fellow nerds).

WHY WE WANT HEAT TRAINING

  • Your sweat threshold lowers, or in simpler terms, you start to sweat earlier and at a lower core body temperature[2].

  • On top of that extra cooling you get by sweating earlier, you will also have an increased sweat rate[3], further increasing your body’s cooling ability.

  • Heat acclimatation also increases our blood plasma volume[4] which provides better heat transfer and oxygen delivery.

  • Mental preparation for managing heat and understanding the perceived effort in heat.

HOW TO DO HEAT TRAINING

Incorporating heat acclimation into your training is primarily about spending time at an elevated core body temperature and stressing our body’s ability to cool itself. Below are some ways to incorporate heat training into each sport of triathlon.

Swim: Many pool facilities have sauna and hot tub access. Throughout your swim workout, keep sipping on your hydration in between sets. At the end of your swim session, immediately get into the sauna or hot tub. Start the heat sessions for small durations, 5 – 10 minutes, then gradually increase the duration to 30 minutes in the hot tub or 45 minutes in the sauna (saunas tend to run hotter but the water submersion of hot tubs is more stressful on our bodies ability to cool). Avoid any active hydration during these sessions. Since you were hydrating throughout the swim workout, you should not be at risk to over dehydration during the heat session. If needed, take only small sips of your hydration, and it should not be chilled.

Bike: Anyone that has trained on an indoor trainer knows that our “pain cave” room can get warm quick. We usually keep things cool by running a fan (or several) faced directly on us. For heat training, turn those fans off. By simply removing the forced convection of fans and relying on natural convection, your body heats up quickly. I have measured core temperature over 101°F while training in a fanless garage  that had an ambient temperature of 50°F. You will get sweaty, very sweaty. Have a towel ready to keep too much sweat from sitting on your bike. Also, be mindful of the pool of sweat that will start accumulating under you. Go ahead and have a towel laying there or at least a hardy exercise mat to keep the sweat off any floors your care about.

Run: Some of us love running in cooler temperatures, and sometimes, we do so in bare minimum clothing. It’s hard for us not to love that extra cooling boost that cold temperatures provide. Well, you are going to throw that out the door for heat acclimation. Instead, Add an extra layer or two to your running attire. Remember the goal is to stress your cooling ability. If you would have normally worn some thin shorts and tank top for your run, now throw on some thermal leggings and long sleeves. Just have the washing machine ready, because those clothes are going to stink.

For both the bike and run suggestion above, keep hydrating throughout the training session with the proper electrolyte solution. Remember, athletes can have vastly different needs in electrolyte solutions, from as little as 200 mg of sodium per liter to over 2000 mg of sodium per liter. If you are unsure of what your individual electrolytes needs are, I highly recommend getting a sweat concentration test at Playtri (https://www.playtri.com/testing/#sweat). During the sauna or hot tub sessions, avoid drinking. You should go into those already well hydrated. Hydrating during the sauna or hot tub can work against our core body temperature rise that we are wanting out of it as well as other physiological benefits. You can immediately start hydrating afterwards BUT do it slowly and gradually throughout the day (i.e. no chugging).

WHEN WE DO HEAT TRAINING

The tricky and most important part about heat training is when to do. How often do you it? How many times a week? During which sessions? , how often, and for how many weeks? There are a lot of different ways to incorporate heat training. We have to keep in mind that the inclusion of heat training is extra stress on the body and that has to be properly accounted for. Failure to do so can leave an athlete showing up to race day still fatigued – not a great starting point for that ‘a’ race you wanted to crush.

For anyone wanting to incorporate heat acclimation into their training plan, I highly encourage you to work with a coach that understands it and can help you apply it correctly and safely. Chronic heat stress can rock your body and have some serious detrimental effects. There are many anecdotes of athletes, including professionals, pushing themselves in hot conditions for too long and too often which only resulted in their body having long term struggles when returning to heat[5].

SUMMARY

Heat training and acclimation can be a great addition to your race build that you can give you a slight edge over you competition. When done properly, you can exhibit the same benefits that come with altitude training as well as improved body cooling. However, we must be mindful of the particular stress that heat induces. Think of heat training as that little bit of seasoning you sprinkle onto an entrée – a little goes a long way but too much can absolutely ruin it. If you have never experienced heat training, consult or hire a coach - you can get started with Playtri Coaching at https://www.playtri.com/individual.

Personally, I will be using heat acclimation as a part of my training plan for  Ironman World Championship in St. George, and I can’t wait to see what the pay off will be.

Chad Carpenter is a Playtri Level II Coach and IRONMAN World Championship Qualifier. Learn more about Chad at www.playtri.com/chad-carpenter.


[1] Lee, B. J., Miller, A., James, R. S., & Thake, C. D. (2016). Cross acclimation between heat and hypoxia: heat acclimation improves cellular tolerance and exercise performance in acute normobaric hypoxia. Frontiers in physiology, 78.

[2] Roberts MF, Wenger CB, Stolwijk JA, Nadel ER. Skin blood flow and sweating changes following exercise training and heat acclimation. J Appl Physiol Respir Environ Exerc Physiol. 1977 Jul;43(1):133-7. doi: 10.1152/jappl.1977.43.1.133. PMID: 893254.

[3] Armstrong, L.E., Maresh, C.M. The Induction and Decay of Heat Acclimatisation in Trained Athletes. Sports Medicine 12, 302–312 (1991). https://doi.org/10.2165/00007256-199112050-00003

[4] Senay, L. C., & Kok, R. (1977). Effects of training and heat acclimatization on blood plasma contents of exercising men. Journal of applied physiology, 43(4), 591-599.

[5] While leading the race with only 1 kilometer to go, Sara True collapsed during Ironman Frankfurt due to heat exhaustion. She continued to have extreme reactions to heat in the following years of her career.

Playtri's Five Pillars of Open Water Swimming

Open water swimming season is here, which means now is a good time to get back in the water and gain more confidence for those upcoming races. At Playtri, we teach Five Pillars of Open Water Swimming based on decades of experience and research that we have learned apply to all triathletes. Whether you are a beginner or already competing at a high level, here are the Five Pillars on which to build a strong open water swim.


1.      Visualization: For some, Open Water Swimming is an anxiety producing experience. Because of this, we teach our athletes to utilize visualization during their training so that when race day comes you can swim confidently with minimal thought or decision making. Visualization helps eliminate surprises and spur of the moment decisions during the race. Set aside 5-10 minutes every other day during your build and taper phases, and on race day prior to start, to visualize how your swim is going to go. To make sure that visualization has a positive affect on your race, keep these three things in mind.

a.      Know your course and potential conditions. What direction are you swimming in? Where’s the sun likely to be? What are possible water conditions (waves, swells, etc.) you might face?

b.      Know what you want to do and envision yourself doing it. Envision your start position, your strong stroke, your confidence, how you will respond calmly if your goggles are knocked off, and how you will exit the water with a smile on your face because you’re going to nail this swim!

c.      DON’T visualize (or vocalize) the things you DON’T want to do! Negative self talk and imagery is not helpful in achieving your goals, so don’t do it. Be realistic and stay positive!

2.      Warm up: The swim warm up is THE most important warm up on race day since you hit the water first. Your swim warm up should be the last portion of your warm routine and should finish about 15 minutes before the race start. Depending on the event, you will end up either an in-water or dryland warm up. For an in-water warm up, begin with easy swimming and drills that help you focus on good form. Then sprinkle in a few brief pickups and end with a minute or two at race effort. For a dryland warm up, bring along some resistance tubing. Start with shoulder rotations, arm circles, and upper body twists, then use your resistance tubing to do single- and dual-arm pull drills finishing with 30-60 seconds of single-arm pull drills at race cadence.

3.      Starting position: For mass starts, never line up in the middle, unless you really want to experience what clothing feels like in a washing machine. Instead, line up at the front of the group on either side so that you have clean water to swim in at the start. Also, remember to line up on the side opposite of your preferred breathing side, so that you can see the other swimmers when you take a breath.

4.      Drafting & sighting off other athletes: Utilize the other athletes to improve your swim. Ideally, you spend the whole swim drafting of an athlete who is slightly faster than you with your head within 1-2 feet of the other athlete’s hip, never having to forward sight, using them for sighting, and enjoy swimming in their wake. Practice getting comfortable swimming this way, by regularly working out with other athletes and practicing this skill. You can practice this skill in the pool or open water.

5.      Continuous swimming: Barring personal danger, keep on moving forward at all times. It may be difficult in a large pack or going around buoy turns, but getting started from a full stop is hard. If you need a break, then utilize a different stroke like breaststroke, backstroke, or even doggie paddle. But keep swimming!


Building on these Five Pillars can set you up for a great swim. Start practicing these today – join us at a Playtri Open Water Swim if you have one available locally. Good luck this year and I look forward to seeing you at the races!


Coach Jim Rowe is a Playtri Level 3 Coach, and also holds a USA Triathlon Level I Coaching Certification, a UESCA Triathlon Coaching Certification, and a TRX Coaching Certification. He can be reached at jim.rowe@playtri.com.


Learn more about our Aquatics programming at www.playtri.com/aquatics.